– 12 –
[10] HARNESS HANDLING METHOD
In normal use of the reaper, set the harness side hook on the
hanger strap stem securely before starting the work. This
applies to both single and double harness. (Fig. 10-1)
For the harness fitting method, see Fig. 10-2.
In the case of an emergency pull up the belt (red), and the
total machine can be separated from the harness. Be careful
not to operate the belt carelessly except for a case of
emergency. (Fig. 10-3)
[11] REGULAR MAINTENANCE
From time to time make sure all brush cutter screws are
firmly secured. Replace damaged, worn, cracked or
warped-blades. Always make sure nylon string head and
blade have been assembled correctly (see section BLADE
AND NYLON STRING HEAD ASSEMBLY) and blade
fastener is tightened.
1. AIR FILTER CLEANING (at lease every 25 working
hours). A dust clogged air filter may cause carburetor
problems. This may prevent the engine from reaching
its maximum r.p.m. and cause high fuel consumption
and/or difficult starting. Remove filter cover. Carefully
clean the inside of filter box. The filter can also be
cleaned with compressed air.
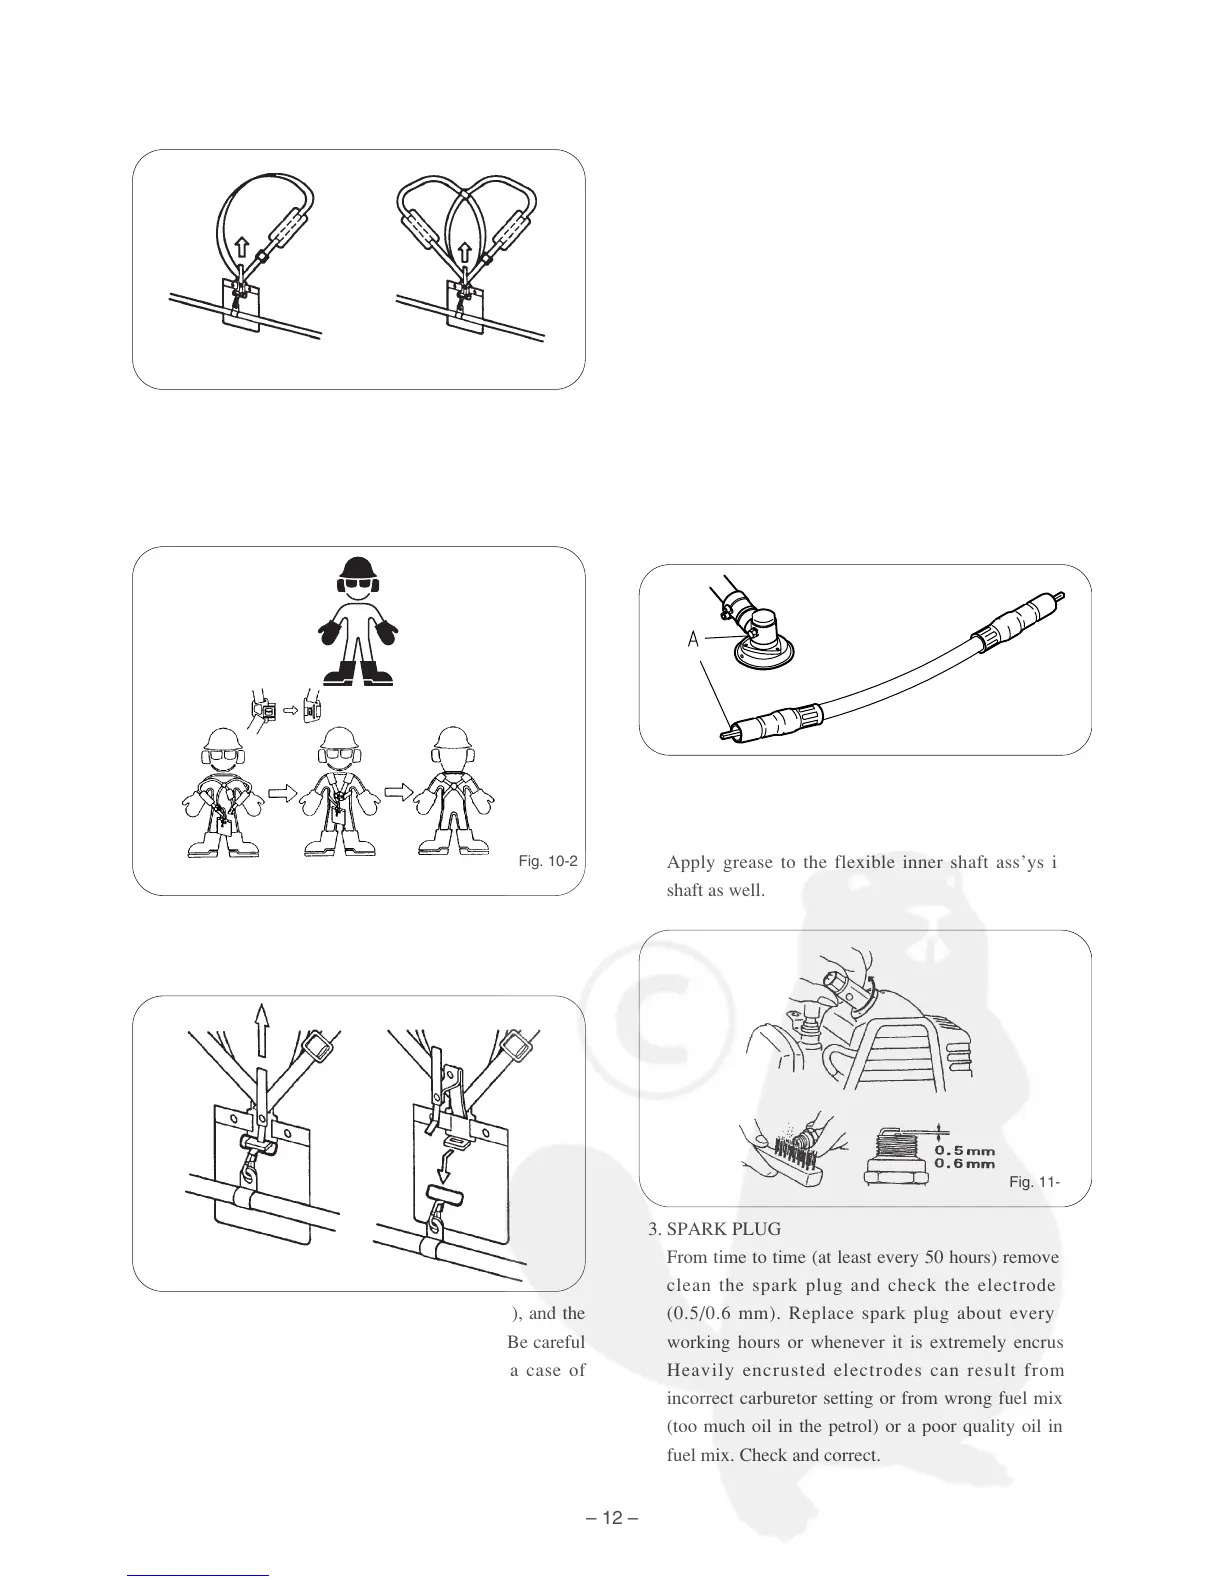
2. Every 50 working hours inject the gearcase with gear
grease under high pressure through hole A.
In the case of a backpack type reaper;
Apply grease to the flexible inner shaft ass’ys inner
shaft as well.
3. SPARK PLUG
From time to time (at least every 50 hours) remove and
clean the spark plug and check the electrode cap
(0.5/0.6 mm). Replace spark plug about every 100
working hours or whenever it is extremely encrusted.
Heavily encrusted electrodes can result from an
incorrect carburetor setting or from wrong fuel mixture
(too much oil in the petrol) or a poor quality oil in the
fuel mix. Check and correct.
Fig. 10-1
Fig. 10-2
Fig. 10-3
Fig. 11-1
Fig. 11-2