Do you have a question about the Marzocchi X-Fly and is the answer not in the manual?
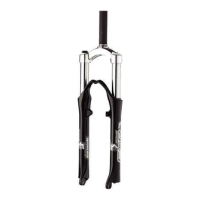
| Type | Suspension Fork |
|---|---|
| Steerer Tube Diameter | 1 1/8" |
| Wheel Size | 26" |
| Brake Compatibility | Disc |
| Adjustability | Rebound |
General rules for assembling, disassembling, cleaning, and lubricating the Marzocchi shock absorption system.
Details common fork failures, their causes, and suggested remedies for effective troubleshooting and repair.
Guidance on installing the fork on a bicycle, emphasizing care, safety warnings, and service center checks.
Instructions and warnings for correctly assembling the disc brake system, including pin usage and torque specifications.
Procedure for adjusting compression damping by pressurizing fork legs with a specialized pump and gauge.
How to adjust rebound damping on the right fork leg using an adjuster screw to control fluid resistance.
Instructions for locking fork leg rebound on the left leg for uphill riding, with safety warnings for downhill use.
General advice before starting disassembly, referencing exploded views and the correct disassembly sequence.
A visual flowchart outlining the quickest procedure and exact sequence for disassembling fork components.
Steps to remove the stanchion plug, depressurize fork legs, and unscrew caps using a socket wrench.
Procedures for draining fork oil and removing hydraulic cartridges, noting differences in rebound springs based on travel.
Instructions for withdrawing the crown/stanchions assembly and removing dust seals and stop rings from sliders.
Steps for fitting a slider protector and removing the oil seal, then extracting the pilot bushing from the slider.
How to remove and replace the air valve and its O-ring, checking for clogging and ensuring proper reassembly.
Procedures for installing pilot bushings, upper washers, and oil seals, ensuring correct placement and lubrication.
Instructions for inserting stop rings and dust seals into sliders, and fitting the crown/stanchions assembly with lubrication.
Reassembling hydraulic cartridges, foot nuts, and filling the fork legs with oil to the specified level.
Steps for screwing on and tightening cartridge caps to specific torques, and setting the rebound limiting knob.