MAINTENANCE
Read all of SAFETY and this section before attempting any procedure. Pay particular attention to Notices, Cautions, Warnings and Dangers.
The batteries are heavy. Use correct lifting methods when you move them.
Always lift the battery with a commercially available battery lifting device. Be
careful not to tilt batteries when you remove or installing them; spilled electrolyte
can cause burns and damage.
Hardware that is removed must be installed in its original position unless otherwise specified. If torque values are not
specified, refer to the Torque Specifications table.
1.
Turn key switch to the OFF position and remove the key
1
2.
Disconnect the main negative (-) battery cable (BL-)
3.
Disconnect the main positive (+) battery cable (BL+)
3
4.
Disconnect and remove all other wires connected to the batteries.
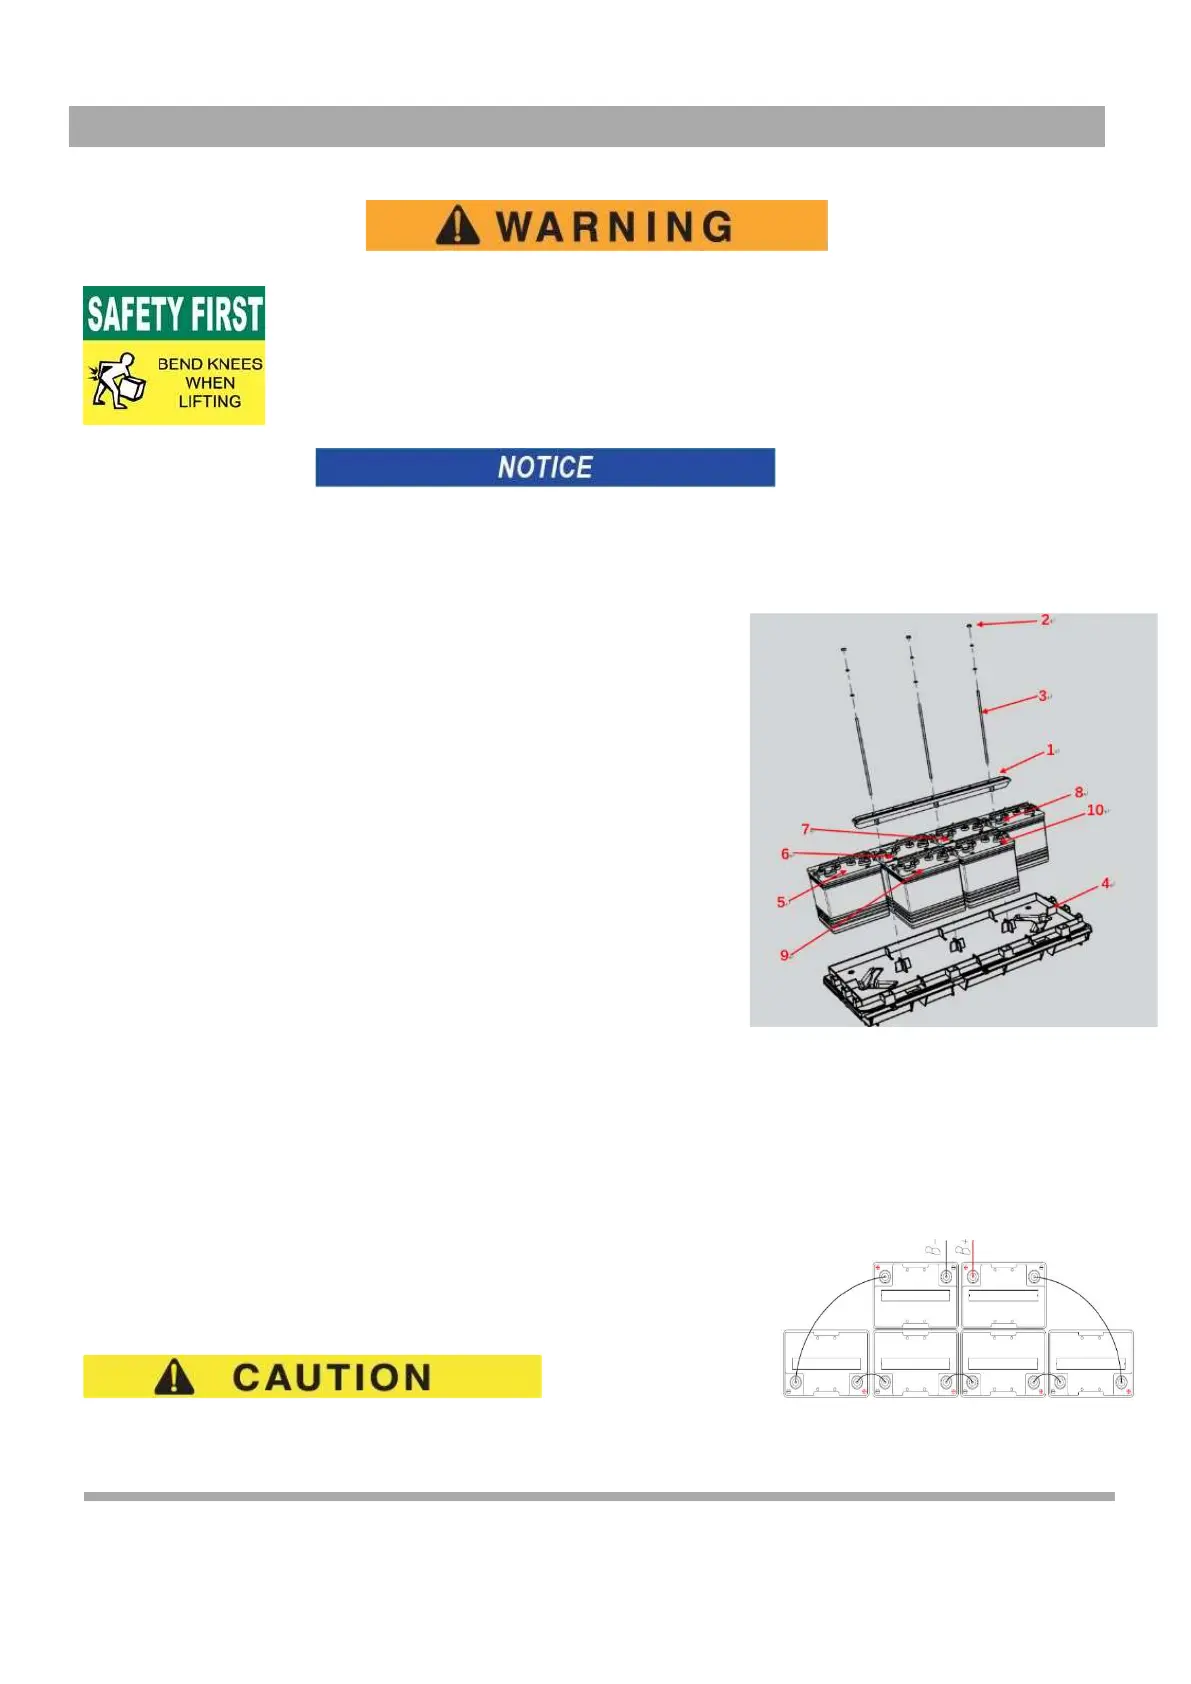
5.
6 - 8V Battery System: Remove three hex nuts (2) securing battery
8
9
retainer (1) until they are at the end of the Rod (3), unhook the J-
10
bolts from the battery tray (4).
6.
Remove the batteries using commercially available battery
5
carrier straps (1 per battery) and a portable lifting device.
6
Remove the four front batteries (5, 6, 7 and 8) one at a
time; then Remove the two rear batteries (9 and 10) to
7
the front of the vehicle just enough to clear the rear body and
lift up and out of the vehicle, one after another.
4
Check the area around the battery tray for corrosion. If any corrosion is found, it must
7.
be immediately removed with a putty knife and a wire brush (for metal surfaces) or a
plastic bristle brush (for plastic surfaces). The area must be washed with a solution
of baking soda and water and dried completely. All metal surfaces that has been
cleaned must be primed and painted with a corrosion resistant paint
8.
Replace the batteries, starting with the battery
(5)
located at the rear end of the battery tray, by
making sure that it is positioned as
shown (8,9,10) (Figure 3)
Figure 3 Battery Components
9.
Tie the rod with battery fixing cage, use Hex nutto fasten the rod and the force should control between 5 -6.2 N
10.
Inspect all wires and terminals and clean any corrosion from the battery terminals or wire terminals with a solution of
baking soda and water, using a wire brush to completely remove corrosion if required.
11.
Carefully reconnect the wires on the battery terminals as shown (Figure 4). Make sure to reconnect the main negative
(-) battery cable, BL-, from the controller lastly.
12.
Tighten all battery terminal hardware to 98 - 105 in. lbs. (11 - 12 Nm) torque.
13.
Protect the battery terminals and battery cable terminals with a commercially
available protective coating
Prolonged Storage
Disconnect the battery charger, controller and other electronic devices for extended
storage. All connected electronic components cause the dis-charge of batteries
Figure 4 Battery Connections
Owner’s Guide 53