6
ASSEMBLY INSTRUCTIONS
NEVER LEAVE THE HEATER
UNATTENDED WHILE BURNING!
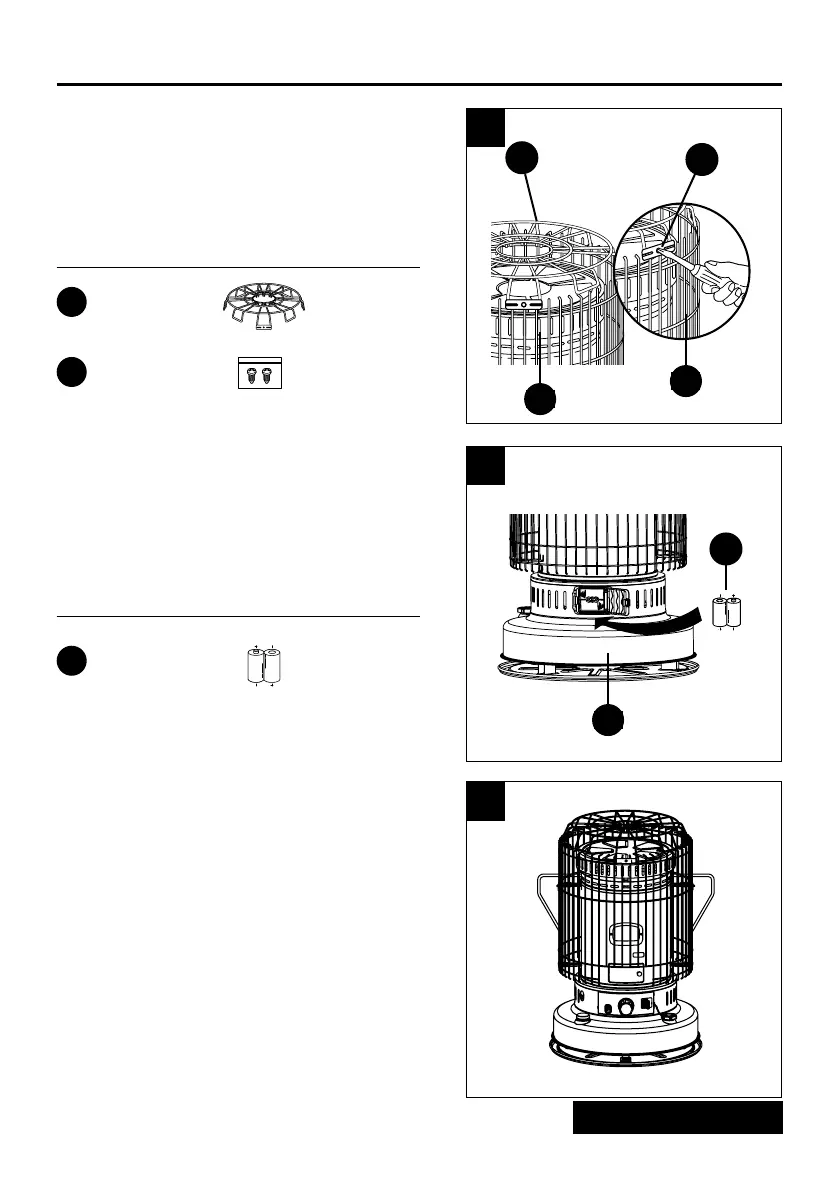
6. Align the 2 brackets on the top guard (CC) with
the 2 mounting brackets on the front (DD) and rear
(EE) guards. Secure each bracket with a screw
(HH). Make sure that the brackets on the top guard
(CC) are positioned outside the mounting brackets
on the front (DD) and rear (EE) guards.
8. Now your heater is completely assembled.
7. Battery holder is located on the back of the heater
(A). Open the battery cover from the battery case.
Insert two (2) “C” cell batteries (FF) according to the
plus (+) and minus (-) markings inside of the holder.
Replace the battery cover to the heater (A).
Fig.8
Fig.9
Fig.6
Fig.7
Top Grill Screw
Fig.8
Fig.9
Fig.6
Fig.7
Top Grill Screw
Fig.8
Fig.9
Fig.6
Fig.7
Top Grill Screw
FF
HH
6
7
8
DD
CC
EE
x1
x2
x2
Top guard
Screw
Batteries
CC
HH
FF
Hardware Used
Hardware Used
A