8
FUELING YOUR HEATER
NEVER LEAVE THE HEATER
UNATTENDED WHILE BURNING!
IMPORTANT NOTICE REGARDING FUELING OF THE HEATER: When fueling your heater for the rst time
and any other time when the tank has been completely empty, as in “Dry Burning” (page 11) make sure to allow the
wick to soak a minimum 60 minutes before you attempt to light the heater. Take note of the time you started to soak
the wick or use a kitchen timer or wrist watch with an alarm feature. Failure to properly soak the wick can trap air
pockets in the wick causing the heater to burn poorly. Premature ignition can destroy your wick.
IMPORTANT NOTICE REGARDING FIRST IGNITION OF HEATER
The rst time you light your heater there may be some odor due to the burning off of oils used in the
manufacturing process. To avoid this you may wish to burn the heater outside on a calm and windless day. If it s
windy consider a porch or garage or other room where the windows can be open to disperse the odor.
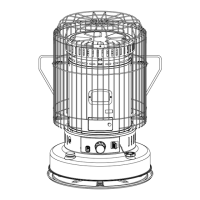
After fueling the fuel tank of the heater by using siphon pump, make sure
that you loosen (counter clockwise) the cap on the siphon pump to drain
thoroughly the remaining kerosene in the siphon pump. For the reuse
of siphon pump, make sure that you tighten (clockwise) the cap on the
siphon pump to transfer the kerosene into the fuel tank properly. (Fig.11)
Fig.11
LOOSEN
TIGHTEN
AUTOMATIC IGNITION SYSTEM
For safety and convenience, this heater features an automatic
ignition system.
2 “C” cell batteries, included with the heater, provide the power
for the igniter which lights the wick once it has been raised to its
maximum height.
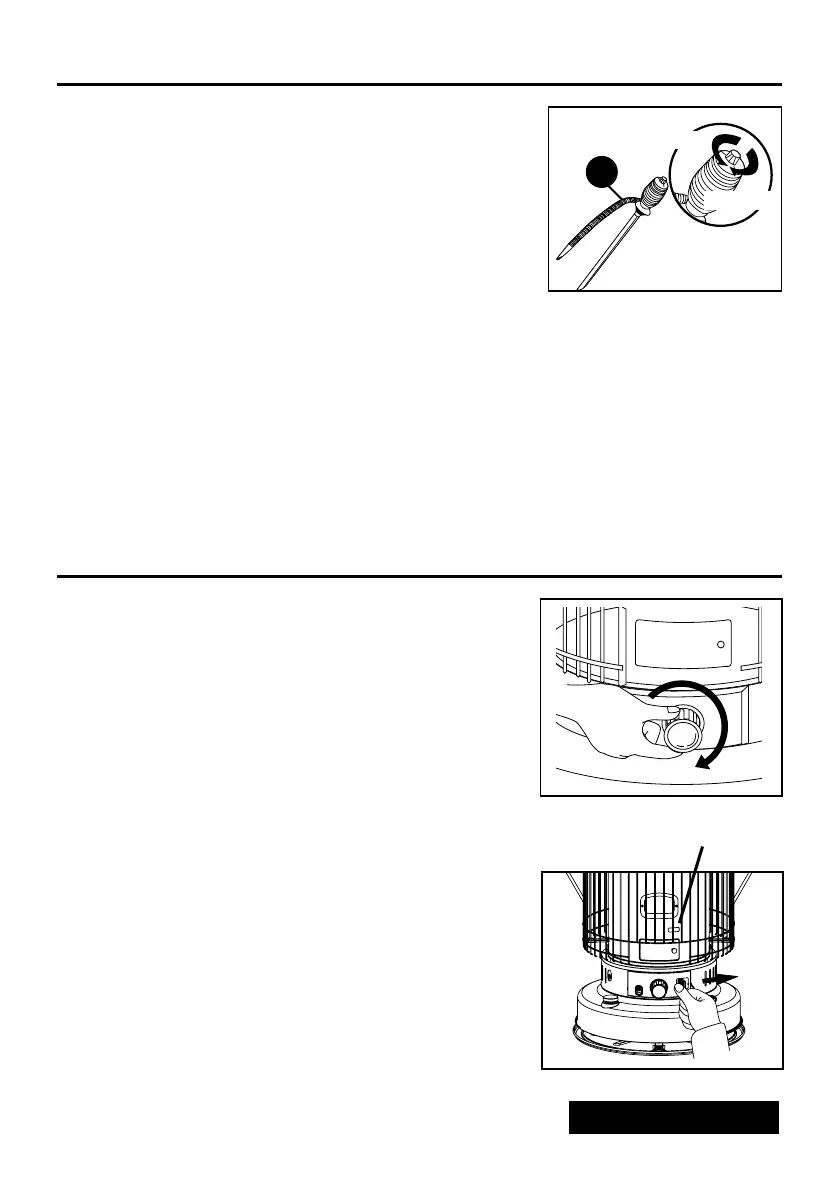
To use the automatic ignition system:
• Make sure the batteries have been installed.
• Turn the wick adjuster knob clockwise until the wick has
been raised to its maximum height. (Fig.12)
• Push the ignition lever to the right (Fig.13) to bring the
glowing igniter into contact with the wick.
This will cause ignition to occur.
• As soon as you see that the wick has been lit through the
ignition checking hole, release the ignition lever.
• Rotate the burner knob from side to side a few times to
make sure that the burner is positioned
properly on the wick adjuster.
• Then begin following the steps outlined in “Adjusting the
wick” (page 11).
31.giF
21.giF
GG
Ignition checking hole