13
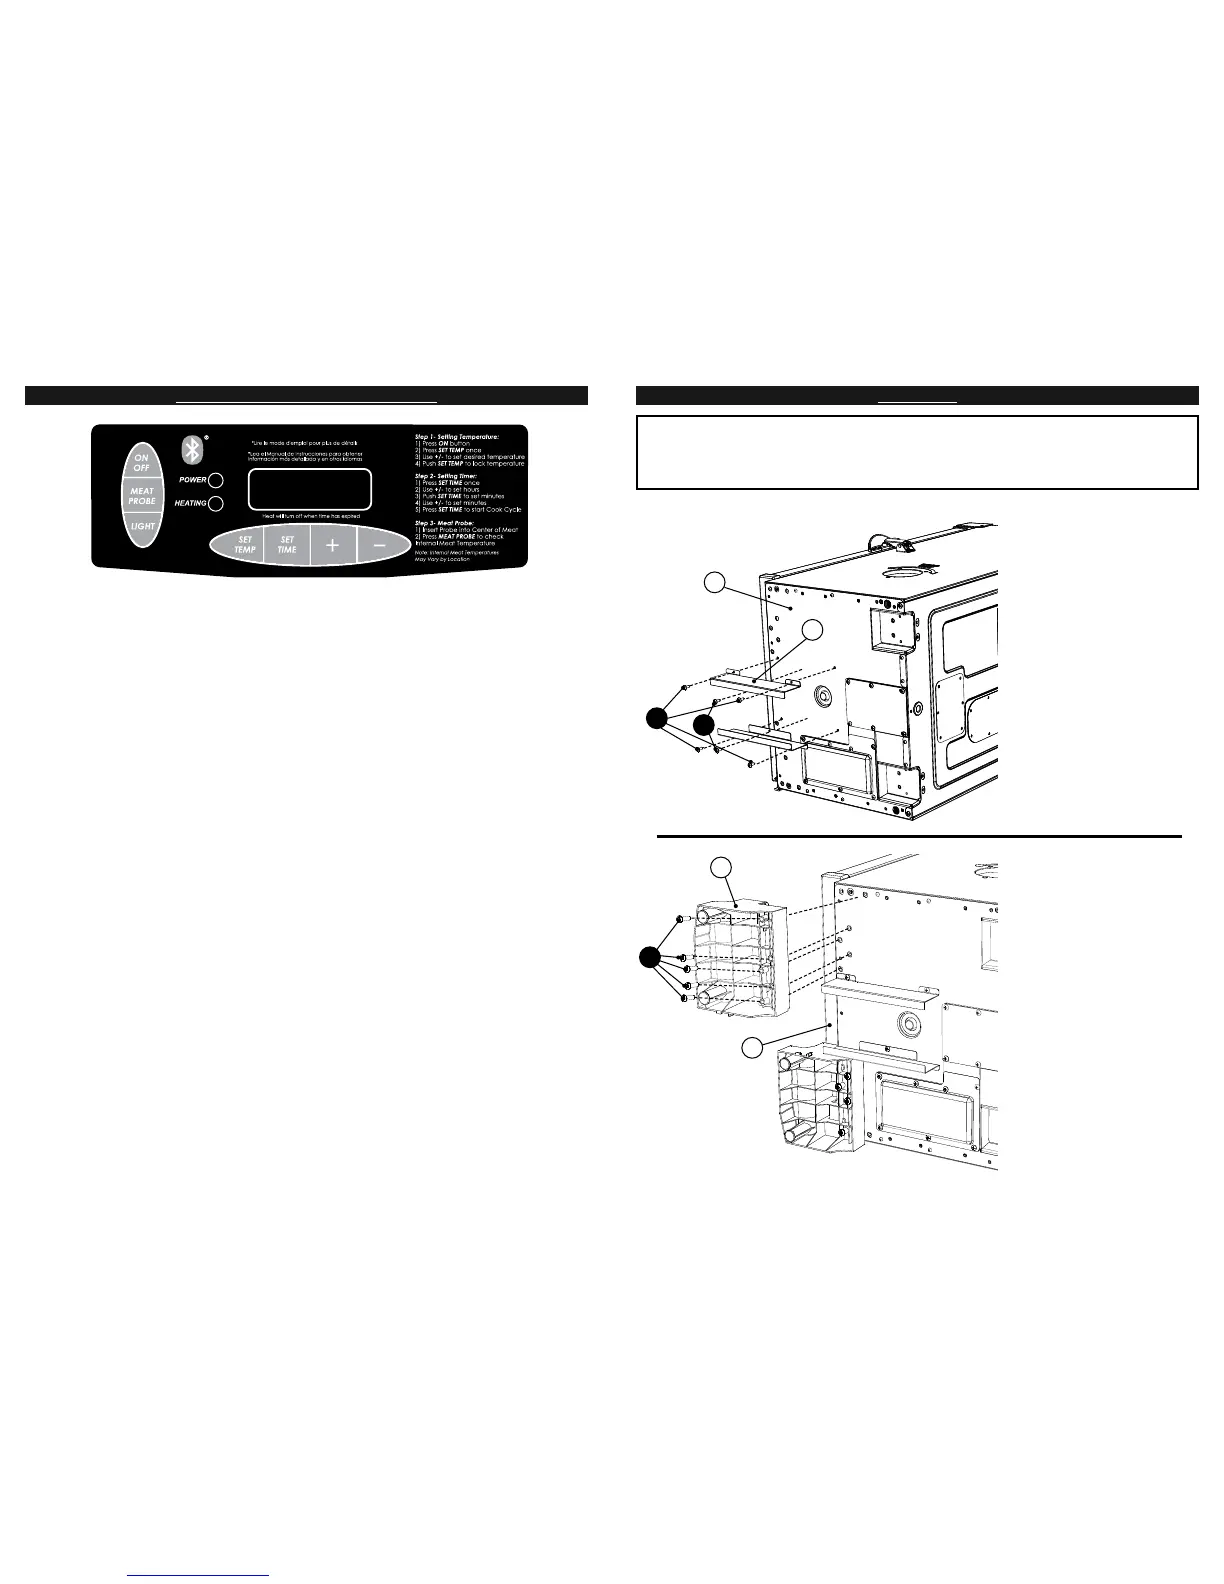
CÓMO USAR EL PANEL DE CONTROL
Nota: La luz solar directa puede interferir con la habilidad de leer la pantalla LED, bloquee la luz de ser
necesario.
Para confi gurar la temperatura:
•Presione el botón ON.
•Presione el botón SET TEMP una vez, la luz LED empezará a titilar.
•Use +/- para confi gurar la temperatura.
•Presione el botón SET TEMP otra vez para fi jar la temperatura.
Nota: No empezará a calentarse hasta que se confi gura el cronómetro.
Para confi gurar el cronómetro:
•Presione el botón SET TIME una vez, la pantalla LED para horas empezará a titilar.
•Use +/- para confi gurar las horas.
•Presione el botón SET TIME otra vez para fi jar las horas. Los minutos LED empezarán a titilar.
•Use +/- para confi gurar los minutos.
•Presione el botón SET TIME para fi jar los minutos y empezar el ciclo de cocción.
El calor se apagará cuando el tiempo haya expirado.
Para usar la sonda de carne:
• Inserte la sona de carne para obtener la lectura más precisa.
• Presione y mantenga presionado el botón MEAT PROBE, la pantalla LED mostrará la temperatura
interna de la carne.
• Una vez que suelte el botón MEAT PROBE, la pantalla LED retornará a confi guración de temperatura
o confi guración de tiempo.
Para usar la luz:
• Presione el botón LIGHT para encender la luz.
• Presione el botón LIGHT para apagar la luz.
Para REANUDAR el panel de control:
Si el panel de control muestra un mensaje de error, apague el ahumador eléctrico, desenchufe la
unidad del tomacorriente, espere diez segundos, vuelva a enchufar la unidad al tomacorriente y luego
encienda el ahumador eléctrico. Esto reanudará el panel de control.
ASSEMBLY
• BEFORE ASSEMBLY READ ALL INSTRUCTIONS CAREFULLY.
• ASSEMBLE UNIT ON A CLEAN, FLAT SURFACE.
• TOOLS NEEDED: PHILLIPS HEAD SCREWDRIVER, ADJUSTABLE WRENCH
**Some assembly steps may already be completed due to pre-assembly at the factory.**
B
23
2
21
2
6
A
STEP 2
Secure front foot (21) to
bottom of smoker body (2)
using screws (A).
Repeat step on opposite side
for remaining front foot.
STEP 1
Remove all components on
inside of smoker before
beginning assembly.
Carefully position smoker on
side as shown. Alternatively,
the smoker can be positioned
upside down for assembly.
However, make sure styrofoam
packaging remains on top to
prevent damage to control
panel.
Attach grease tray bracket (23) to
bottom of smoker body (2) using
screws (B), (D).
Repeat step for remaining grease
tray bracket.
D
(L)
(R)