EasyManua.ls Logo

Masterbuilt 20070411 - User Manual

Masterbuilt 20070411
2 pages
Print Icon
To Next Page IconTo Next Page
Loading...
SMOKER SIDE SHELF
Upright Position
With both hands on the left and right of the shelf, lift
smoker side shelf. When shelf is in full upright position,
push the shelf gently towards the smoker. The hinge will
then drop and lock into place.
Downward Position
Again, with both hands on each side of the smoker side
shelf, slightly lift the shelf to remove it from its locked
position, then gently pull towards yourself and swing the
shelf into its downward position.
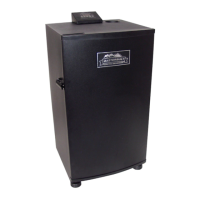
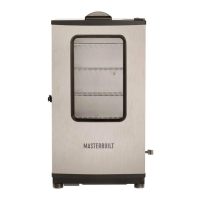
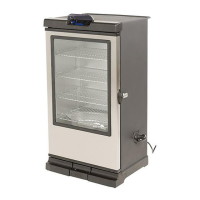
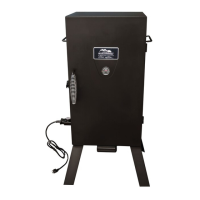
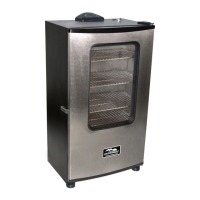
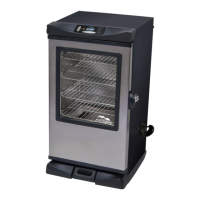
FITS MASTERBUILT 30-in. MODELS: 20070411, 20070911, 20071011, 20071111
FITS MASTERBUILT 40-in. MODELS: 20070211, 20070212, 20070311, 20071211,
20071311, 20071411, 20071611, 20071711
POSITIONING
Model# 20101513
Masterbuilt Manufacturing, Inc. · 1 Masterbuilt Ct. Columbus, GA 31907 · Customer Service / Servicio de atención al cliente: 1-800-489-1581 · www.masterbuilt.com
081612-04SS
MADE IN CHINA
C
A
1
Facing right side of smoker, remove door hinge
cover screw (A) and door hinge cover (B), then re-
move only the closest door hinge screws (C) from
hinge. (Do not remove far rear screws as the door
will loosen and the seal could be compromised.)
1
Still facing the right side of smoker, slightly loosen
handle screws (D) and completely remove handle
screws (D) closest to you, allowing rear handle (E)
to move freely.
2
Insert hinge cover screw (A) through door hinge
cover (B), then take nut (F) and thread onto screw
taking care not to fully tighten screw; leaving a
slight gap between the nut (F), door hinge cover
(B) and screw (A).
3
With smoker side shelf (G) in downward position,
align shelf support bracket and holes onto the right
side of smoker body as shown.
With side shelf (G) between smoker body and
handle (E), replace handle screws (D) and door
hinge screws (C). Tighten all screws at this time.
Re-set door hinge cover (B) over door hinge and
secure with door hinge cover screw (A) as shown.
Shelf installation is now complete.
4
2 3
4
E
E
G
C
B
B
CAUTION
· SMOKER SIDE SHELF WEIGHT CAPACITY 25 LBS.
· NEVER MOVE SMOKER WITH SHELF IN UPRIGHT POSITION.
· DO NOT SIT ON OR LEAN AGAINST SHELF.
· WHEN ADJUSTING SHELF, KEEP FINGERS CLEAR OF HINGES.
D
D
A
D
B
A
F

Other manuals for Masterbuilt 20070411

Questions and Answers

  • L
    Lisa MurphyAug 6, 2025
    Why does my Masterbuilt Smokers take so long to heat up?
    • S
      Shawna ThomasAug 6, 2025
      If your Masterbuilt Smoker is taking longer than 60-70 minutes to heat up, there might be a couple of reasons. Ensure the unit is not plugged into an extension cord. Try to position the unit so that an extension cord isn't needed. Also, make sure the door is completely closed and the latch is securely fastened.
  • C
    Cynthia McknightAug 11, 2025
    What to do if the power light won’t come on on Masterbuilt Smokers?
    • N
      Nathan SmithAug 11, 2025
      If the power light on your Masterbuilt Smoker won't turn on, start by checking the wall connection to ensure it's properly plugged in. Next, verify that a house fuse hasn't tripped, and avoid operating other appliances on the same electrical circuit. If these steps don't resolve the issue, further assistance may be needed.
  • T
    Theresa CisnerosAug 16, 2025
    Why is there no smoke from my Masterbuilt 20070411?
    • J
      jamesochoaAug 16, 2025
      If your Masterbuilt Smoker isn't producing smoke, the most likely cause is a lack of wood chips. Add wood chips to the smoker to generate smoke.
  • J
    Jeremy OwensAug 21, 2025
    What to do if grease is leaking from my Masterbuilt Smokers?
    • F
      freyjasonAug 21, 2025
      If grease leaks from your Masterbuilt Smoker through the door and legs, it could be due to several reasons. First, ensure the drip pan is correctly positioned, aligning its hole with the drain hole at the bottom. Excess grease buildup can also cause leaks, so clean the unit thoroughly. Lastly, check the drain tube at the back of the unit to ensure it's not blocked and is draining properly.
  • E
    Eric StoneAug 26, 2025
    How to fix interior light that does not come on in Masterbuilt 20070411?
    • T
      Thomas WilliamsAug 26, 2025
      If the interior light of your Masterbuilt Smoker isn't working, first check if the bulb is burned out and replace it with a 15W-25W bulb made for ovens. Also, ensure that the light switch is in the 'on' position.
  • T
    Todd BartlettAug 31, 2025
    Why will remote not control Masterbuilt 20070411 Smokers?
    • C
      Cheryl RodriguezAug 31, 2025
      If the remote isn't controlling your Masterbuilt Smoker, ensure the batteries aren't weak or installed incorrectly. Refer to page 13 instructions for how to install the batteries.

Summary

Smoker Side Shelf Installation and Positioning

Installation Step 1: Initial Screw Removal

Remove door hinge cover screw and cover, then remove closest door hinge screws from the hinge.

Installation Step 2: Handle Screw Adjustment

Loosen handle screws and completely remove those closest to you to allow rear handle movement.

Installation Step 3: Hinge Cover Screw Assembly

Insert hinge cover screw through cover, thread nut onto screw with a slight gap for adjustment.

Installation Step 4: Final Shelf Attachment

Align shelf bracket, replace handle/hinge screws, re-attach door hinge cover and secure.

Safety Precautions

Shelf capacity 25 lbs; do not move smoker with shelf upright; do not sit or lean on shelf.

Shelf Positioning - Upright

Lift shelf to full upright position, push towards smoker until the hinge drops and locks.

Shelf Positioning - Downward

Lift shelf slightly to unlock, pull towards you, and swing to its downward position.

Masterbuilt 20070411 Specifications

General IconGeneral
BrandMasterbuilt
Model20070411
CategorySmokers
LanguageEnglish

Related product manuals