EasyManua.ls Logo

Masterbuilt 20070211 User Manual

Masterbuilt 20070211
20 pages
To Next Page IconTo Next Page
Page #1 background imageLoading...
Page #1 background image
Manual Code: 9807100002 100916-04JH
Tool needed for assembly: Phillips Head Screwdriver
Approximate assembly time : 15 minutes
CARBON MONOXIDE HAZARD WARNING
Burning wood chips gives off carbon
monoxide, which has no odor
and can cause death.
DO NOT burn wood chips inside homes,
vehicles, tents, garages or any enclosed areas.
Use only outdoors where it is
well ventilated.
This manual contains important
information necessary for the proper
and safe use of this unit.
Read and follow all warnings
and instructions before using
smoker and during use.
Keep this manual for future reference.
Some parts may have sharp edges
handle with care.
Failure to follow these warnings and instructions properly could result in personal injury or death.
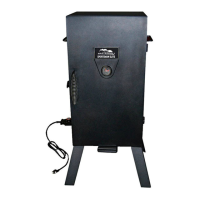
ASSEMBLY, CARE & USE MANUAL
WARNING & SAFETY INFORMATION
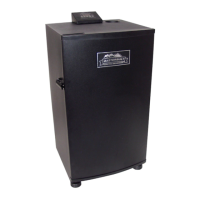
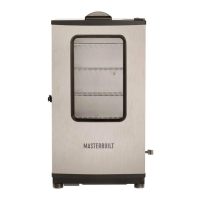
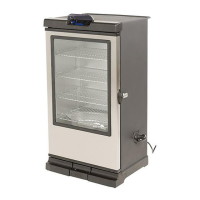
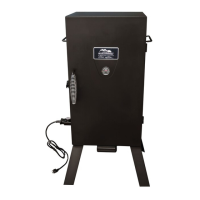
ELECTRIC SMOKER MODELS 20070211, 20070311, 20070411
THIS PRODUCT IS FOR OUTDOOR USE ONLY

Other manuals for Masterbuilt 20070211

Questions and Answers:

Masterbuilt 20070211 Specifications

General IconGeneral
BrandMasterbuilt
Model20070211
CategorySmokers
LanguageEnglish

Summary

Warning & Safety Information

Carbon Monoxide Hazard

Warning about the deadly, odorless gas produced by burning wood chips.

General Warning

Important information for proper and safe use of the unit.

General Safety Warnings

Read All Instructions

Emphasizes the importance of following all safety guidelines before and during use.

Getting Started Tips

Usage and Cooking Advice

Provides essential tips for initial setup, cooking, and maintenance.

Parts List

Hardware List

Model Specific Parts

Lists parts for different models (20070211, 20070311, 20070411).

Assembly - Initial Steps

Installing Wheels and Legs

Attaching wheels and adjustable legs to the smoker body for stability.

Mounting Control Panel

Connecting and securing the digital control panel to the smoker body.

Assembly - Panel and Handle

Securing Control Panel

Fastening the control panel to the smoker body using screws.

Attaching Rear Handle

Installing the rear handle onto the back of the smoker unit.

Assembly - Interior Components

Inserting Cooking Racks

Sliding the cooking racks onto the internal guides.

Placing Water Bowl

Positioning the water bowl on the lower bracket inside the smoker.

Assembly - Fuel and Drip Management

Placing Wood Chip Holder

Positioning the wood chip holder for proper smoking.

Installing Drip Pan

Placing the drip pan below the heating element, aligning its hole.

Assembly - Final Touches

Attaching Grease Tray

Securing the grease tray to the back of the smoker body.

Inserting Wood Chip Loader

Placing the wood chip loader into the side of the smoker.

Pre-Season Instructions

Using the Wood Chip Loader

Detailed guide on loading, adding, and managing wood chips for smoking.

Control Panel & Remote Control Usage

Setting Temperature and Timer

Guide on using the control panel to set cooking temperature and time.

Using Meat Probe and Light

Instructions for utilizing the meat probe and interior light features.

Resetting the Control Panel

Steps to reset the control panel in case of error messages.

Troubleshooting

Remote Control and Link Issues

Solutions for problems with the remote control or its connection to the unit.

Troubleshooting Guide

Important Facts & Cleaning

How to Clean Smoker

Instructions for cleaning cooking racks, trays, interior, and exterior components.

Recipes and Smoking Guide

Wood Smoking Guide for Meats

Recommends wood flavors for different types of meat and poultry.

Limited Warranty Information

Related product manuals