6
ASSEMBLY
• BEFORE ASSEMBLY READ ALL INSTRUCTIONS CAREFULLY.
• ASSEMBLE UNIT ON A CLEAN, FLAT SURFACE.
• TOOL NEEDED: PHILLIPS HEAD SCREWDRIVER
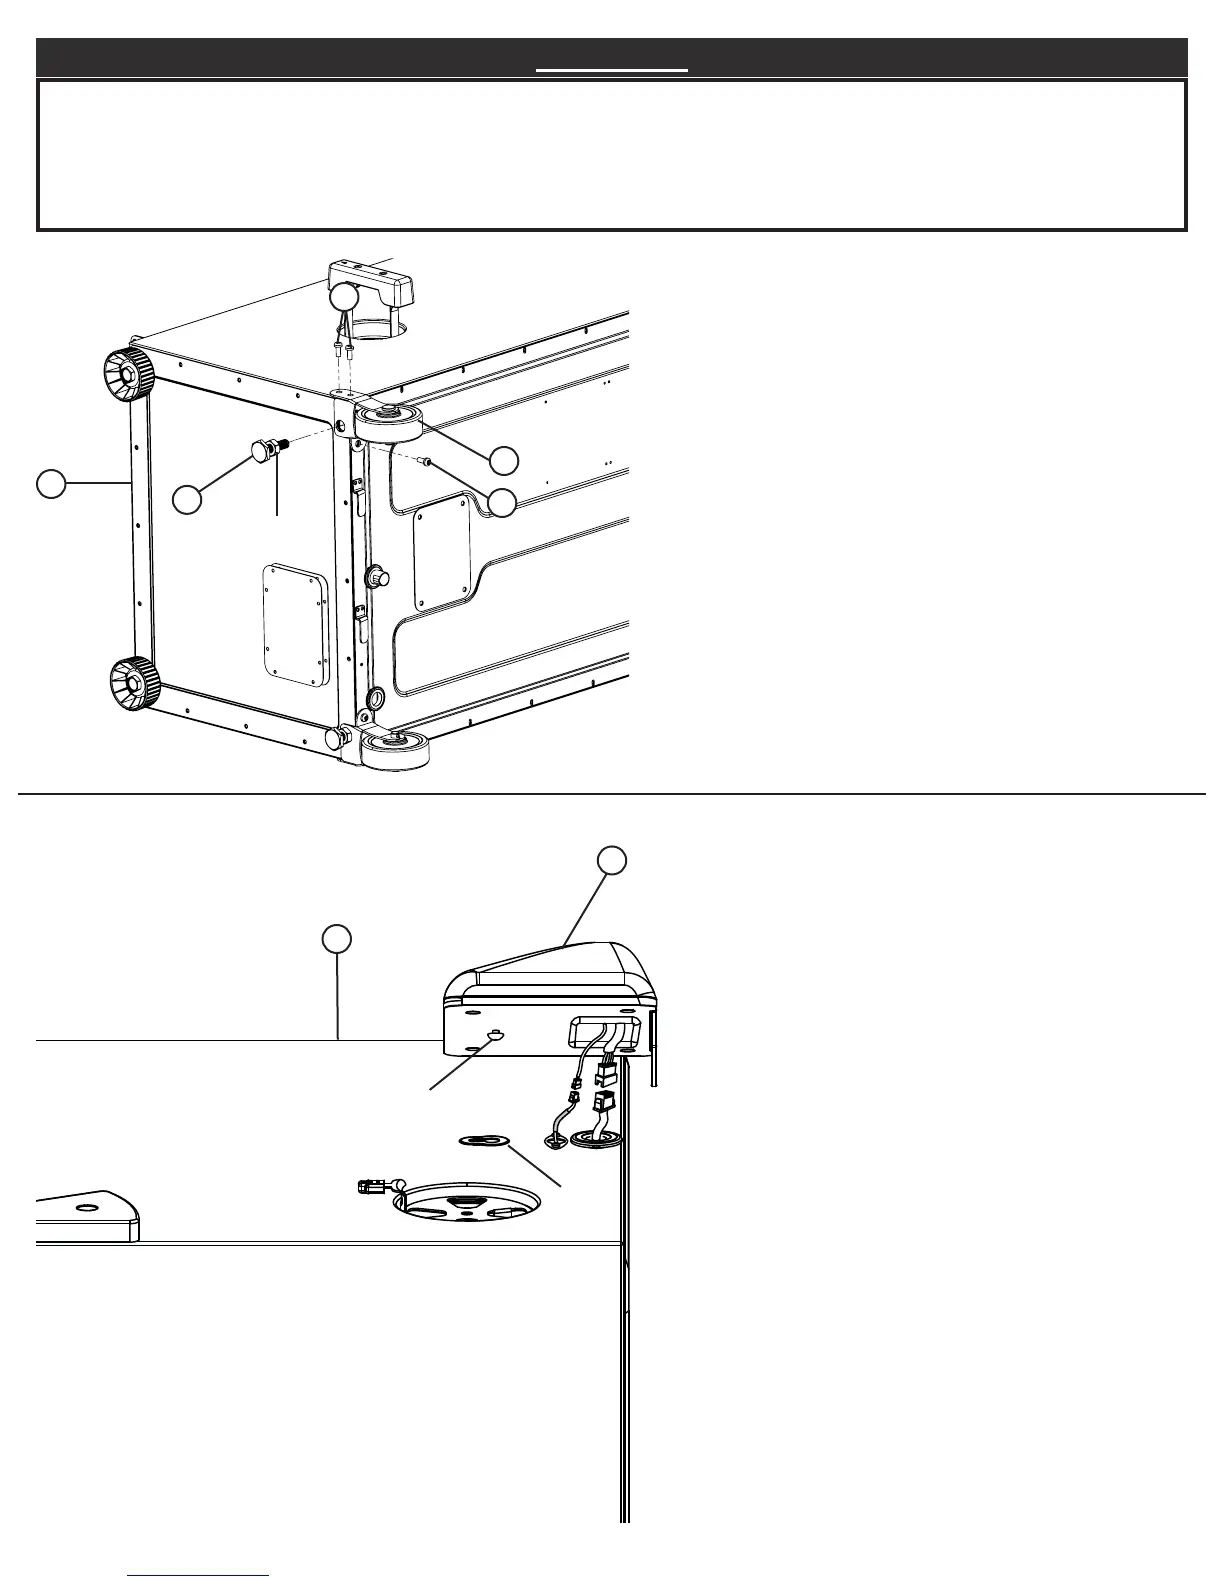
STEP 1
Position wheel (5) on bottom of
smoker body (1) as shown.
Insert adjustable screw leg (4)
into bottom of wheel (5).
Secure wheel (5) to bottom of
smoker body (1) using phillips
screws (A).
Repeat step for opposite side.
Note: Set adjustable screw leg
height by turning clockwise/coun-
terclockwise so that smoker is
level when unit is upright. Once
level, secure back leg positions
with attached tension nuts.
STEP 2a
Position control panel (6) on top of
smoker body (1) as shown.
Align slots on wire connecter from
control panel with tabs on wire
connecter on smoker as shown
and connect together.
STEP 2b
Mount control panel by inserting
stabilizing screw head into
keyhole.
Note: Stabilizing screw may need
slight adjustment for snug fi t.
1
6
Stabilizing
Screw
Keyhole
A
5
A
1
4
Tension
Nuts