9
Symptom
Power light won't come on
Unit takes excessive amount of time to
heat up
Grease is leaking out of smoker
No smoke
Temperature rapidly decreased, or shut
down after few hours of use
Power light is on, unit isn't
heating
Controller does not adjust heat
Cause
Not plugged into wall
House fuse tripped
Controller malfunctioning
Unit plugged into an extension cord
Door not closed properly
Controller malfunctioning
Drip tray not in place
Excess grease or oil build-up in unit
No wood chips
Faulty control unit
Controller/unit malfunctioning
Controller/unit malfunctioning
Possible Solution
Check wall connection
Make sure other appliances are not operating on
the same electrical circuit. Check household fuses.
Contact Masterbuilt at 1.800.489.1581
Set unit so an extension cord does not have to be
used
Close door and fasten latch securely
Contact Masterbuilt at 1.800.489.1581
Reposition so hole lines up with drain hole in
bottom of unit
Clean unit
Add wood chips See Page 8
Contact Masterbuilt at 1.800.489.1581
Contact Masterbuilt at 1.800.489.1581
Contact Masterbuilt at 1.800.489.1581
TROUBLESHOOTING GUIDE
TO ENSURE THAT IT IS SAFE TO EAT, FOOD MUST BE COOKED TO THE MINIMUM INTERNAL
TEMPERATURES LISTED IN THE TABLE BELOW.
Fish
Pork 160°F (71°C)
Egg Dishes 160°F (71°C)
Steaks and Roasts of Beef, Veal or Lamb 145°F (63°C)
Ground Beef, Veal or Lamb 160°F (71°C)
Whole Poultry (Turkey, Chicken, Duck, etc.) 165°F
(74°C)
Ground or Pieces Poultry (Chicken Breast, etc.) 165°F
(74°C)
USDA* Safe Minimum Internal Temperature
s
* United States Department of Agriculture
145°F (63°C)
6
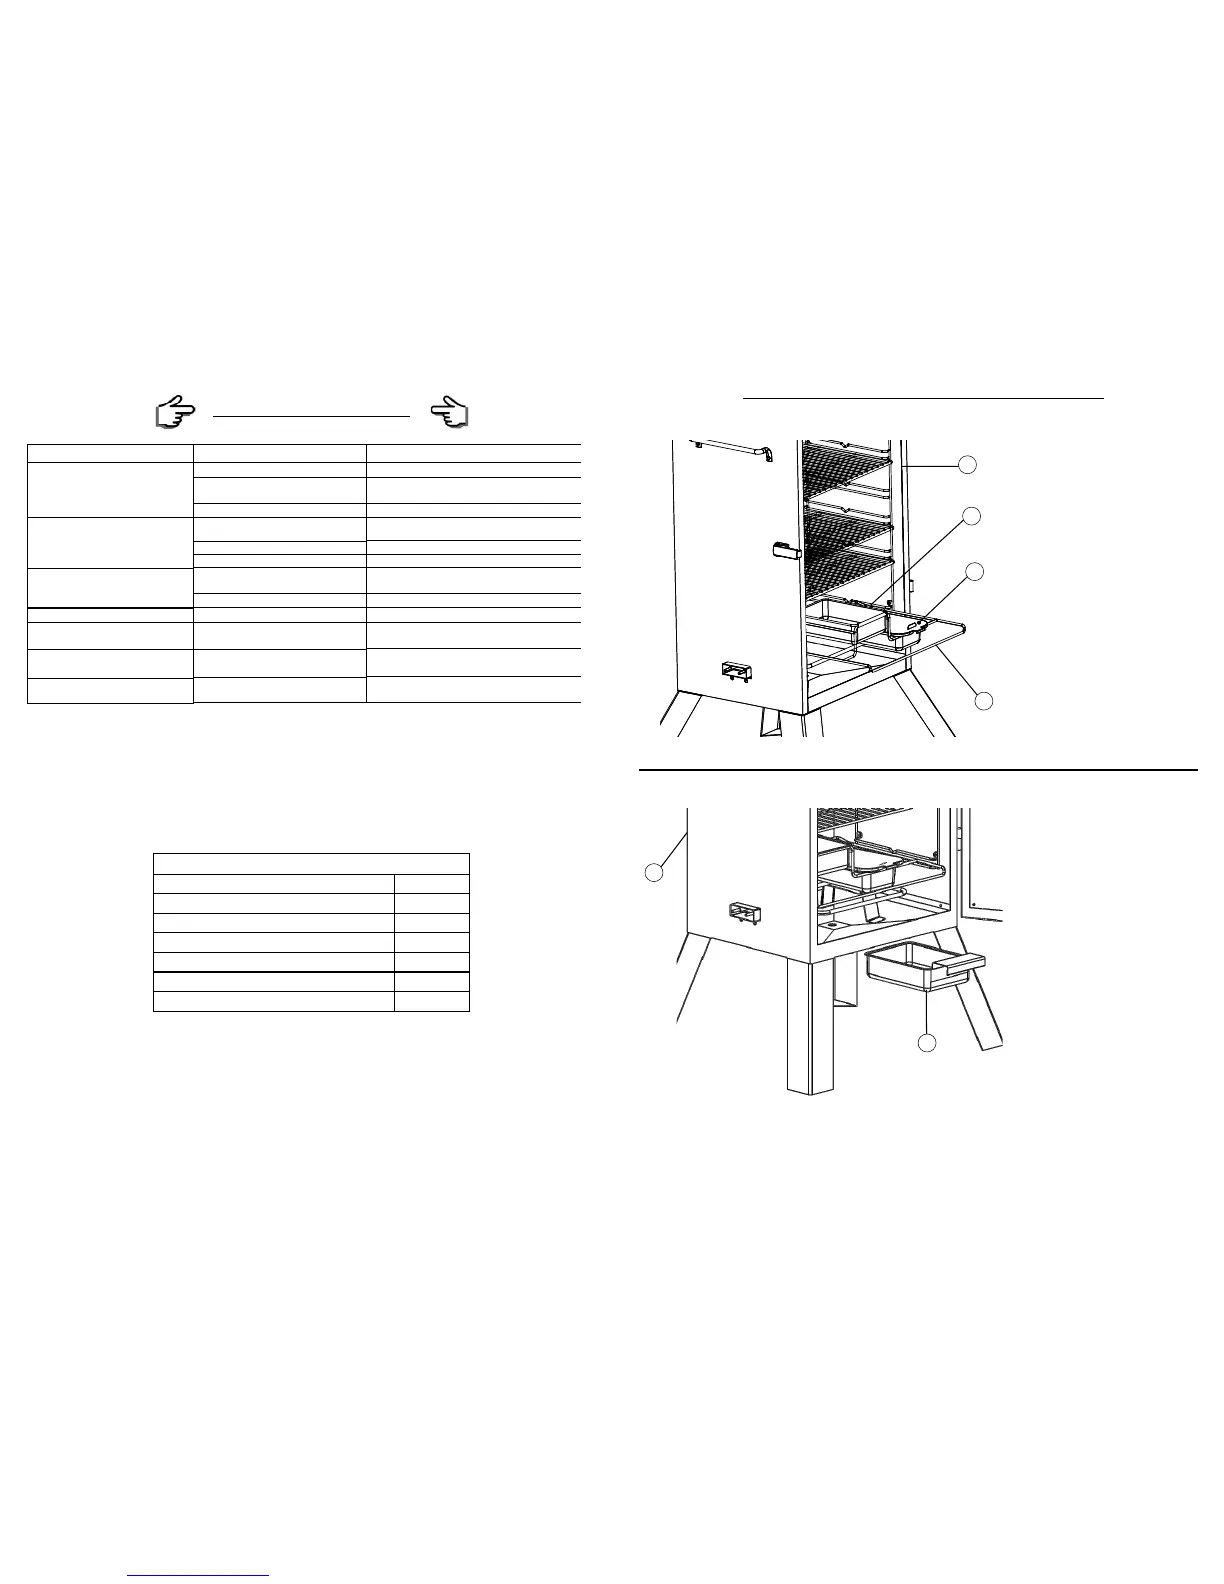
INSTRUCCIONES PARA EL ARMADO (continuación)
Paso 6
Meta el recipiente para la grasa (5)
en las ranuras ubicadas debajo del
cuerpo del ahumador (1).
ALGUNAS PARTES NO SE
MUESTRAN PARA MAYOR
CLARIDAD.
Paso 5
Coloque los recipientes (4) y (3) en
la rejilla para los trocitos de madera
(12) como se ilustra.
Nota: Para usar el ahumador, los
recipientes para los trocitos de made-
ra y para el agua DEBEN estar colo-
cados en su lugar. Esto reduce al
mínimo la posibilidad de que se pro-
duzcan llamaradas en la madera.
5
1
12
1
4
3