9
(A)
M6x1x10
Phillips Head
Flange Screw
qty - 12
(F)
M6
Flat Washer
qty - 6
(J)
M5x0.8x50
Phillips Head
Screw
qty - 4
(K)
M6x1x35
Phillips Head
Screw
qty - 2
(L)
M6
Hex Nut
qty - 2
(M)
M5
Hex Nut
qty - 4
(B)
M6x1x16
Phillips Head
Flange Screw
qty - 16
(C)
M5x1x10
Phillips Head
Screw
qty - 3
(I)
M5
Lock Washer
qty - 3
(G)
M6
Lock Washer
qty - 6
(H)
M5
Hex Nut
qty - 3
(N)
M6
Flat Washer
qty - 2
(Q)
M5
Lock Washer
qty - 4
(O)
M6
Lock Washer
qty - 2
(P)
M5
Flat Washer
qty - 4
(D)
Grill Bracket
qty - 6
(E)
6MM
Wing Nut
qty - 12
(J)
8MM
Wing Nut
qty - 1
HARDWARE LIST
SIDE SHELF HARDWARE
(SIDE SHELF NOT INCLUDED IN ALL MODELS. CHECK UNIT PACKAGING FOR PRODUCT DETAILS.)
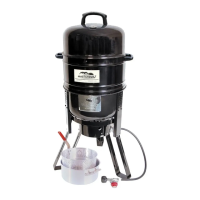
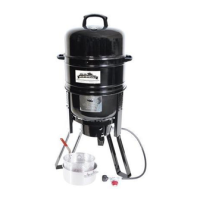
STEP 7.
Use handle’s (7) pre-threaded bolt,
flat washer (F), lock washer (G) and
wing nut (E) to mount handle to
smoker lid (1) as shown.
Insert temperature indicator (8)
through hole in lid. Secure with
pre-threaded wing nut (J).
Dome lid has an inside dome clip.
When removing dome lid you may
clip lid on side of smoker body.
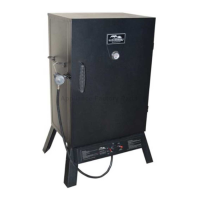
STEP 8.
Place flame disk bowl (11) in smoker
base pan.
Place water bowl (10), when used, on
base pan grill brackets.
Place cooking grate (9) on base pan
grill brackets.
Place grill body on top of base pan.
Place cooking grate (9) on body grill
brackets.
Place lid on top of smoker body
1
7
8
SMOKER IS READY FOR USE.
MASTERBUILT RECOMMENDS SEASONING SMOKER BEFORE USE.
SEE “HOW TO SEASON AND USE SMOKER” SECTION IN THIS MANUAL.
E
G
F
J
10
11
9
9
14