Technical Techniques
Step 18:Setasidetheactuator,andusingthe3/16”drillbit,drilltheadditionalholes,EXCEPTthecenterholewherethewiringwill
run.Thatholeshouldbedrilledwiththe3/8”drillbit.
Step 19: Repeatontheotherside.
For all models except X25, continue with Step 23.
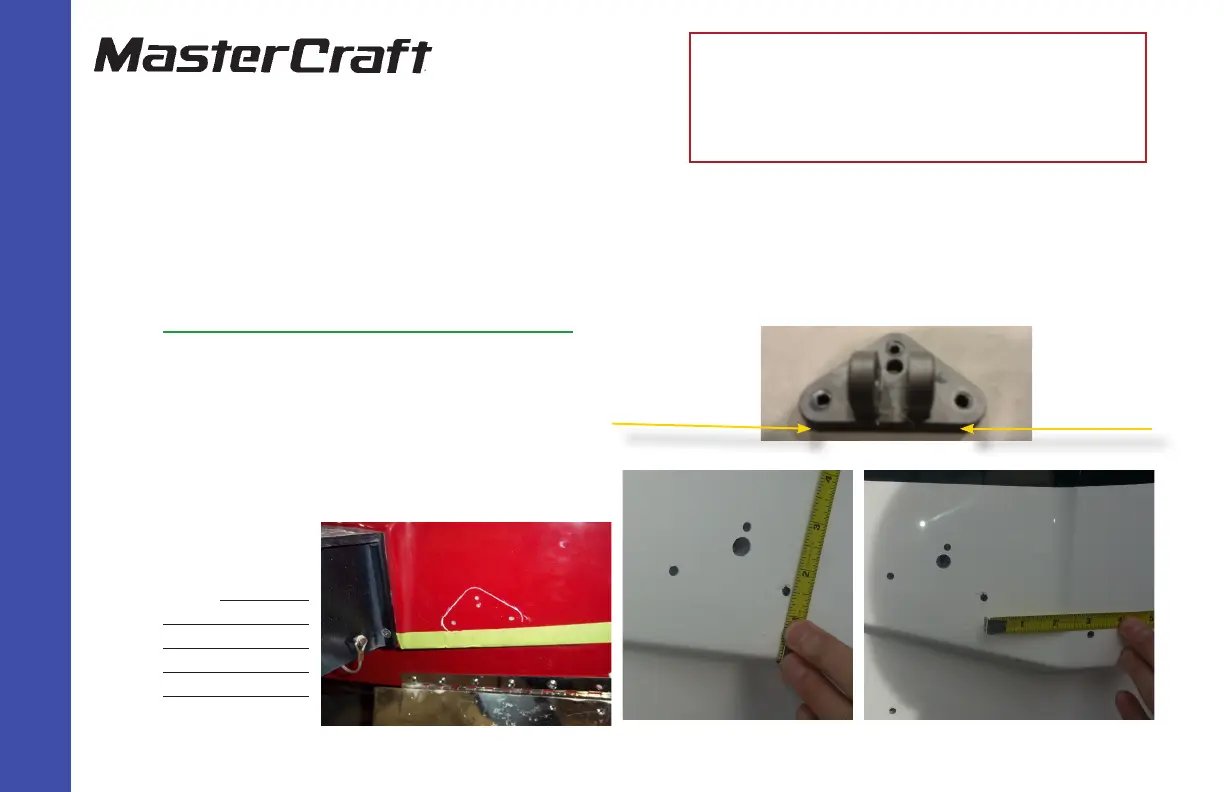
Preparation for actuator reinstallation on X-25:
Step 20:Using1”maskingtape,placeontransomfromplatform
across,aligningwithlip.
Step 21:Measure from center of the platform bolt over three
inches(3”).Note that the bracket will be tilted off the line
1/8” on the out-
board side to make
it parallel with the
hinge. This means
the outside hole
will be an addition-
al 1/8” above the
bottom of the tape.
Markfortheholes
GEN 2 Wake Shaping Devices Installation
(Replacing GEN 1) for X2, X10, X25,
X30, and X46
(Page 5)
lower outboard
(port side)
lower outboard
(starboard side)