Technical Techniques
most-outboardholeonthetransomisthesecondholeonthenewGEN
2plateontheX25only.)
Step 12: Alignandmarktheshimswithagreasepencil.
Step 13:Usingthe3/16”drillbit,drilltheholestoattachtheshims.
Step 14:Usingthe3/8”SSscrews,attachtheshims.
Preparation for actuator reinstallment (all models except X2 & X25):
No preparation required for the X2. For the X25, go to Step 20.
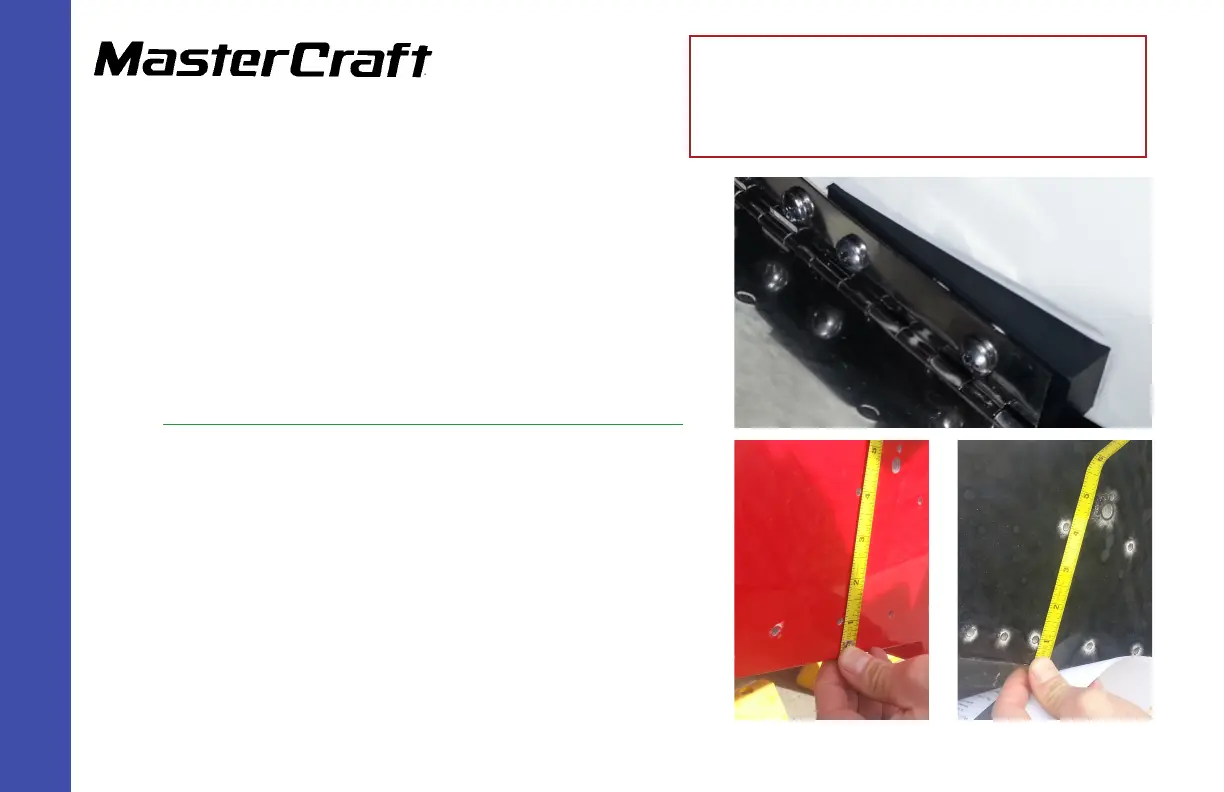
Step 15: For the X10 and X30,usingthesecond holefromtheoutboardsideof
theplateasthestartingpoint,measureuponthetransomthreeinches
(3”)fromthecenterofthehole,andmarkwithgreasepencil.
For the X46,usingthethird holefromtheoutboardsidefortheplateas
thestartingpoint,measureuponthetransomthreeinches(3”)fromthe
centerofthehole,andmarkwithgreasepencil.
Step 16: Usingthe3/16”drillbit,drillahole.
Step 17:Placetheactuatoronthetransomwiththeholeattheloweroutboard.
Keepingthebottomoftheactuatorbracketparalleltothebottomof
thetransom,marktheothertwoholesformounting.
GEN 2 Wake Shaping Devices Installation
(Replacing GEN 1) for X2, X10, X25,
X30, and X46
(Page 4)
X46 example - 3”
center of hole to center of hole
X10/X30 example - 3”
center of hole to center of hole