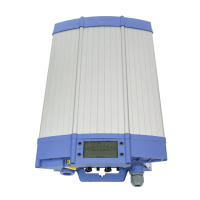
INSTALLATION AND COMMISSIONING
16 August 2010 / SunMaster CS15TL/CS20TL / EN
6.7 COMMISSIONING AFTER INSTALLATION
To check the correct operation of the
CS15TL/CS20TL, commissioning should be
carried out during daytime only.
6.7.1 Switching on
Follow these steps to switch On the CS15TL/CS20TL:
1 Check whether the DC switches (if applied) are in the
OFF position.
2 Check AC and DC cabling and connectors.
3 Move the DC switch (if applied) of the solar array to
the ON position.
As long as the CS15TL/CS20TL is not
configured in accordance with the local
regulations for grid connection, it will stay in
Standby mode. This means that no power can
be converted.
4 If applicable, switch on the AC grid.
5 Select language and country, using the display. See
chapter 8.
6 Set the day and time.
7 Check the PV input DC voltage and the AC voltage at
the grid side of the AC circuit breaker using the
display multimeter menu. The AC voltages should be
as follows:
L1 N 230V AC +/- 10%
L2 N 230V AC +/- 10%
L3 N 230V AC +/- 10%
L1 L2 400V AC +/- 10%
L2 L3 400V AC +/- 10%
L3 L1 400V AC +/- 10%
If DC and AC voltages are within range and solar
irradiation is sufficient, the CS15TL/CS20TL will switch on
automatically. This may take a few minutes.
6.8 DE-COMMISSIONING
If it is necessary to put the CS15TL/CS20TL out of
operation, follow the instructions in order of succession as
described below:
CAUTION!
Follow below mentioned instructions in order
of succession as described.
1 Cut off the grid voltage by switching off the AC circuit
breaker
2 Switch Off the DC switch
3 Release the AC connector
4 Release the CS15TL/CS20TL MultiContact
connectors, using the MultiContact tool
Now the CS15TL/CS20TL can be demounted in a safe
way.
CAUTION!
Never release the MultiContact plugs during
operation of the CS15TL/CS20TL. A spark or
an electric arc may develop, in which case
both plug and socket of the CS15TL/CS20TL
must be replaced.