152
10.7 NETPULSE & AM SETTING UP SOP
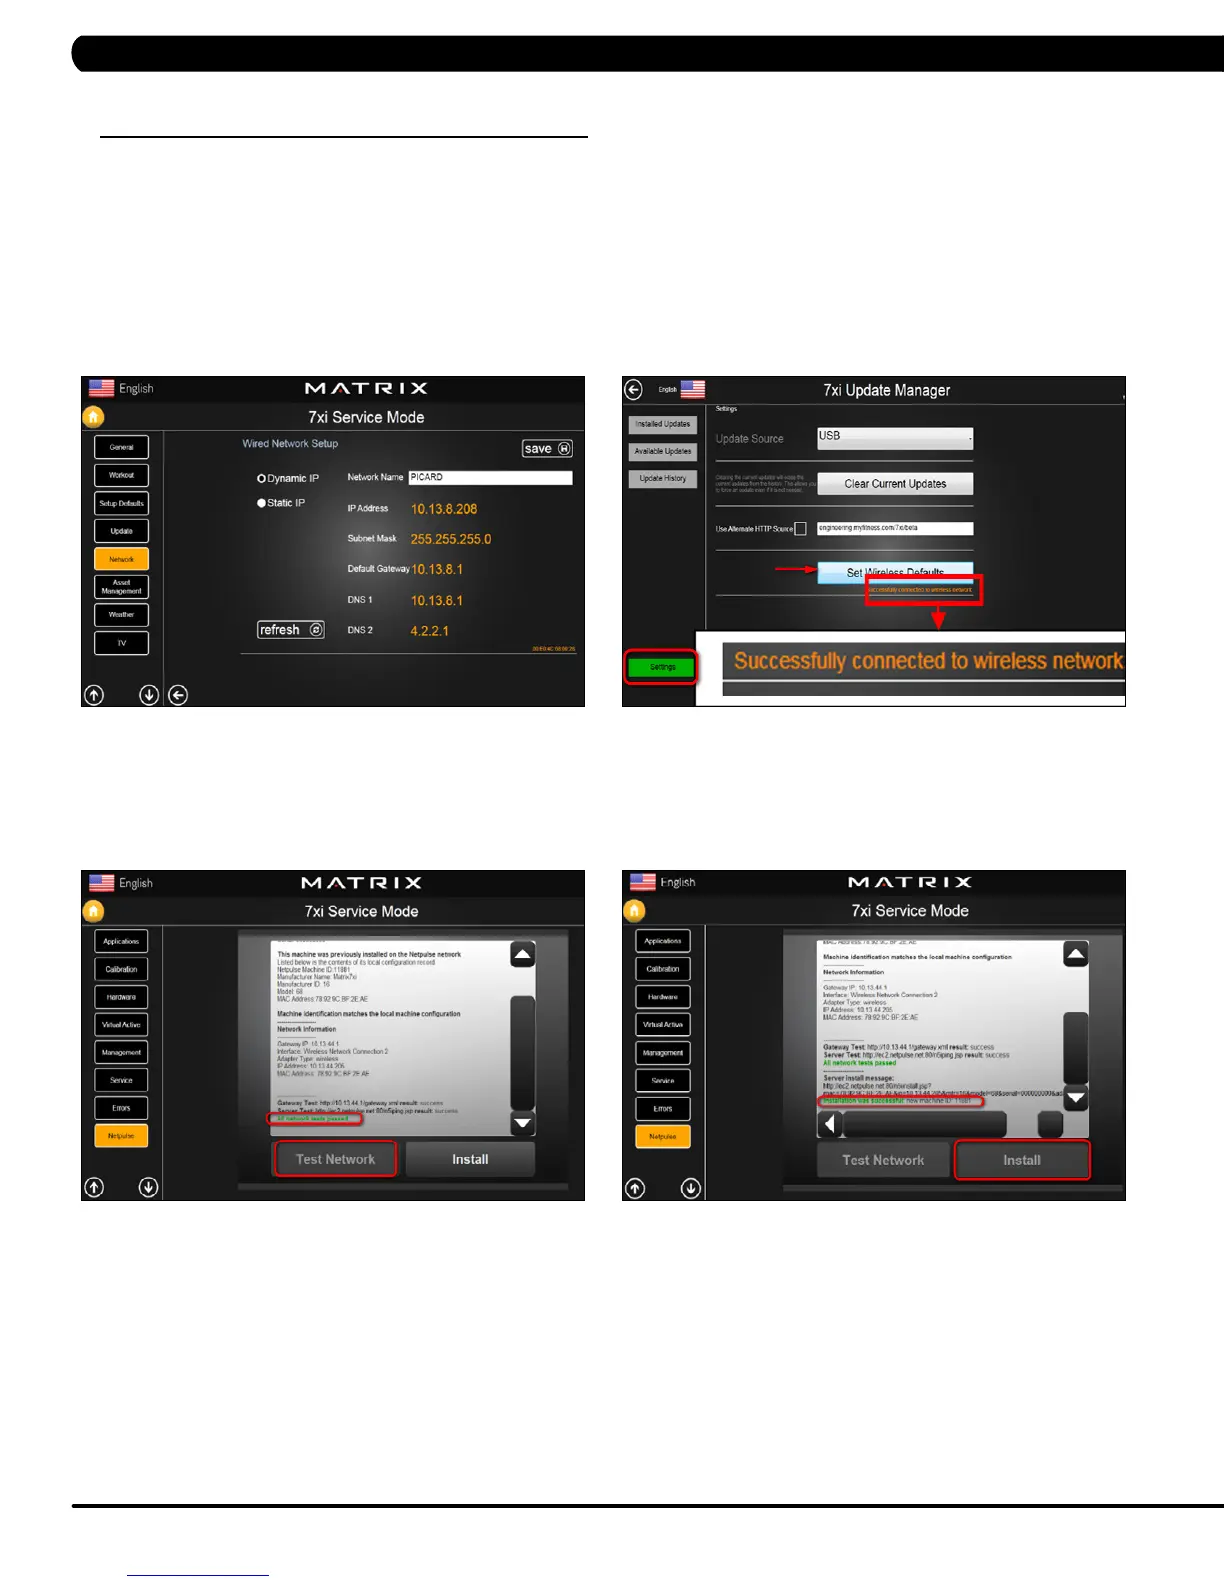
2. Network Setting:
a. Wired Solutions
Once the Ethernet cabling that has been installed in the facility, the console should automatically recognize and connect to the network via the
Ethernet Cable. Select the Network to obtain the network setting screen, press the right / left arrow to switch the screen to wired network setup
screen (Figure D).
b. Wireless Solutions (With meraki AP - MR12 or MR24 and Netpulse gateway setting)
i. From the main screen on the console, enter Update manager by pressing ENTER, 3, 0, 0, 4, ENTER on the lower keypad.
ii. Press the Settings .
iii. Press the Set Wireless Defaults for automatic network configuration. After a few moments, ensure that the message “Successfully
connected to wireless network” is displayed. (Figure E).
iv. Press the HOME key to return to the standard display picture.
v. Press the Enter key, 3-0-0-1, Enter key. Tap or click Netpulse to obtain the Netpulse screen, press Test Network can test the network
status fail or passed (Figure F); if the network was passed, then we can press install to install the netpulse as well (Figure G).
vi. Press Home button to return to Main screen, now very thing was setup on the console.
FIGURE GFIGURE F
FIGURE EFIGURE D
CHAPTER 10: BIKE SPECIFICATIONS AND ASSEMBLY GUIDE
 Loading...