1. As illustrated in the figure, remove the fixing nut from the rotary wire feeding
platform, place the welding wire spool onto the platform, and securely fasten the
fixing nut back onto the platform.
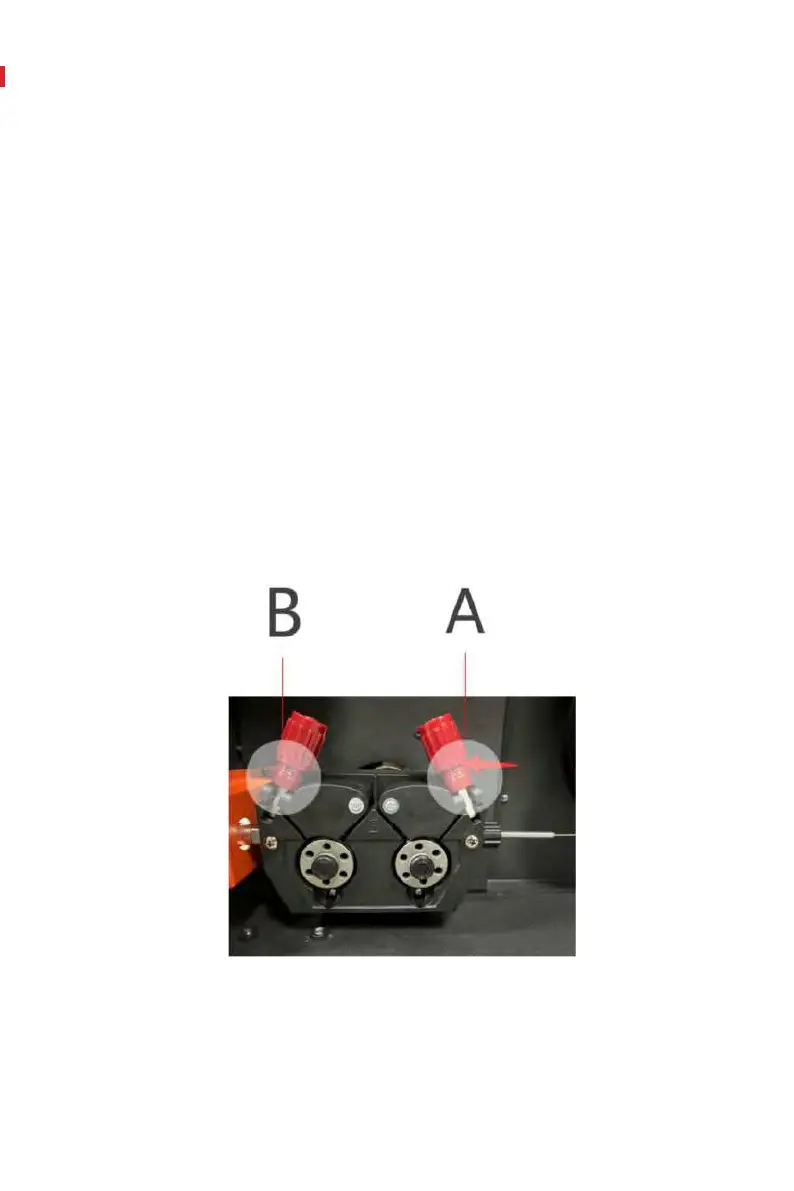
2. Refer to the figure demonstrating the assembly of the wire feeding wheel. Lower
the two red handles, remove the fixing screws of the two wire feeding wheels, and
take out the wheel to be replaced. Assemble the new wire feeding wheel with the
side that matches the size of the welding wire facing outward. Tighten the screws,
lower the clamping plate, and lift the handle to secure it in place.
3. Pressing Wheel Selection: Based on the diameter of the welding wire used,
choose the appropriate wire feeding gear. For stainless steel welding wire, select a
V-shaped gear; for aluminum welding wire, opt for a U-shaped gear..
 Loading...