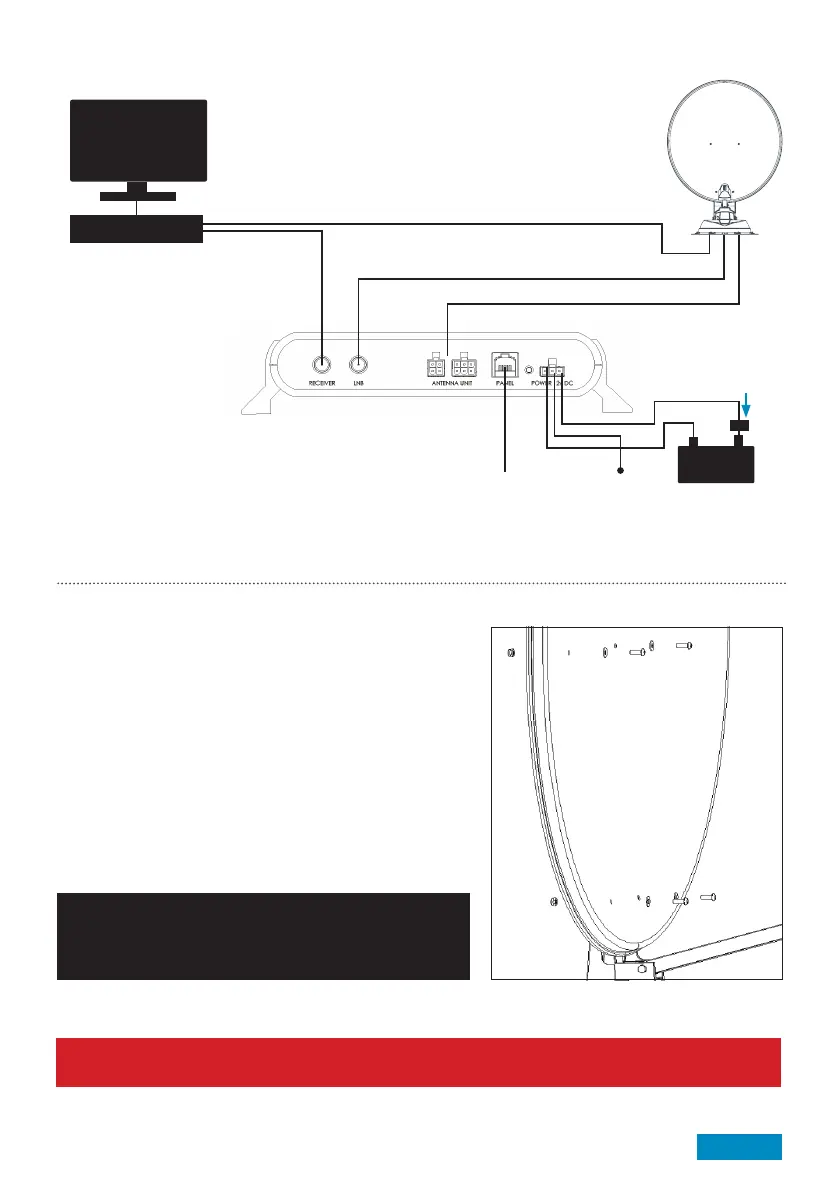
+
Satellite Receiver/s
Not required
Ignition
5A Fuse
Key:
A: Satellite Cable B: Satellite Cable. Note: For Skew variants, satellite cable labelled ‘Control Box’ must
be routed to ‘B’ C: Antenna Cable D: Cable for PVR or additional Satellite Receiver
Page 11
Connection Diagram
TV
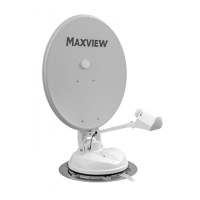
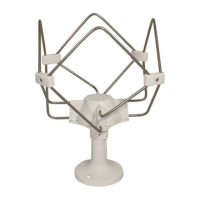
Attach Satellite Dish to Antenna Unit - For 65cm & 85cm only
50cm is already attached.
1. Ensure Antenna Unit is free from obstacles
2. Press installation button on reverse of Control Box to elevate
antenna. Once elevated turn off power to Control Box and
remove fuse
3. Fix Satellite Dish to Antenna Arm using M6 Button
Head Screws, M6 Nuts and 6mm Plastic Washers
The 65cm and 85cm satellite dishes have different fixing hole
positions. Therefore 4 of the holes will be unused
4. Remove all tools, packaging and obstructions from roof
5. Replace fuse and turn power switch on. Antenna will
automatically retract into the park position
Caution:
Replace Nylon locking nuts if they have been removed more
than twice. The locking action of the Nylon becomes less
effective if repeatedly assembled and disassembled.
Caution:
Before driving vehicle on a highway ensure adhesive has cured. Check all fasteners are secure.
D B
C
A
-
Finally, turn overleaf to test the head unit and check for software updates.
(Sat Cable labelled ‘Control Box’ - Skew only)