12 RC12 Windlass
Installation Instructions
Before you start
Before installing the windlass, identify any bulkheads, wiring or piping under the deck. This may
determine where the windlass can be positioned. Ensure the deck is flat, if not; a plinth will be
required to ensure the windlass sits on a flat surface.
Deck thickness
It is imperative that the deck and under-deck pad (not supplied) are of sufficient thickness and
structural strength to support the loads imposed on or by the windlass.
An under-deck pad should spread the load as widely as possible.
Preventing electrolysis
For aluminium boats, it is essential that the deckplate be insulated from the deck with a non-
conductive gasket (not supplied), that the mounting studs pass through insulators (not supplied),
and that the under-deck fastenings are insulated from the deck with nylon washers (not supplied).
It is also important that the anchor and chain are insulated from the hull, including rubber lining the
rope/chain locker and insulating the fixing for the end of the rope/chain to the hull.
Without these precautions, severe electrolysis can occur.
Because the motor is of the isolated earth type, it is not necessary to separately earth the
windlass.
Locating the chain stopper
The chain stopper should be positioned and aligned in a convenient position between the windlass
and the bow roller, so that it clears the anchor stock. The chain should pass through the stopper
without being deflected.
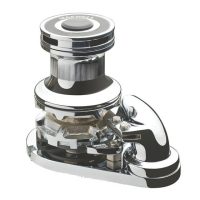
Preparing windlass
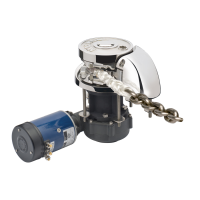
Remove windlass from its packing case.Disassemble it in the following order :
1. Remove the cap from the top of the windlass
2. Undo and remove the retaining screw and retaining washer under the cap,
using a 5mm Allen key.
3. Undo and remove clutch nut
4. For Capstan models only - remove washer, drum and key
5. Remove upper clutch cone, key and Bellevile washer
6. Undo screw that retain chain stripper and remove it.
7. Remove chainwheel assembly (together with stripper ),Bellevile washer, lower
clutch cone, key and retaining clips
8. Undo bolts and remove the deckplate
Refer to drawing in this Manual and identify all parts. If any parts are damaged or missing, contact
your Maxwell distributor. Some smaller parts might not be assembled on the windlass by the
factory, but supplied in a plastic bag in the packing case.
Maxwell strongly recommends generous application of a high quality anti-corrosive paste or
coating to the mating sections of main shaft, drive key, flanges, screw threads and other surfaces
that are likely to seize after being in contact for a prolonged period of time.
Also ensure anti-corrosive coating is liberally applied to the inside wall of the spacer tube.