10
INSTALLATION INSTRUCTIONS
WARNING
Excessive Weight Hazard
Use two or more people to move and install washer.
Failure to do so can result in back or other injury.
It is necessary to remove all shipping materials for proper
operation and to avoid excessive noise from washer.
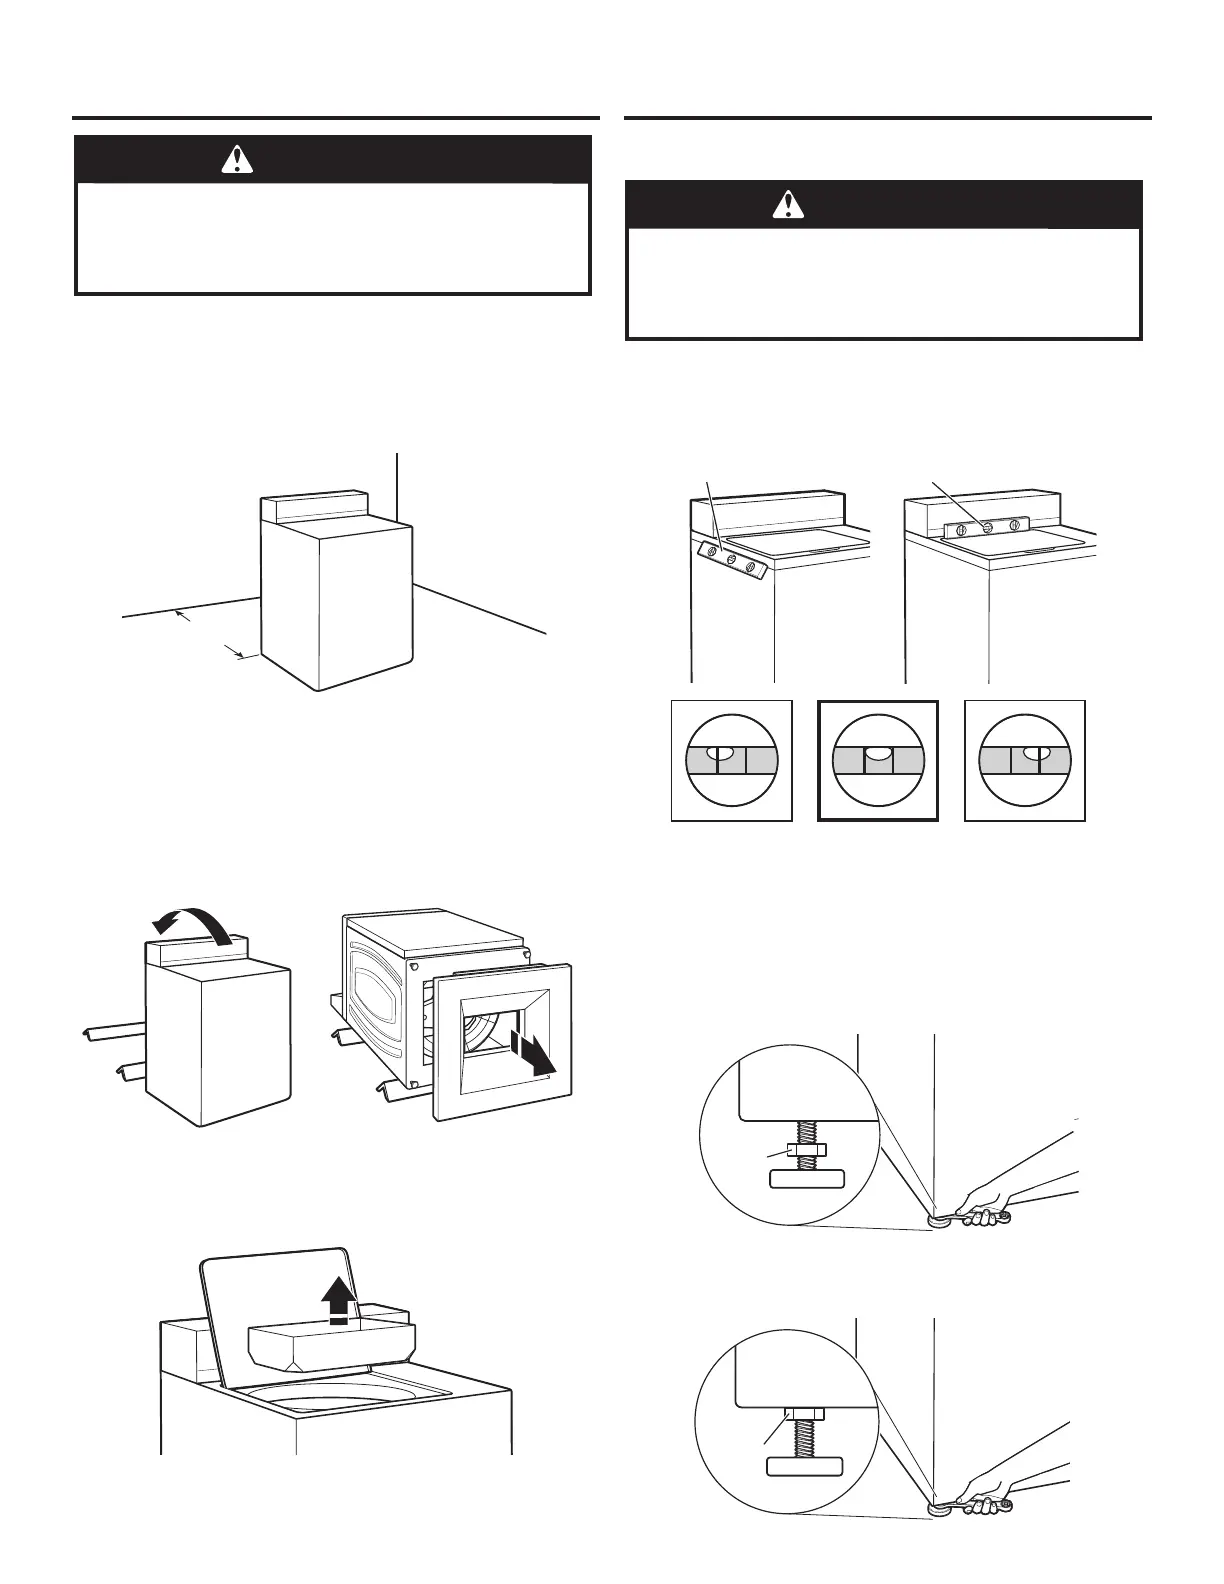
1. Move washer to within 1.2 m (4 ft) of its nal location; it must
be in a fully upright position.
NOTE: To avoid oor damage, set washer onto cardboard
before moving it and make sure lid is taped shut.
1.2 m
(48")
2. To avoid damaging oor, place cardboard supports from
shipping carton on oor behind washer. Tip washer back
and place on cardboard supports. Remove shipping base.
Set washer upright.
IMPORTANT: Removing shipping base is necessary for proper
operation.
NOTE: Keep shipping base in case you need to move washer
later.
3. Remove tape from washer lid, open lid, and remove cardboard
packing tray from tub. Be sure to remove all parts from tray.
NOTE: Tray must be removed prior to plugging the washer
into an outlet. Keep tray in case you need to move washer
later.
1. Move the washer to its nal location. Place a level on top
edges of washer. Use side seam as a guide to check levelness
of sides. Check levelness of front using lid, as shown. Rock
washer back and forth to make sure all four feet make solid
contact with oor.
Place level here
Place level here
Place level here
Place level here
LEVEL WASHER
IMPORTANT: Level washer properly to reduce excess noise
and vibration.
WARNING
Excessive Weight Hazard
Use two or more people to move and install washer.
Failure to do so can result in back or other injury.
2. Use a 14 mm or 9/16" open-end or adjustable wrench to turn
jam nuts clockwise on feet until they are about 13 mm (1/2")
from the washer cabinet. Then turn the leveling foot clockwise
to lower the washer or counterclockwise to raise the washer.
Recheck levelness of washer and repeat as needed.
HELPFUL TIP: You may want to prop up front of washer about
102 mm (4") with a wood block or similar object that will support
weight of washer.
Jam nut
Jam nut
3. When washer is level, use a 14 mm or 9/16" open-end
or adjustable wrench to turn jam nuts counterclockwise
on leveling feet tightly against washer cabinet.
Jam nut
Jam nut
NOT LEVEL LEVEL NOT LEVEL



 To Next Page