8
pH Drive Installation
Pre-Installation Checklist
!
The pH Drive unit MUST be mounted
vertically, with the cables at the bottom, in
order to be weather resistant. Any water
ingress due to the unit being incorrectly
mounted is not covered by warranty.
!
Check the mounting bracket of the Ozone
Swim system with which your pH Drive is
being installed. If it has an extension for
mounting the pH Drive, then you do not
need to install the mounting rail supplied
with the pH Drive.
!
Choose a position that will allow the cable
from the pH Sensor to reach the pH Drive
without straining, and power lead to reach
the outlet on the Ozone Swim system. The
dosing pump tubes must also be able to
reach the chemical drum and the pH Tee.
!
Ensure that the pH Drive is protected from
direct sunlight and weather. Although the
unit has a weather resistant design,
damage from long term exposure is not
covered by the warranty.
!
Do not connect the pH Drive power lead to
the Ozone Swim outlet until all installation
steps are complete.
INSTALL MOUNTING PLATE
Install the mounting plate levelly in the
desired location. Screws and wall plugs are
provided. This step is not required if your
Ozone Swim system has an extended
bracket for mounting the pH Drive.
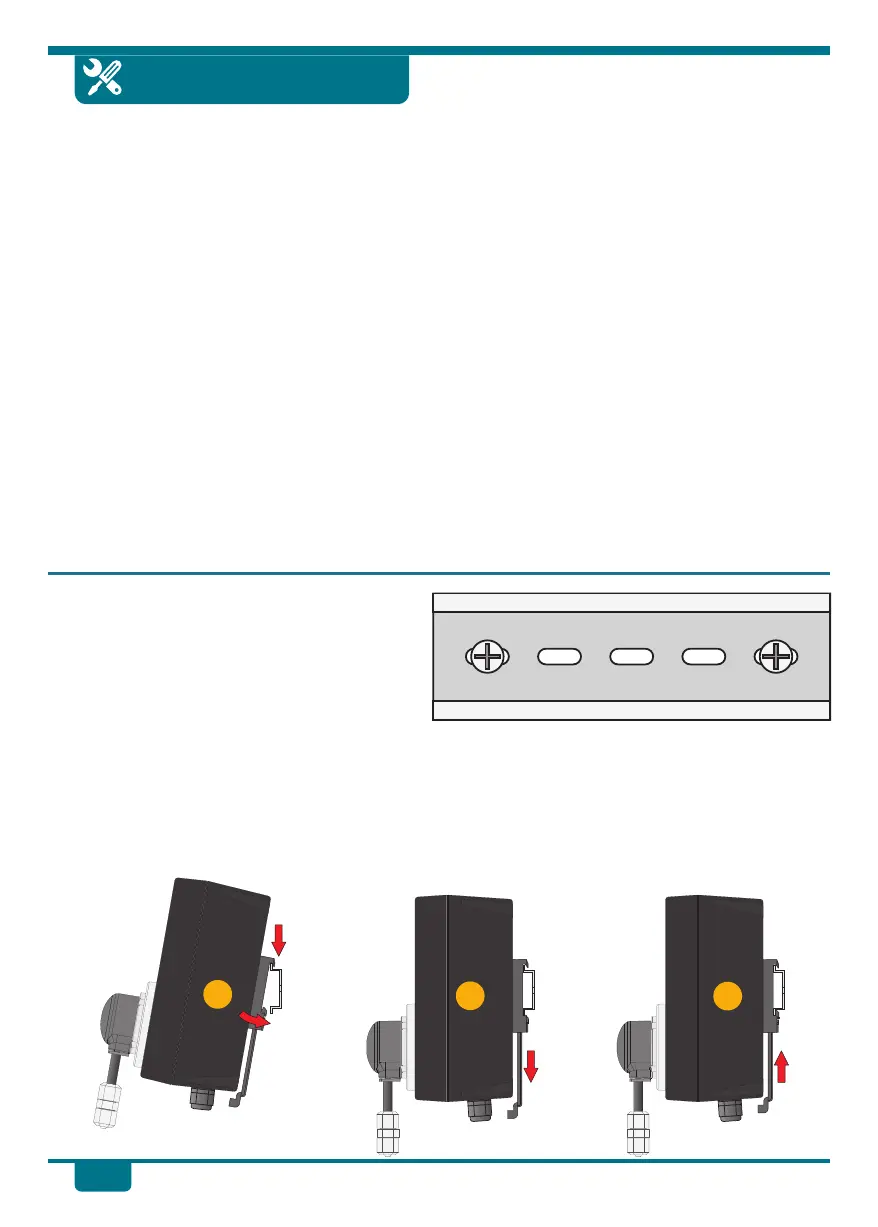
MOUNT pH DRIVE
u Hook the pH Drive mounting clip onto the top rail of the mounting plate.
v Pull the mounting clip down pull pushing the pH Drive against the bottom rail of the mounting
plate.
w Allow the mounting clip to lock in place behind the bottom rail.
1
2
3