Connect the management port
When you connect your network device to the Advanced Threat Defense Appliance, you can
congure the
appliance IP address and other parameters for integration in your network.
Task
1
On the rear panel, plug the Category 5e or 6 Ethernet cable in the Ethernet port 1
.
The Ethernet port 1 is the ATD Management port.
2
Plug the other end of the cable into the network device.
Congure the Advanced Threat Defense Appliance network information
Manage the Advanced Threat Defense Appliance from a remote computer or terminal server.
Task
1
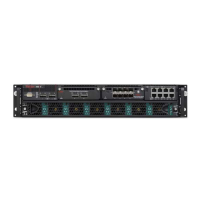
On the Advanced Threat Defense Appliance back panel, plug the console cable (RJ45 to DB9 serial) into the
console port (RJ45 serial-A port).
2
Locate the computer or port of the terminal server you are using to
congure the Advanced Threat Defense
Appliance, then connect the other end of the cable into the COM port.
3
From your Microsoft Windows-based computer, run the HyperTerminal using the following settings.
• Baud rate — 9600
• Number of Bits — 8
• Parity — None
• Stop Bits — 1
• Control Flow — None
4
To log on to the Advanced Threat Defense Appliance, use the following credentials.
• User name — cliadmin
• Password — atdadmin
To access all the built-in command syntax instructions, enter help or ?. For a list of all commands, enter
list.
5
Open the command prompt and
congure the Advanced Threat Defense Appliance.
a
Enter the Advanced Threat Defense Appliance name.
For example, set appliance name matd_appliance_1.
Best Practice: Use an alphanumeric character string up to 25 characters. The string must begin with a
letter and can include hyphens, underscores, and periods, but not spaces.
b
Enter the Advanced Threat Defense Appliance management port IP address and subnet mask.
For example, set appliance ip 10.34.2.8 255.255.255.0.
Do not assign this class C network IP address: 192.168.55.0/24.
c
Enter the default gateway IP address.
For example, set appliance gateway 12.34.2.1.
16