27
Setup, con’t
Input Selection and Title Reassignment
The C1000 has nine Audio Inputs, which includes seven
high level inputs, two dedicated Phono Inputs and two ex-
ternal processor loops. These inputs already have assigned
titles that will allow for immediate hookup, operation and
enjoyment. When the C1000 Controller is connected to the
C1000 Preamplifier and C1000 Tube Preamplifier the num-
ber of inputs double.
If the default Input Titles for the High Level Inputs do
not match up with components in your system they may be
reassigned. The following example (with either preamplifier
connected to the C1000 Controller, but not both) will illus-
trate how to rename the AUX Input to DVD2. When the In-
put Selector is rotated to select what was originally the
AUX Input, DVD2 will now appear on the Front Panel Al-
phanumeric Display.
Notes: 1. Unused Inputs may be switched Off so they will not
appear when going through the input source choices
using the LISTEN Control, RECORD Control or
when using the Remote Control or Keypad. Refer to
figure 25.
2. The Alphanumeric Display will indicate the default
Title for the Input number selected with a dot
appearing to the right of the Title. Refer to figure
26a.
3. The Input Titles choices available for the High Level
Inputs start with DVD2, AUX2, TUN2, SVR2, CDR2,
or CD2.
4. The PHONO MM and PHONO MC Inputs Titles are
fixed, however they may be switched On or Off.
1. Press the SETUP Push-button twice to access the Setup
Preamp Mode unless the C1000C is already in the
Setup Preamp Mode.
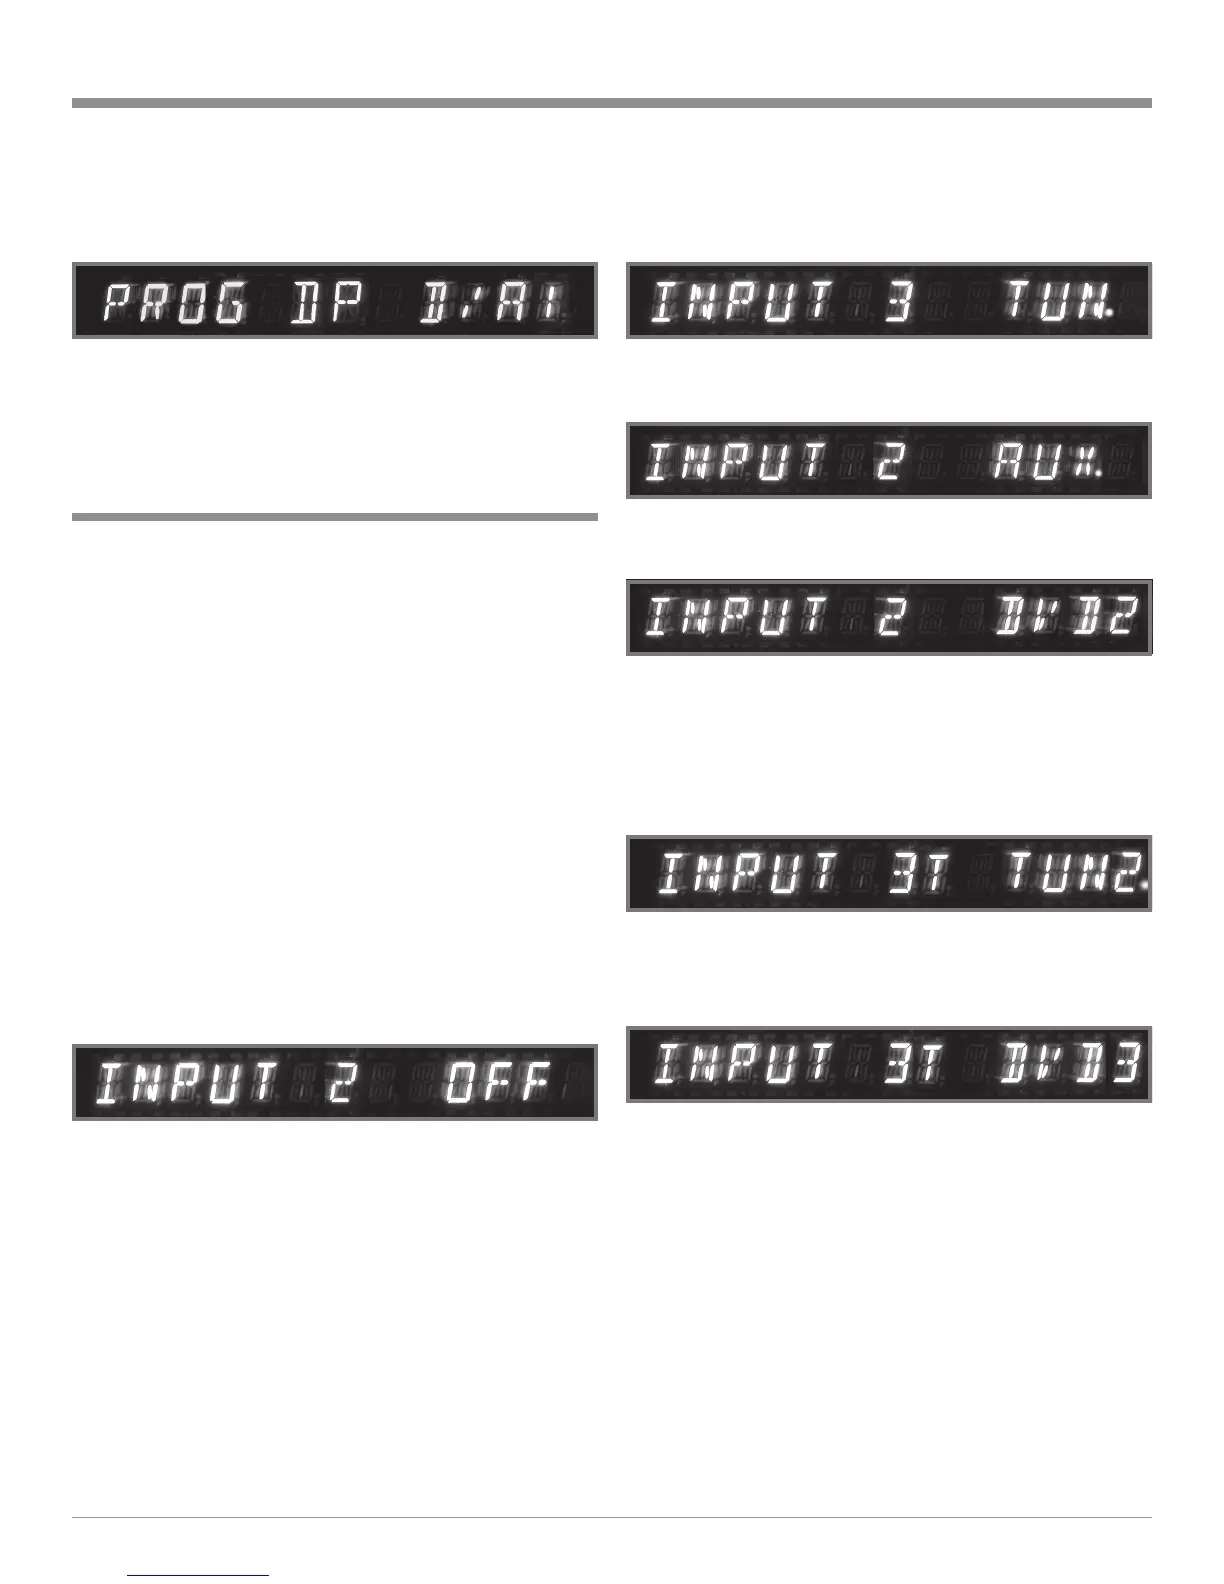
2. Rotate the BALANCE (Menu) Control until the Alpha-
numeric Display indicates “INPUT 3 TUN•” appears.
Refer to figure 26a.
3. Rotate the RECORD (Select) Control until the Display
indicates “INPUT 2 AUX•”. Refer to figure 26b.
4. Rotate the LISTEN (Select) Control until the Display
indicates “INPUT 2 DVD2”. Refer to figure 27c.
5. Repeat steps 3 and 4 until all the Inputs have the de-
sired Title or are switched Off.
Notes: 1. When both Preamplifiers (C1000P and C1000T)
are connected to the same C1000 Controller the
character “T” will appear to the right of Input
Number. Refer to figure 28a.
2. The available Input Title Choices will start with
DVD3, AUX3, TUN3, SVR3, CDR3, or CD3.
Refer to figure 28b.
6. If no other adjustments are to be made at this time,
press the SETUP Push-button to exit the Setup Preamp
Mode or proceed to the next desired Setup Preamp
Mode for adjustment.
Figure 26aFigure 24
10. Rotate the LISTEN (Select) Control to select the Digital
Input of the MDA1000 that the MCD1000 is connected
to. Refer to figure 24.
11. Press the SETUP Push-button to exit the Setup Control-
ler Mode.
Figure 25
Figure 26b
Figure 27b
Figure 28a
Figure 28b
 Loading...