17
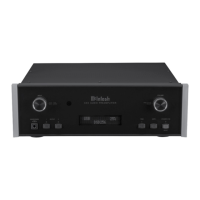
When the C49 is part of a Home Theater or Mul-
tichannel Audio System the Right and Left Front
Channels from an Audio/Video Processor or Surround
Decoder can “Passthru” the C49 and onto its associ-
ated Power Amplifier(s). The Setup Mode allows
selection of the specified C49 Input to be used for the
Right and Left Front Channels. In the example below,
the Right and Left Front Channels from the Audio/
Video Processsor will be connected to the BALanced
2 Input Connectors on the C49. Refer to pages 8 and 9
for additional connection information.
Note: The Phono and Digital Inputs are not assign-
able as a Passthru Input.
1. Press and hold in the INPUT Control to enter the
SETUP MODE. Refer to figure 2 on page 13.
2. Rotate the INPUT Control until “SETUP: Passth-
ru, OFF” appears on the Information Display.
Refer to figure 37.
3. Rotate the VOLUME (ADJUST) Control to select
“BAL 2” Input. Refer to figure 38.
4. Exit the SETUP Mode by several presses of the
INPUT Control.
The C49 may be remotely controlled from other
equipment connected to the Rear Panel RS232 Jack.
The speed at which the C49 communicates (8 bit, no
parity and 1 stop bit) with other equipment is adjust-
able from 9,600 bits per second to 115,200 bits per
second. To change from the default speed of 115,200
bits per second, perform the following steps:
1. Press and hold in the INPUT Control to enter the
SETUP MODE. Refer to figure 2 on page 13.
2. Rotate the INPUT Control until “SETUP: RS232,
115200 Baud” appears on the Information Dis-
play. Refer to figure 41.
3. Rotate the VOLUME (ADJUST) Control to select
the desired Baud Rate Speed.
4. Exit the SETUP Mode by several presses of the
INPUT Control.
Setup, con’t
Comm Port Baud Rate
Passthru
Figure 41
115200 Baud
Figure 37
OFF
Figure 38
BAL 2
The USB Automute Feature helps to ensure noise free
playback of streaming music via the C49 USB AUDIO
Input, as the Digital Audio Signal format changes
(PCM, DSD, etc.). On occasion due to the way a Dig-
tal Audio Music Recording was made, it may become
desirable to switch Off the USB Automute Feature. To
switch Off Automute, perform the following steps:
1. Press and hold in the INPUT Control to enter the
SETUP MODE. Refer to figure 2 on page 13.
2. Rotate the INPUT Control until “SETUP: USB
Automute, ON” appears on the Information Dis-
play. Refer to figure 39.
3. Rotate the VOLUME (ADJUST) Control to select
“SETUP: USB Automute, OFF” Input. Refer to
figure 40.
4. Exit the SETUP Mode by several presses of the
INPUT Control.
USB Automute
Figure 40
Figure 39

 Loading...