32
10. Proceed to the Digital Input Setting. If you do not
wish to perform Digital Input Setting at this time, pro-
ceed to the ZONE A Analog Input Setting.
Digital Input
There are three Optical Digital Inputs and three Coaxial
Digital Inputs available for assignment with any of the
eleven Analog Audio/Video Inputs. The following example
describes how to reassign Digital Input C, which by default
has been assigned to Input Number 8 LV, over to the newly
created DVD2 Input instead.
11. Using the Up or Down directional push-buttons,
select SOURCE INPUT from the On-Screen Menu,
followed by pressing the Left or Right directional
push-buttons to select the DVD2 Input Number 5.
12. Using the Up or Down directional push-buttons,
select DIGITAL INPUT on the On-Screen Menu, fol-
lowed by pressing the Left or Right directional
push-buttons to select the OPT C LK Digital Input.
Refer to figure 17.
Notes: A Digital Input may be assigned to multiple Audio
Inputs. The “LK” after the Digital Input Name
indicates the MX135 will stay locked into the
Digital Mode even with an interruption of the
Signal. When the Lock is Off, the MX135 will
switch to the associate Analog Input Signal if there
is interruption of the Digital Signal.
13. Continue next to the ZONE A Analog Input Setting. If
you do not wish to perform ZONE A Analog Input
Setting at this time, proceed to the SURR MODE set-
ting.
ZONE A Analog Input
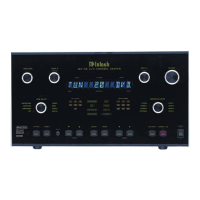
The MX135 has two pairs of Stereo Balanced Inputs that
may be assigned to any of the eleven Audio Inputs instead
of unbalanced (RCA Type) jacks. The AUX Input also in-
cludes the option of connecting a Turntable with a Moving
Magnet type Phono Cartridge to PH/AUX unbalanced
jacks. In the steps below, the BALanced 1 Inputs will be
assigned to the DVD Input and the PH/AUX Input will
change over to a Phono Input.
14. Using the Up or Down directional push-buttons,
select SOURCE INPUT from the On-Screen Menu,
followed by pressing the Left or Right directional
push-buttons to select the DVD Input Number 11.
15. Using the Up or Down directional push-buttons,
select ZONE A ANALOG INPUT on the On-Screen
Menu, followed by pressing the Right directional
push-button to select BAL1. Refer to figure 18.
Note: The BALanced (1 or 2) Input may be assigned to
multiple Audio Inputs.
16. Using the Up or Down directional push-buttons,
select SOURCE INPUT from the On-Screen Menu,
followed by pressing the Left or Right directional
push-buttons to select the PH/AUX Input Number 1.
17. Using the Up or Down directional push-buttons,
select ZONE A ANALOG INPUT on the On-Screen
Menu, followed by pressing the Right directional
push-button to select the PHON. Refer to figure 19.
18. Using the Up or Down directional push-buttons,
select TITLE, followed by pressing the SELECT/OK
Push-button. The On-Screen Menu Title can now be
changed from the default name.
Figure 18
MENU: INPUT SETUP
SOURCE INPUT 11 - IR-DVD
TITLE DVD1
DIGITAL INPUT OPT C LK
ÆZONE A ANALOG INPUT BAL1
SURR MODE LAST
VIDEO POWER ON
COMPONENT VIDEO 5
VIDEO CONV. INPUT OFF
MAIN MENU
Figure 17
MENU: INPUT SETUP
SOURCE INPUT 5 - IR-TP2
TITLE DVD2
ÆDIGITAL INPUT OPT C LK
ZONE A ANALOG INPUT RCA
SURR MODE LAST
VIDEO POWER ON
COMPONENT VIDEO NONE
VIDEO CONV. INPUT OFF
MAIN MENU