Note: Installation and maintenance are to be performed only by qualified personnel who are familiar with local codes and regulations, and are
experienced with this type of equipment. Caution: Sharp edges are a potential injury hazard. Avoid contact with them.
Page 2 / IM 742
Transportation & Storage
Installation
General
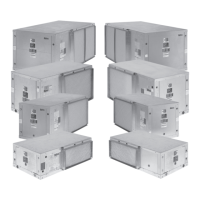
Upon receipt of the equipment, check carton for visible
damage. Make a notation on the shipper’s delivery ticket
before signing. If there is any evidence of rough handling,
immediately open the cartons to check for concealed dam-
age. If any damage is found, notify the carrier within 48
hours to establish your claim and request their inspection
and a report. The Warranty Claims Department should then
be contacted.
Do not stand or transport the machines on end. For stor
-
ing, each carton is marked with “up” arrows.
In the event that elevator transfer makes up-ended posi-
tioning unavoidable, absolutely ensure that the machine is
in the normal upright position for at least 24 hours before
operating.
Temporary storage at the job site must be indoors,
completely sheltered from rain, snow, etc. High or low tem
-
peratures naturally associated with weather patterns will
not harm the conditioners. Excessively high temperatures,
140°F (60°C) and higher, may deteriorate certain plastic
materials and cause permanent damage.
1. To prevent damage, this equipment should not be oper-
ated for supplementary heating and cooling during the
construction period.
-2. Inspect the carton for any specific tagging numbers
indicated by the factory per a request from the installing
contractor. At this time the voltage, phase and capacity
should be checked against the plans.
3. Check the unit size against the plans to ensure unit
installation is in the correct location.
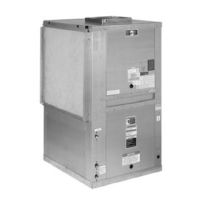
4. After removing the carton, remove the hanger kit from
the fan housing.
5. Before installation, check the available ceiling height
versus the height of the unit.
6. Note the location and routing of water piping, conden
-
sate drain piping, and electrical wiring. The locations of
these items are clearly marked on submittal drawings.
7. The installing contractor will find it beneficial to confer
with piping, sheet metal, ceiling and electrical foremen
before installing any conditioners.
NOTE: Check the unit name plate for correct voltage with
the plans before installing the equipment. Also,
make sure all electrical ground connections are
made in accordance with local code.
8. Remove all shipping blocks in the fan wheel.
9. Change the airflow direction from straight discharge to
end discharge or vice versa before the unit is installed
in the ceiling. Refer to the section in this bulletin for
instructions.
10. We recommend that the contractor cover the condi
-
tioners with plastic film to protect the machines during
finishing of the building. This is critical while spraying
fireproofing material on bar joists, sandblasting, spray
painting and plastering. If plastic film is not available,
the shipping carton may be modified to cover the units
during construction.
Product Catagory
W = WSHP
Product Identifier
CCH = Ceiling Mounted / R-410A / Standard Range
CCW = Ceiling Mounted / R-410A / Geothermal
CRH = Ceiling Mounted / R-22 / Standard
CRW = Ceiling Mounted / R-22 / Geothermal
Design Series
1 = A Design
2 = B Design
3 = C Design
4 = D Design
Nominal Capacity
007 = 7,000 030 = 30,000
009 = 9,000 036 = 36,000
012 = 12,000 042 = 42,000
015 = 15,000 048 = 48,000
019 = 19,000 060 = 60,000
024 = 24,000 070 = 70,000
W CCH 1 009 M E Y L S
Model Nomenclature
Discharge Air
S = Straight
E = End
Return Air
L = Left
R = Right
Future
(None)
Voltage
A = 115/60/1
E = 208-230/60/1
F = 208-230/60-/3
J = 277-265/60/1
K = 460/60/3
L = 575/60/3
50 Hz (CCH&CCW Only)
M = 230/50/1
N = 380/50/3
Note: For illustration purposes only. Not all options available with all models.
Please consult McQuay Sales Representative for specific availability.
Controls
M = Mark IV
K = Micortech 2000 w/LonMark
®
3.3
L = Microtech 2000 w/LonTaLk
®
A = BACnet
E = Less Board
 Loading...