© 2009 McQuay International 800-432-1342 www.mcquay.com IM 1024/Page 42
3 Attach Subbase Extensions to the Right and Left Chassis
Support Panels using 1 screw in each. See Figure 2.
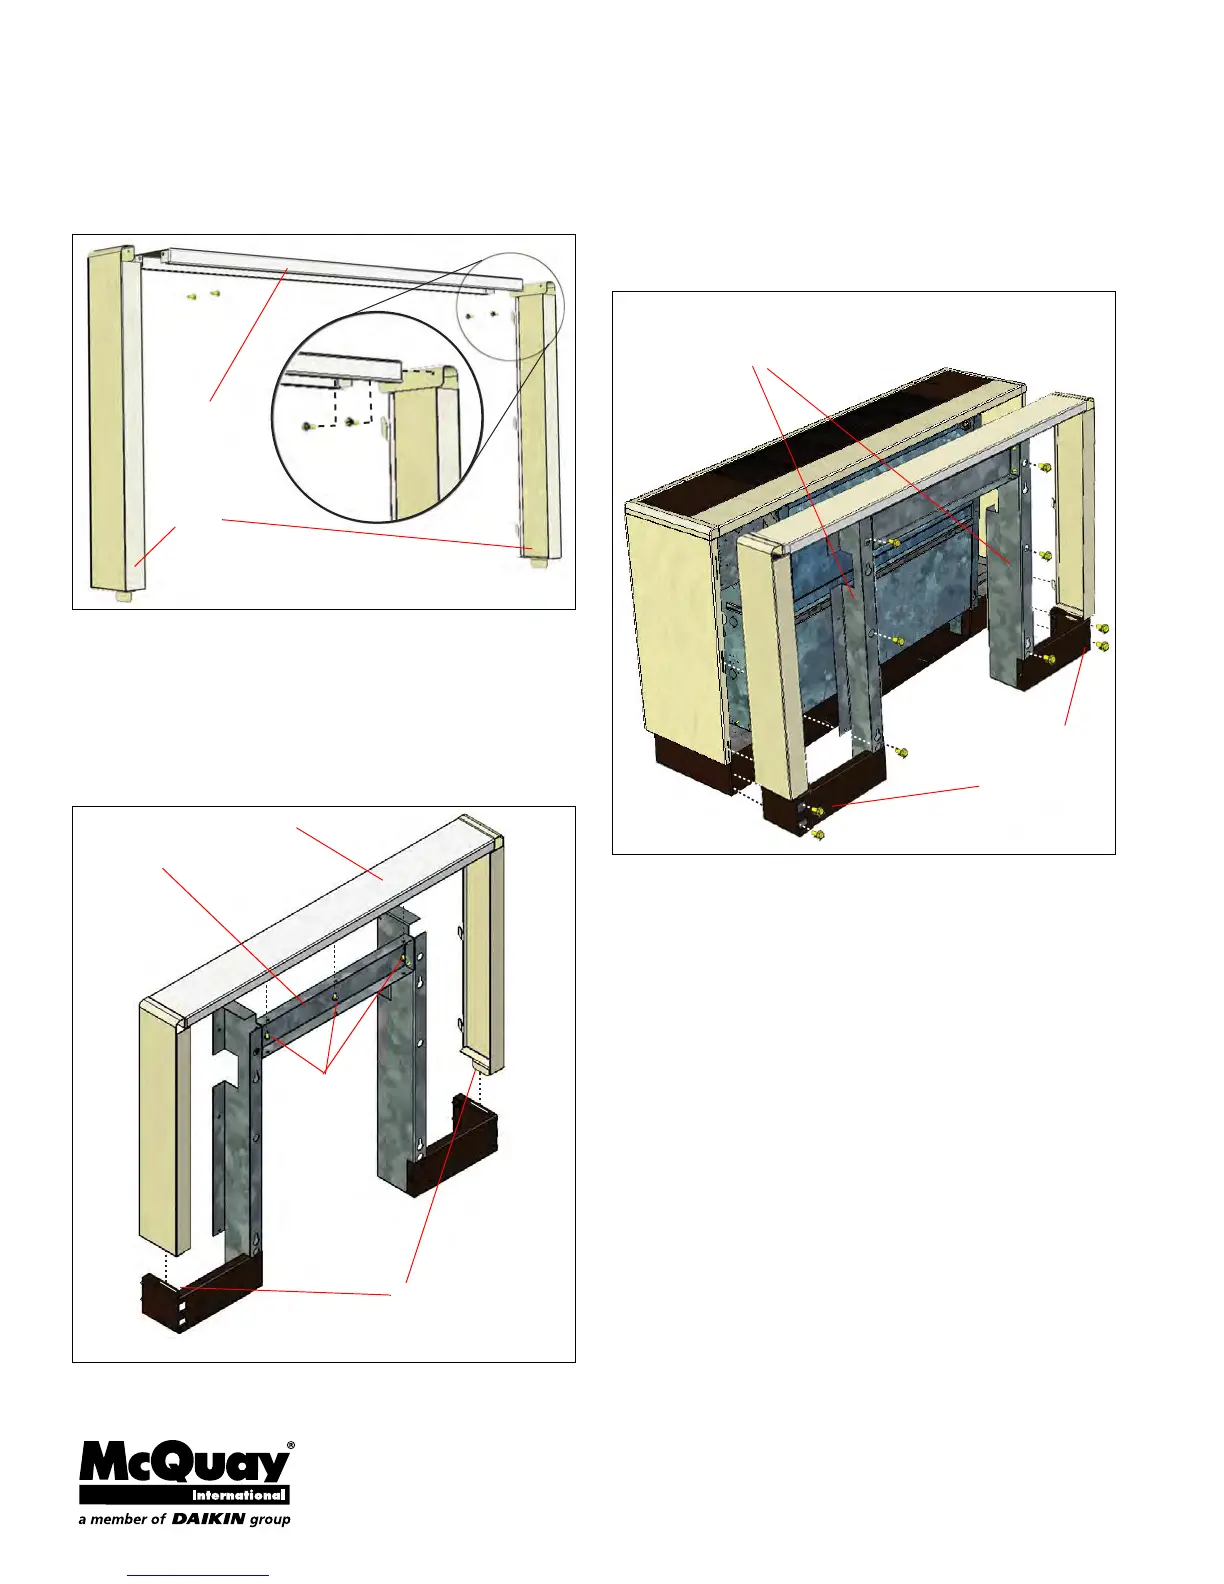
4 Attach the Top Cabinet Panel to the Right and Left
Cabinet Side Panels using 4 screws (2 on each side). See
Figure 3.
Figure 3: Cabinet Panel Assembly
5
Lower the Cabinet Assembly from step 4 onto the
Chassis Support Assembly from step 3 (see Figure 4).
Note that the tabs on the Cabinet Side Panels are inserted
into the slots in the Subbase Extensions.
6 Use 3 screws to fasten the Top Cabinet Panel to the
Center Chassis Support Panel.
Figure 4: Attach Cabinet Assembly To Chassis Assembly
7 Attach extension to fan coil unit as follows (see
Figure 5):
a Attach the Subbase Extensions to the left and right
subbases on the unit using 4 screws.
b Attach the Left and Right Chassis Support Panels to
the left and right coil panels on the fan coil unit using
6 screws.
Figure 5: Attach Extension To Unit
Some common applications for the rear cabinet extension
include:
• Allow additional depth for appearance of unit.
• Allow additional clearance for cross-over piping and
connections.
• Extend the discharge grille past drapery or wall hangings.
• Cover floor covering terminations in remodeling projects.
• Allow for piping entry through the side panels of the unit.
Attach top
cabinet panel
to right and left
side panels with
4 screws
Insert tabs into slots in
Subbase Extensions
Fasten in
place with 3
screws
Lower the Cabinet Assembly
onto the Chassis Support
Assembly
Attach Subbase
Extensions to
unit subbases
with 4 screws.
Attach Chassis Support
Panels to coil panels on the
unit with 6 screws