6 McQuay IM 980-1
Installation
Installation
Uncrating and Inspecting the Unit
1 Carefully remove the packaging, remaining alert to any
signs of shipping damage. Be careful not to discard
components that may be included with the packaging.
2 If the unit is damaged, file a claim with the carrier.
Notify the local McQuay representative immediately.
3 You may want to retain some or all of the packaging to
provide jobsite unit location information and temporary
protection for the fan coil after installation. Be sure to
dispose of plastic packaging and protective cardboard
properly, in accordance with local recycling rules and
guidelines.
4 Touch up painted panels if necessary. If panels need
paint, sanding is not necessary. However, clean the
surface of any oil, grease, or dirt residue so the paint will
adhere. Purchase factory approved touch up paint from
your McQuay representative or McQuay Factory
Service.
Mounting Unit to Wall
1 Consult job blueprints for unit location.
2 Clean area where unit is to be installed, removing all
construction dirt and debris. Remove any mouldings at
the floor or wall.
3 Remove the unit from the shipping carton and plastic
covering. Save the carton and plastic to use as a
protective cover after the installation is complete.
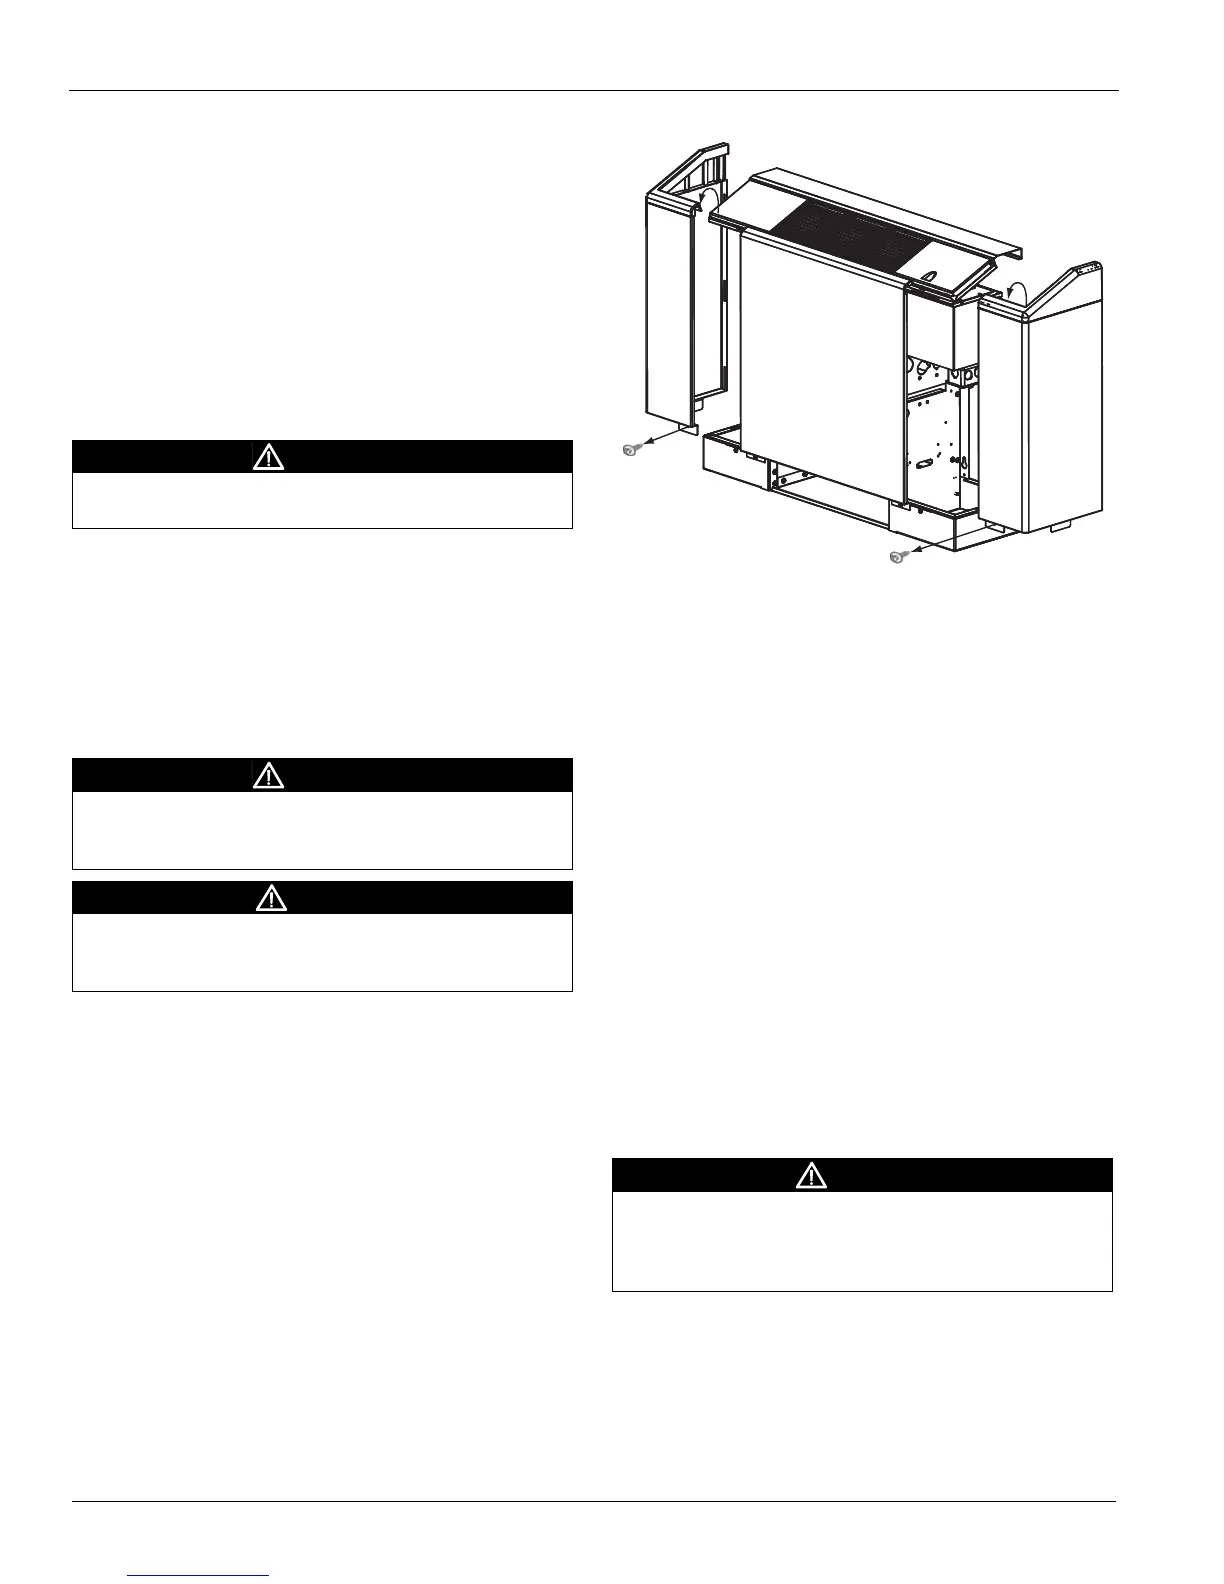
4 On cabinet units, remove the screws shown in Figure 5
that secure the right and left cabinet corner panels to the
subbase. For ease of installation, you may also remove
the center panel. Lift the panels up and out.
Note: Set the unit panels aside where they will not be
damaged. Take care not to bend the mounting tabs
on the bottom of the panels.
Figure 5: Cabinet Side Panel Removal
5
STOP! If an outside air damper kit is to be installed,
install it now. See Fresh Air Damper‚ page 16 and the IM
included with the damper for more information.
6 Position the chassis/subbase against the wall where the
unit is to be installed. Make sure that the area under the
unit is free of combustible materials such as carpet. For
cabinet units, the wall must act to close off the back of
the unit.
7 For hideaway units, if you are using McQuay’s
decorative wallplate, use blocks or other suitable
material to raise the unit off the floor a minimum of 1.5
inches (38 mm).
8 Make sure electrical and piping connections are in the
proper location within the end compartments. The
control box is in the end compartment opposite the main
coil piping connections. Power to the unit is hooked up
through the junction box/disconnect box located under
the control box. See Figure 30, page 21 through
Figure 33, page 24 for location information.
9 Use a level to check that the unit is level both front to
back and side to side (see Figure 6). Adjust the unit as
needed using the optional leveling legs or shims.
10 The chassis has a series of slots on the back flange to
mount the assembly to the wall. Transfer a mark with a
marker or pencil to the wall at the mounting hole
locations.
11 Insert fasteners through the mounting holes in the chassis
and secure the unit to the wall. Do not over-tighten
fasteners. It is the installing contractor’s responsibility to
WARNING
Plastic packaging is a suffocation hazard, dispose of properly.
Keep away from children.
WARNING
Installation and maintenance are to be performed by qualified
personnel who are familiar with local codes and Regulations,
and experienced with this type of equipment..
CAUTION
Personal injury hazard. Wear protective gloves to avoid
possible cuts and abrasions from exposed edges. Avoid
contact with sharp edges.
CAUTION
It is critical that the unit is level to avoid condensate
accumulation in the drain pan. This is especially important
when using a stainless steel drain pan which does not have a
sloped bottom.