42
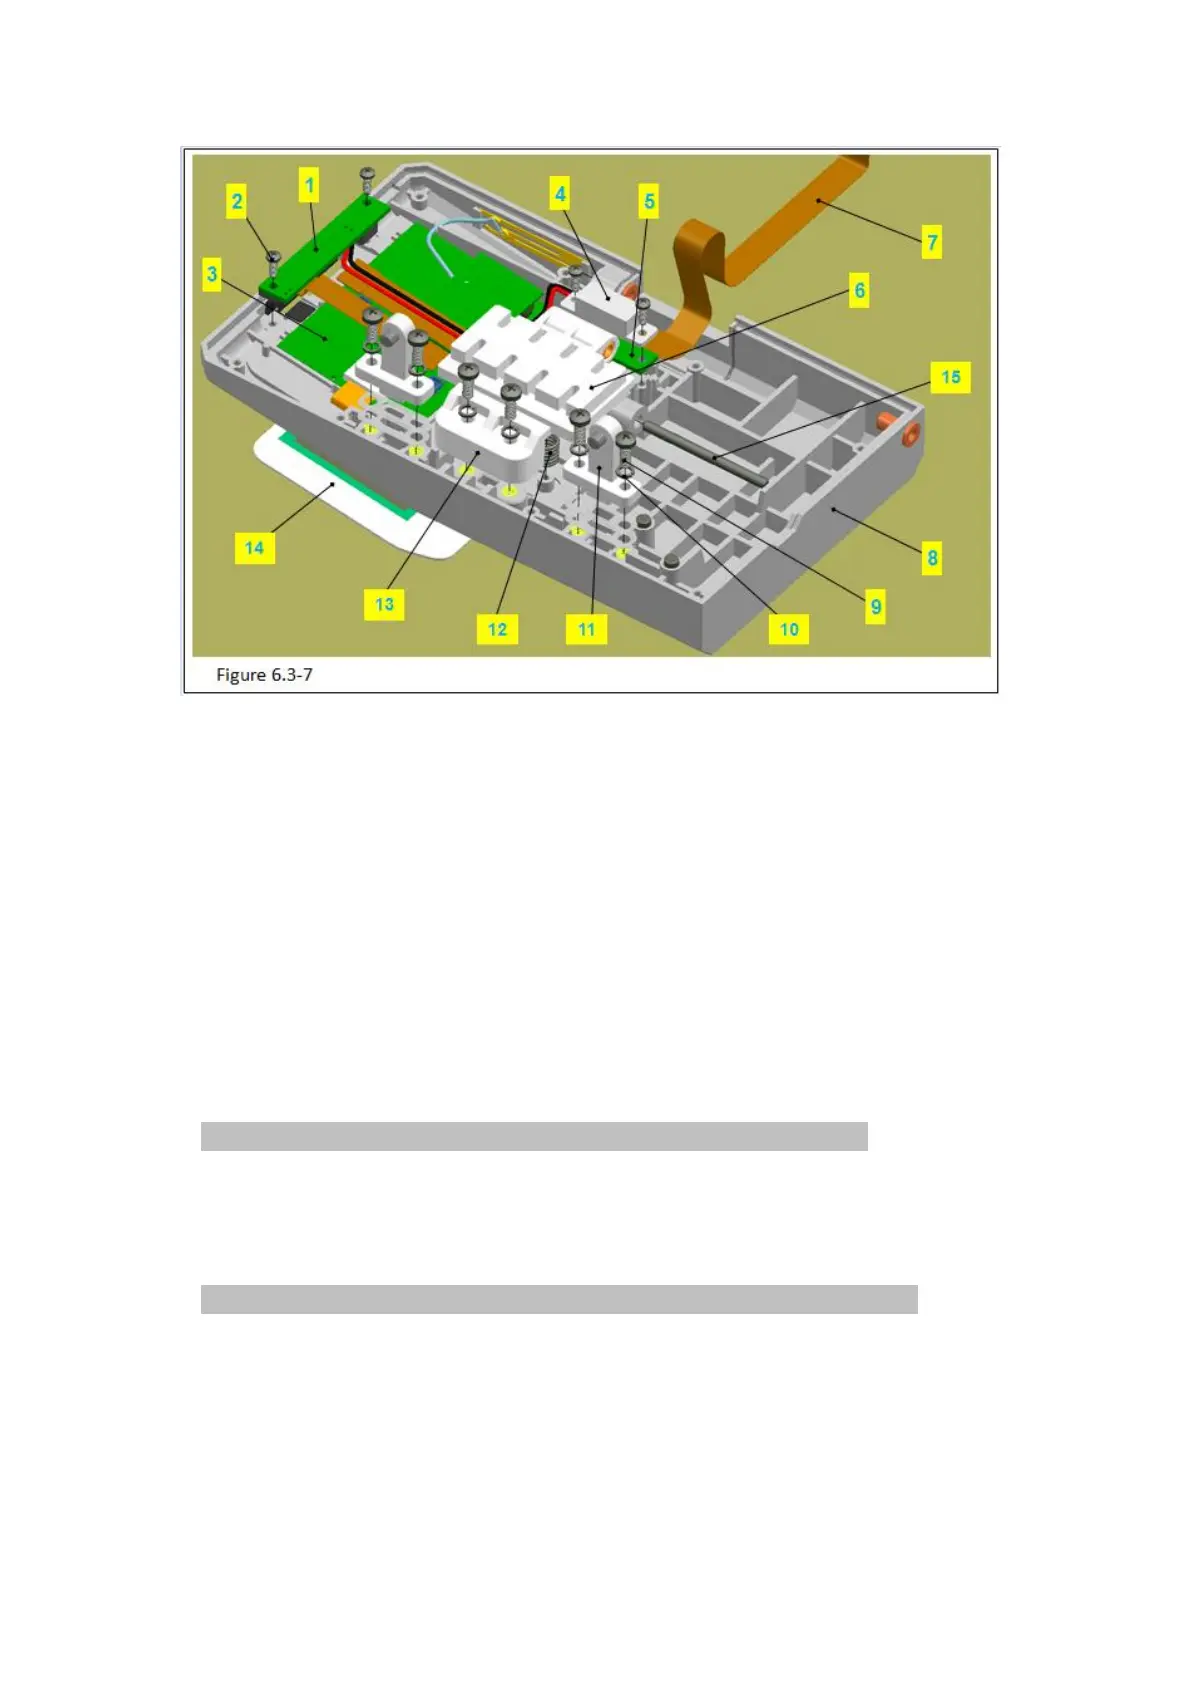
Figure 6.3-7 Notes:
Code Name
3 –SYS02 module and display screen
1)Use phillips screwdriver to remove 2 M3 machine screws (figure 6.3-7/code name 9) in
the baffle block (figure 6.3-7/code name 13), take down the 2 M3 spring washer (figure
6.3-7/code name 10).
Attention: hand press on the baffle, avoid the baffle spring pushes out it.
2)Take down the baffle block.
3)Turn up the baffle (figure 6.3-7/code name 6),take down the 2 baffle springs(figure
6.3-7/code name 12).
4)Use pilers to take down the baffle shaft (figure 6.3-7/code name 15).
Attention: use the pilers tip to push out it backward for a length and pull put it.
5)Take down the baffle.
6)Use phillips screwdriver to remove the 2 PB2.3 tapping screws (figure 6.3-7/code name
2) in the lamp shade(figure 6.3-7/code name 4).
7)Take down the lamp shadeand lamp board (figure 6.3-7/code name 5).
8)Take down the FPC flat cable (figure 6.3-7/code name 7).
9)Remove the connection wire in the alarm lamp board (figure 6.3-7/code name 1)from