6
Lamp Replacement
Caution!
1. Disconnect power before you begging.
2. Allow 15min for the unit and lamp to cool.
3. Do not touch lamps glass envelope with your fingers. If this happens clean with alco-
hol / to remove oils.
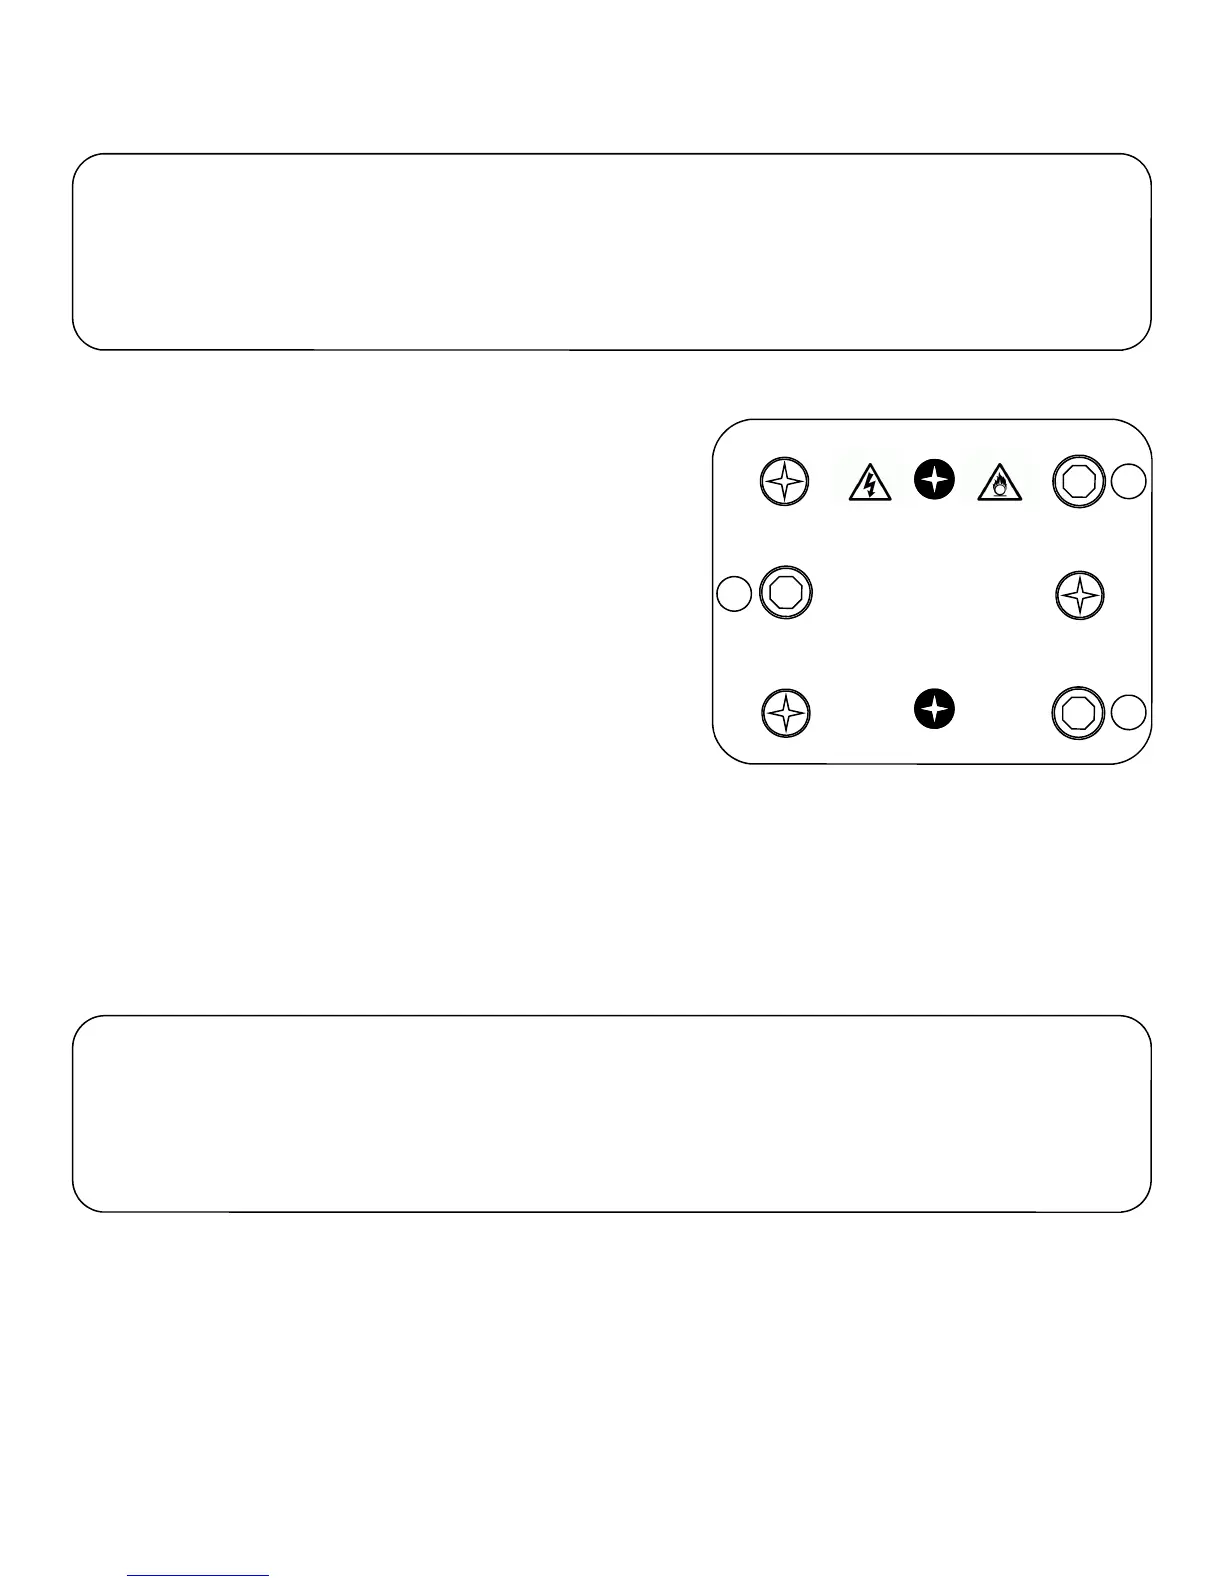
Remove the screws X, Y, and Z for re-lamping
Adjust lamp position by turning screws A,B and C
Disconnect the fixture from AC power before re-lamping.
Lamp is hot! Risk of fire! Protect hands and eyes.
Wait at least 15min. Before opening covers
And removing lamp from fixture.
WARNING!
Maximum room temperature t=40ºC
Minimum distance from flammable material d=0.7m.
Exterior surface temperature T=80ºC.
Not for domestic use.
X
Z
Y
A
B
C
To insert the lamp MSR 575/2, NSK575 or MSD 575. Us a Phillips
screwdriver to unscrew the bolts marked XY and Z. Carefully pull out
the cover with the lamp socket and remove the old lamp from the
socket. Make a note that there is a large and small pole insert the new
lamp into corresponding socket.
Do not install a higher wattage lamp this will void your warranty. Please
note the light bulb manufactures warnings. Do not touch the bulb with
bare hands. Close lamp cover while making sure that the cables are
not pinched or touching the lamp. Tighten the XYZ screws.
Before striking the lamp reset the lamp timer by going to the LAt i sec-
tion of your display screen. In order to reset the lamp counter to 0 you
have to hold the up and down button and press the enter button.
Due to the difference between lamps. Fine adjustment may improve light performance. You will need to strike the lamp and set
the light so the optical path is clear. You will need to turn the screws A,B and C one after another a slight turn clockwise and
counter clockwise until you set the hot spot of the light in the center of the image. If no hot spot can be seen then set the lamp till
the light is evenly distributed.
Lamp Placement
Lamp Adjustment
Rigging the fixture
Caution!
1. The installations must be carried out by an authorized dealer or trained professional.
2. Unit may cause severe injures if you have doubts concerning the safety do not install.
3. Unit is to be 24inches away from flammable materials (decoration material)
4. Use high quality installation equipment to hang unit.
When rigging a unit it is very important that you follow common safety procedures. Rigging requires extensive experience includ-
ing but not limited to calculating working loads, material being used and periodic safety inspections. If you lack these qualifica-
tions, do not attempt the installation yourself, instead use a professional structural rigger.
When rigging the unit always be secured with a secondary safety attachment. The installation location of the projector has got to
be built in the way that it can hold 10 times the weight for 1 hour with out any harming. Installation should be checked at least
one time a year by a skilled person.