6. Select the determined water hardness
range with the arrow buttons or con-
rm the default value with "menu/ok".
» The request Please rell and insert
water tank appears.
7. Remove the water tank. Rinse out the
water tank with clean water. Insert the
new water lter (see section „Inserting
the water lter“ on page 61).
Fill the water tank with fresh water and
insert it.
» The appliance heats up and per-
forms automatic rinsing.
» The ready symbol and the request
Fill beans appear on the display.
8. Fill coee beans into the bean con-
tainer. To do this, read section Filling
with coee beans and using BeanSelect,
page45.
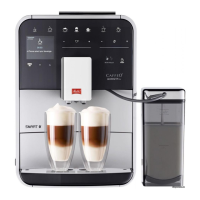
3.6 Installing the
Melitta-Connect-App
The appliance can be operated with
suitable mobile iOS devices via Bluetooth
or with android devices that support Blue-
tooth. You need the Melitta-Connect-App
for this. Detailed information at www.
melitta.de.
The App provides simplied operation of
the appliance, convenient management of
settings and user proles, as well as other
functions and access to the Smart Service
(Service Hotline, appliance data, etc.).
The term Smartphone is used to represent
Smartphones and Tablets in these operat-
ing instructions.
Downloading the App
1. Search in the App Store of your Smart-
phone for the Melitta-Connect-App.
2. Install the App on your Smartphone.
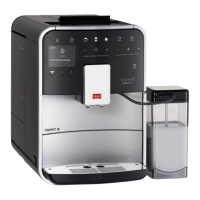
4 Basic operation
This chapter describes basic operating
steps for using the appliance on a daily
basis.
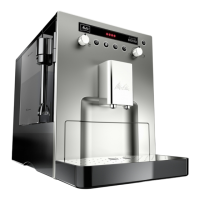
4.1 Switching the appliance on
and o
Before switching on after starting up the
appliance for the rst time, read sec-
tion3.5, page41.
Information
ū When switched on and o, the appli-
ance performs automatic rinsing.
ū During rinsing, rinsing water is also
conducted into the drip tray.
ū The automatic switch-o rinsing can be
switched on or o in the Settings menu.
Switching on the appliance
1. Place a vessel beneath the outlet.
2. Press the ON/OFF button.
» The welcome display appears on the
appliance.
» The appliance heats up and performs
automatic rinsing.
» The appliance is ready for operation.
Switching o the appliance
1. Place a vessel beneath the outlet.
2. Press the ON/OFF button.
» The appliance performs automatic
rinsing.
» The appliance switches o.
Information
ū The appliance switches o automati-
cally when it is not operated for a long
time. Automatic rinsing is also carried
out in this case.
ū The o time can be set in the Auto OFF
menu, see section8.5, page54.
ū If no beverage has been prepared since
switching on or if the water tank is
empty, no rinsing takes place.
 Loading...