Information
ū If the grinding neness is set ner, the
coee avour is stronger.
ū The grinding neness is optimally set
when the coee ows evenly out of the
outlet and a ne, dense crema appears.
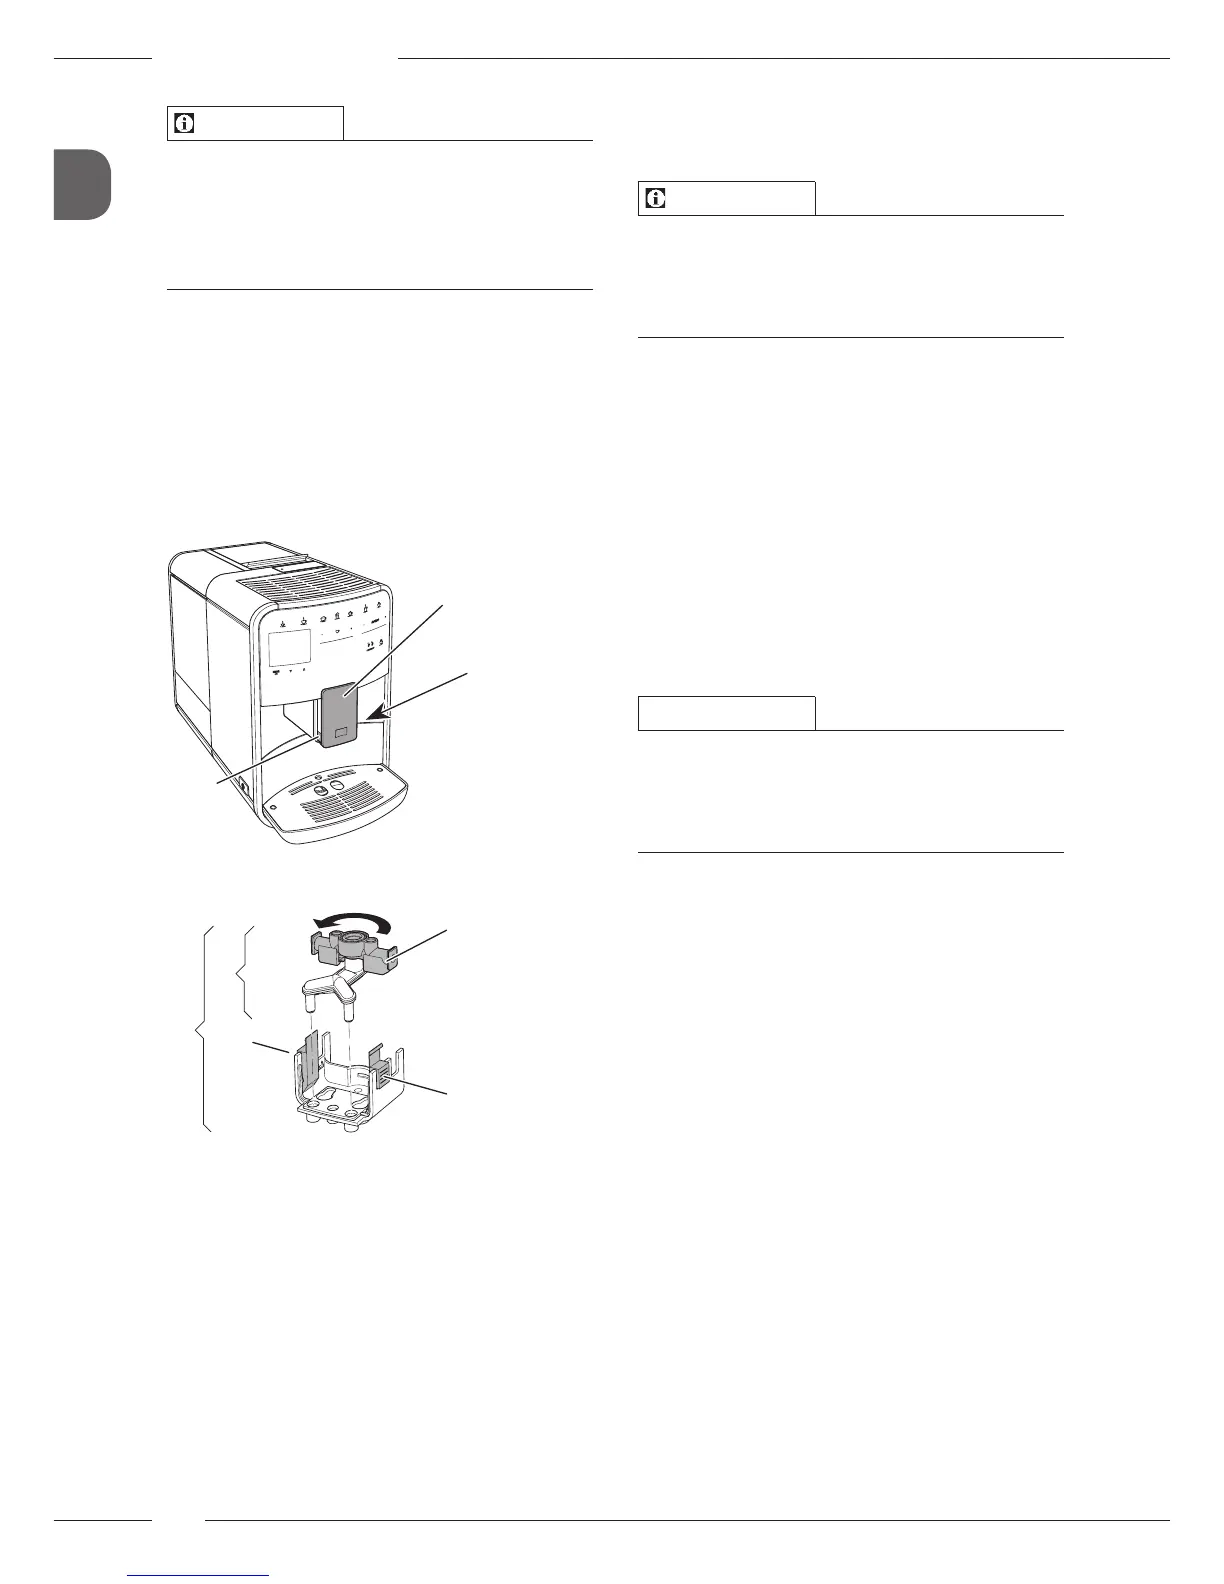
8.10 Converting the connection
for the milk hose
(depending on the model)
Optionally, the milk hose can be con-
nected on the left or right side of the
spout.
7
43
43
Fig. 18: Turn the inlet, 1
41
42
43
43
40
Fig. 19: Turn the inlet, 2
1. Pull the milk hose o the appliance.
2. Push the outlet (7) down as far as it will
go.
3. Press the locking mechanism (43) of
the milk unit(40) together using two
ngers and pull the milk unit down-
wards o the outlet.
4. Pull the milk distributor (41) upwards
out of the milk unit.
5. Turn the inlet (42) by 180°.
Installation is carried out as described in
reverse order.
Information
To install, push the milk unit(41) onto the
outlet (7) using both hands. Make sure
that the locking mechanism(43) audibly
engages on both sides.
9 Care and maintenance
Regular cleaning and maintenance ensure
the consistent high quality of your bever-
ages.
9.1 General cleaning
Clean the appliance regularly. Immediately
remove external soiling caused by milk
and coee.
ATTENTION
The use of unsuitable cleaning agents
can lead to scratched surfaces.
Do not use any abrasive cloths, sponges
or cleaning agents.
Requirement: The appliance is switched
o.
Clean the outside of the appliance with
a soft, damp cloth and normal wash-
ing-up liquid.
Rinse the drip tray and the coee
grounds container with a soft, damp
cloth and normal washing-up liquid.
Clean the bean container with a soft,
dry cloth.
9.2 Rinsing the coee system
During rinsing, the nozzles at the outlet
and the internal parts of the coee system
are rinsed. As a result, rinsing water from
the interior enters the drip tray.
If switch-o rinsing is not deactivated, the
appliance rinses the coee system when
switching on and o.
Rinsing can also be carried out manually.
 Loading...