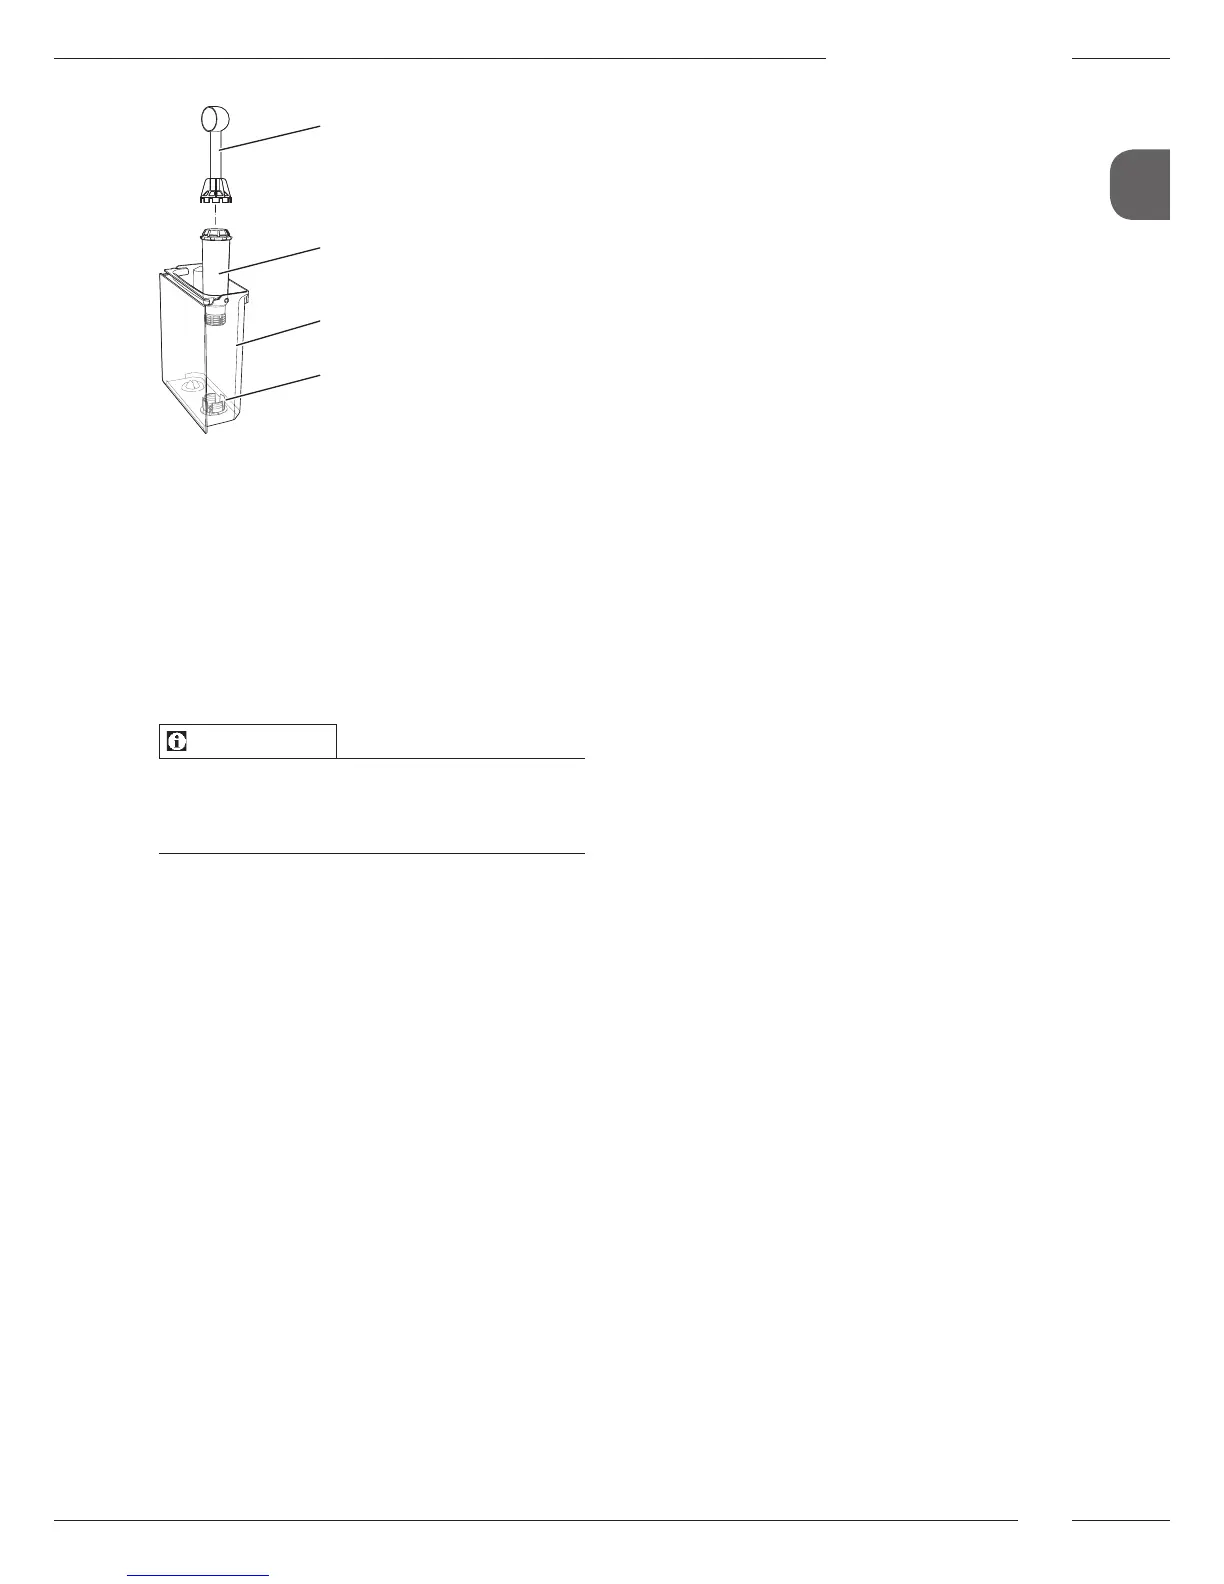
1
46
47
48
Fig. 25: Screwing/unscrewing the water
lter
The water lter(47) is screwed into and
unscrewed from the thread(46) on the
base of the water tank(48) using the
screwing aid at the end of the enclosed
coee spoon(1).
Inserting the water lter
Information
Place the water lter into a vessel lled
with fresh tap water for a few minutes
before inserting it.
Requirement: The appliance is ready for
operation.
1. Press the "menu/ok" button for 2sec-
onds.
» The menu appears on the display.
2. Navigate to the Care > Filter > Insert
lter menu.
3. Use the arrow buttons to select Start
and conrm with "menu/ok".
4. Follow the further instructions on the
display.
» The water hardness is automatically
adjusted on the water lter by the
appliance.
» The appliance is ready for operation.
Changing the water lter
Change the water lter when the appli-
ance requests you to do so.
Requirement: The appliance is ready for
operation.
1. Press the "menu/ok" button for 2sec-
onds.
» The menu appears on the display.
2. Navigate to the Care > Filter > Change
lter menu.
3. Use the arrow buttons to select Start
and conrm with "menu/ok".
4. Follow the further instructions on the
display.
» The appliance is ready for operation.
Removing the water lter
The water lter should not be left standing
dry for a long period of time. When it is
not used for a long time, we recommend
storing the water lter in a vessel lled
with tap water in the refrigerator.
Requirement: The appliance is ready for
operation.
1. Press the "menu/ok" button for 2sec-
onds.
» The menu appears on the display.
2. Navigate to the Care > Filter > Remove
lter menu.
3. Use the arrow buttons to select Start
and conrm with "menu/ok".
4. Follow the further instructions on the
display.
» The water hardness is automatically
reset to the previous setting.
» The appliance is ready for operation.
 Loading...