Changing basic settings
43
GB
6.7 Resetting the appliance to
the factory settings
The appliance can be reset to the factory
settings. When resetting, your settings
in the functions will be lost. The coee
strength and quantity stored with the
Favourite coee function will also be lost.
Requirement: The appliance is ready for
operation.
1. Press the "Service" button as
well as the "Coee" direct key for more
than 2seconds to enter Service
mode2.
2. Press the "Service" button
repeatedly until the display for the
Factory settings function appears.
3. Press the "Coee strength" button
repeatedly until the display of one
coee bean appears.
4. Press the "Service" button for
more than 2seconds to reset the
appliance to the factory settings and
exit the service mode.
6.8 Setting the grinding
neness
The grinding neness of the coee pow-
der inuences the avour of the coee.
If the grinding neness is set ner, the
coee avour is stronger.
ATTENTION
Very nely ground coee powder can
clog the brewing unit.
The grinding neness has been
optimally set prior to delivery. Adjust
grinding neness at the earliest after
about 100coees are dispensed (after
approx.1month, depending on coee
consumption).
Do not set the grinding neness too
ne. The grinding neness is optimally
set when the coee ows evenly out
of the outlet and a ne, dense crema
appears.
Adjust the grinding neness while the
grinder is running.
Requirement: The appliance is ready for
operation.
9
8
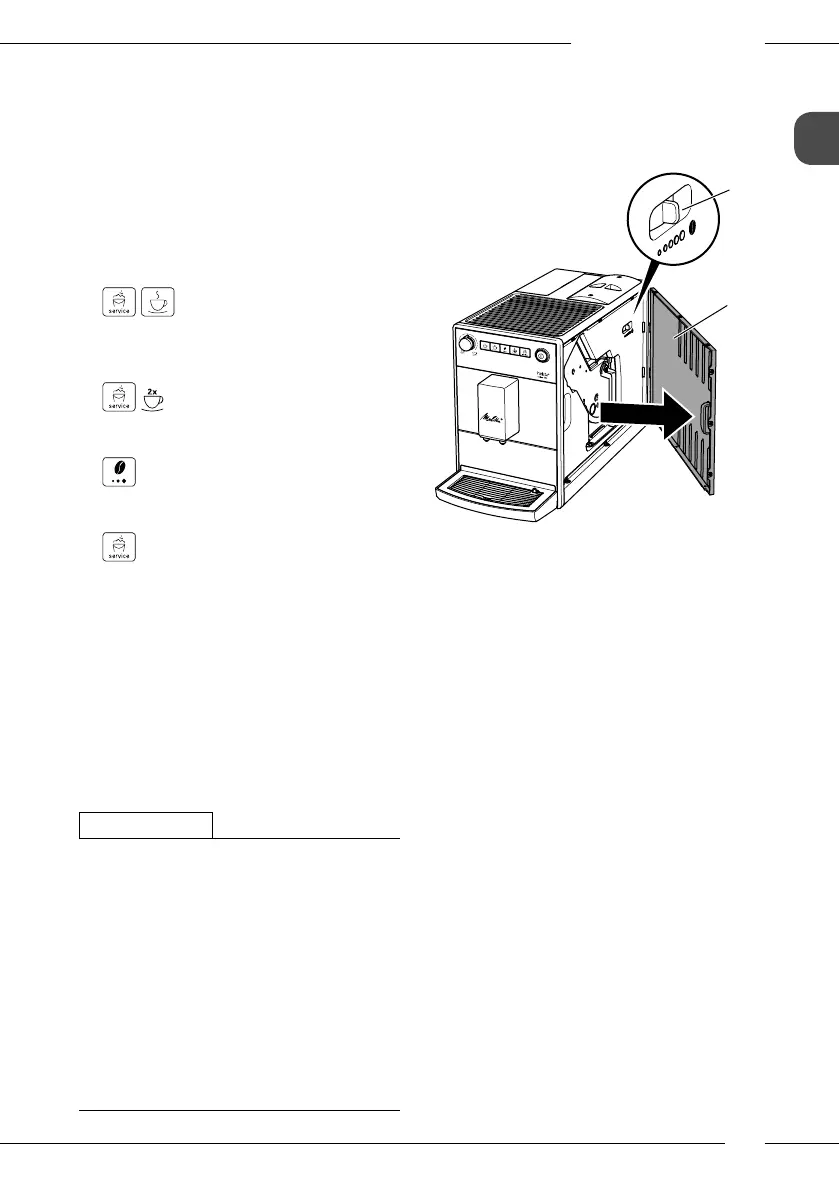
Fig. 11: Setting the grinding neness
1. Open the cover (9). To do this, reach
into the recess on the right of the appli-
ance and pull the cover o sideways.
2. Prepare a coee.
3. Move the lever (8) to the left or right
while the grinder is running.
To the left = grinding neness ner
To the right = grinding neness coarser
4. Insert the cover(9) sideways until it
engages.
 Loading...