Page 19 of 24
• At the back each pump, press the metal
latch and remove the white plug, then
connect the tubing
• Place the other end of the tubing in a
liquid waste container
Optional: to save space, it is possible
to connect the tubing together using
the Milliflex Oasis
®
T connectors (item
MMTCNNECT). In this case cut the tubing
to the desired length and connect them.
• Take out the power supply out of its
package
• Clean the power supply as described
previously
• Use the Milliflex Oasis
®
electrical cable for
connecting two pumps (item MMCABLEMM)
to connect one power port of pump A to
one power port of pump B. Repeat for the
third pump if applicable
• Push the connectors into the power ports
until a click is heard
• Plug the DC power cord in the free power
port, at the back of the Milliflex Oasis
®
pump A
• Plug the region-specific power cord to the
appropriate electrical power source; the
Milliflex Oasis
®
pumps power-up: all the
touch switches light up
Optional: to arrange the tubing and the
electrical cable in your working area,
it is possible to use the Milliflex Oasis
®
guides for electrical cable and tubing
(item MMTUGUIDE)
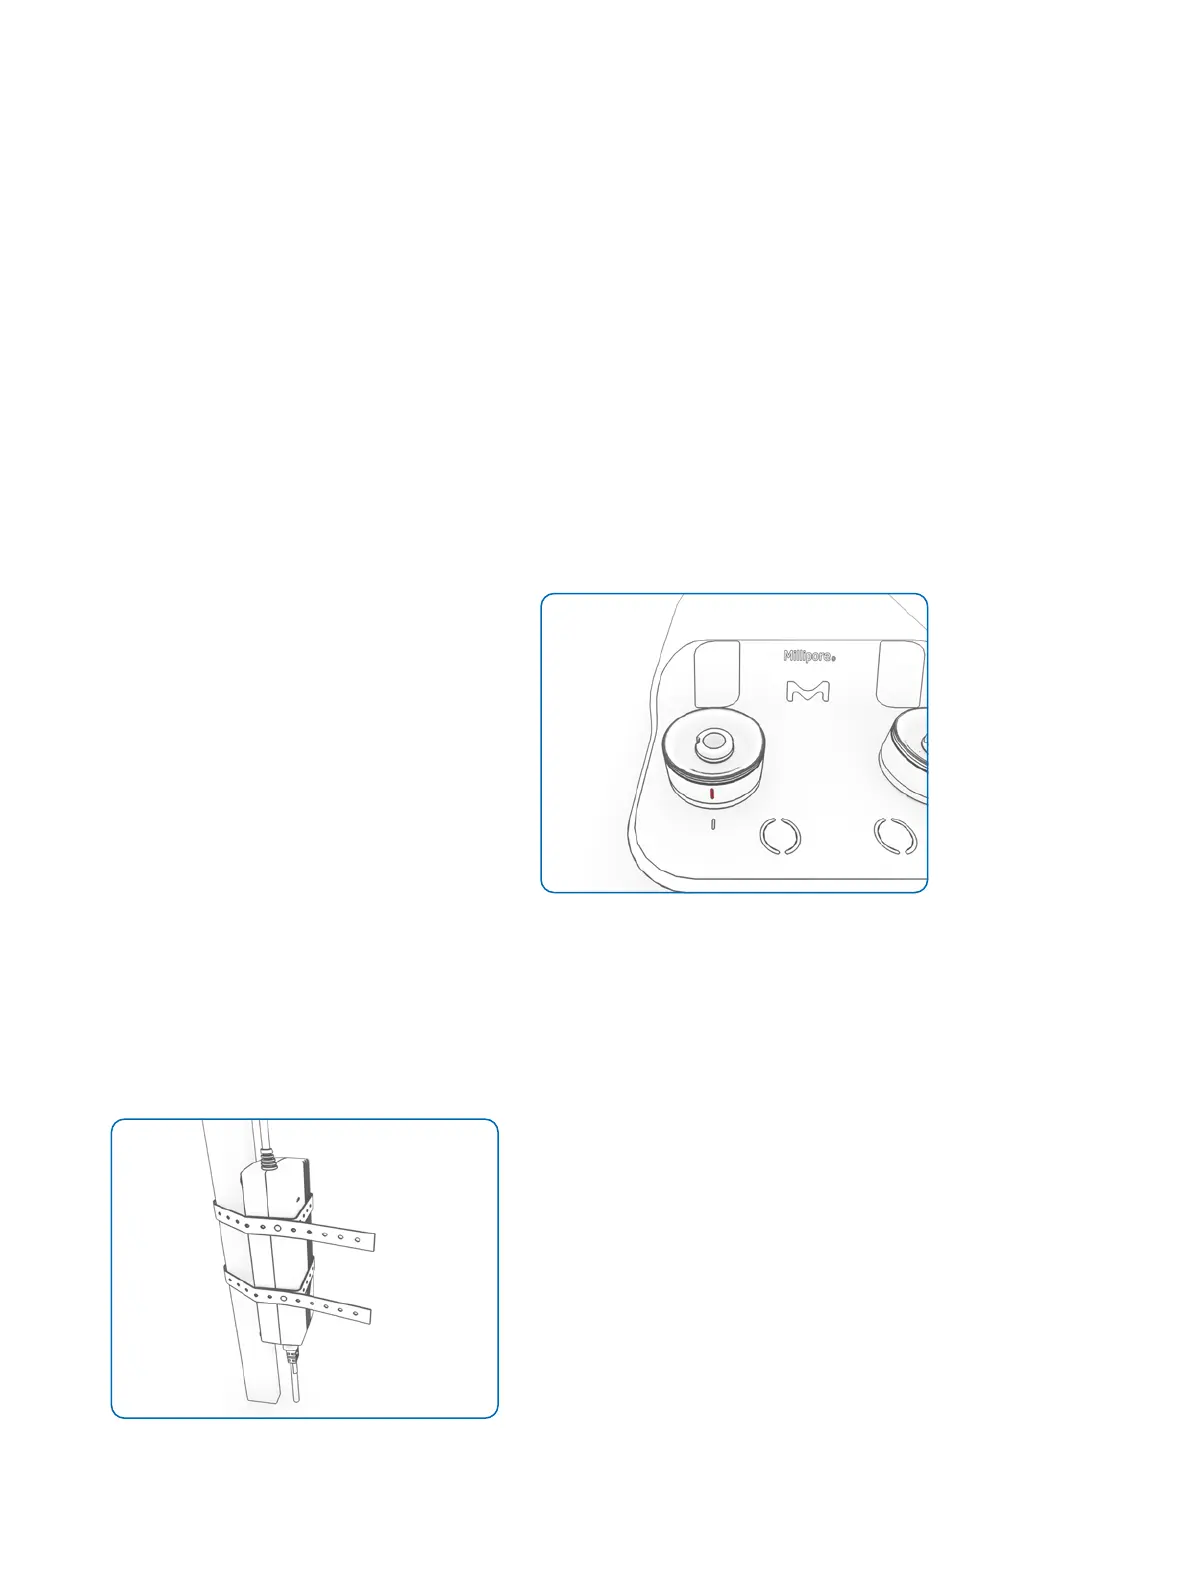
Optional: attach the power supply outside
the working area with the two rubber
fasteners
Figure 32: The power supply can be attached
outside the working area with the rubber fasteners
• For each pump, remove the two pump
heads from their package and remove
the yellow covers
Optional: From the accessory bags, select
colored rings, clean them using a wipe
and one of the sanitizers recommended in
the cleaning & maintenance section, then
install them on the pump heads.
• Clean the pump heads using a wipe
moistened with a surface sanitizer listed
in the cleaning & maintenance section
• Install the pump heads on the pump
bodies
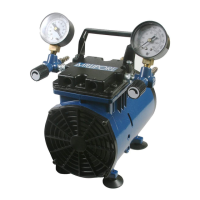
• Lock the pump heads by turning
clockwise until the sign on the head is
aligned with the one on the pump body
Figure 33: The sign on a locked head is aligned
with the one on the pump body
• Sanitize the internal flow path of the
pumps, please refer to the sanitization
described in the cleaning & maintenance
section
The pumps are ready for testing.
To start multiple filtrations simultaneously
(daisy chain), touch the switch three times
within one second. Please refer to the
testing section of this manual for the other
steps of the testing.


 To Next Page