Page 7 of 24
2. Hardware installation
The pump must be installed on a horizontal
surface. Please make sure that your working
area is level to ensure good sample volume
readings.
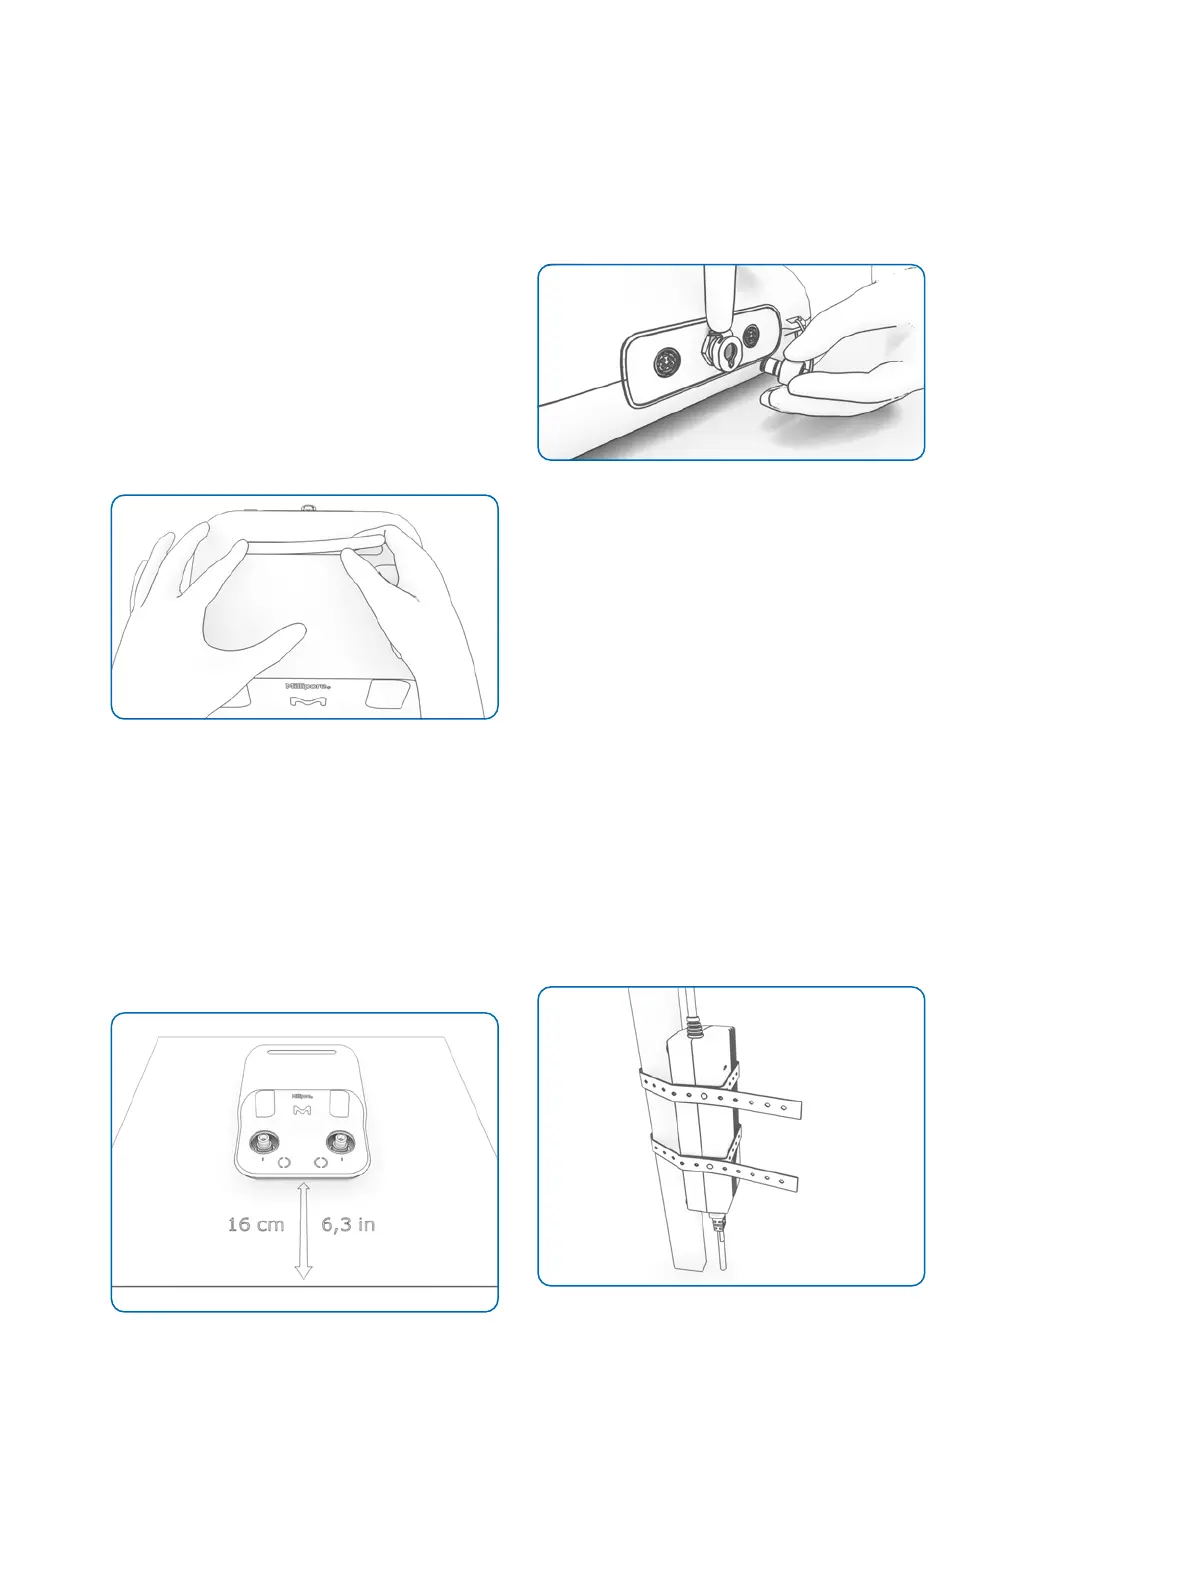
• Take the pump body, pump heads and
tubing out of the package with care
• Take out the accessory bag and spare
part bag
Optional: the accessory bag contains four
stickers; select your preferred sticker and
stick it carefully into the specific groove on
the pump.
Figure 6: Pump sticker set up
• Clean the exterior of the pump and the
tubing using a wipe moistened with a
surface sanitizer listed in the cleaning &
maintenance section
• Place the pump in the working area
Under a horizontal laminar flow hood (LFH),
the front of the pump should be placed at
least at 160 mm (6.3 in.) from the front
edge of the LFH (see picture).
Figure 7: The front of the pump should be placed
at least at 160 mm (6.3 in.) from the front edge of
a horizontal LFH
• On the back of the pump, press the metal
latch and remove the white plug, then
connect the tubing
Figure 8: The metal latch must be pressed to
remove the white plug
• Place the other end of the tubing in a
liquid waste container
• Take out the power supply out of its
package
• Sanitize the power supply in the same
way as the pump
• Plug the DC power cord to one power port
situated at the back of the pump. Push
the connectors into the power port until
a click is heard
• Connect the free power cord to the
power supply
• Connect the other end of the power cord
to a properly grounded power outlet
Optional: attach the power supply outside
the working area with the two rubber
fasteners.
Figure 9: The power supply can be attached
outside the working area with the rubbers
fasteners