Page 9 of 24
3. Testing
The following components are needed
before starting your sample processing:
• Milliflex Oasis
®
pump for EZ-Fit
®
filtration
unit installed following the installation
section
• EZ-Fit
®
filtration units
• Culture media
• Samples to test
Ensure that the internal pump flow was
sanitized according to the cleaning &
maintenance section.
• Clean the exterior of the pump using a
wipe moistened with a surface sanitizer
listed in the cleaning & maintenance
section
3.1 Filtration units
Different types of filtration units are
available (see ordering information section)
Note: for testing samples with
antimicrobial activity, select filtration
units with low binding Durapore
®
membrane.
Note: Isopropyl myristate (IPM) is not
chemically compatible, therefore sample
containing IPM should not be used.
• Open a box of filtration units and remove
the desired numbers of bags or filtration
units
• Repeat the operation if more than one
box of filtration units is needed.
• Clean each bag or each unit using a wipe
moistened with a surface sanitizer
3.2 Media plates
Follow the instructions of use for your
selected culture media
3.3 Testing
When the pump is on standby mode,
the switch is not lit up. To power up the
Milliex Oasis
®
pump, touch the front of the
pump between the two switches with your
ngertip.
Note: If starting a filtration without a
filtration unit placed on the filtration
head, you will hear a whistle noise, this
is due to a check valve to be found in
each pump head and is perfectly normal.
If the pump is started after having
placed a filtration unit on the pump head,
this noise will not be heard.
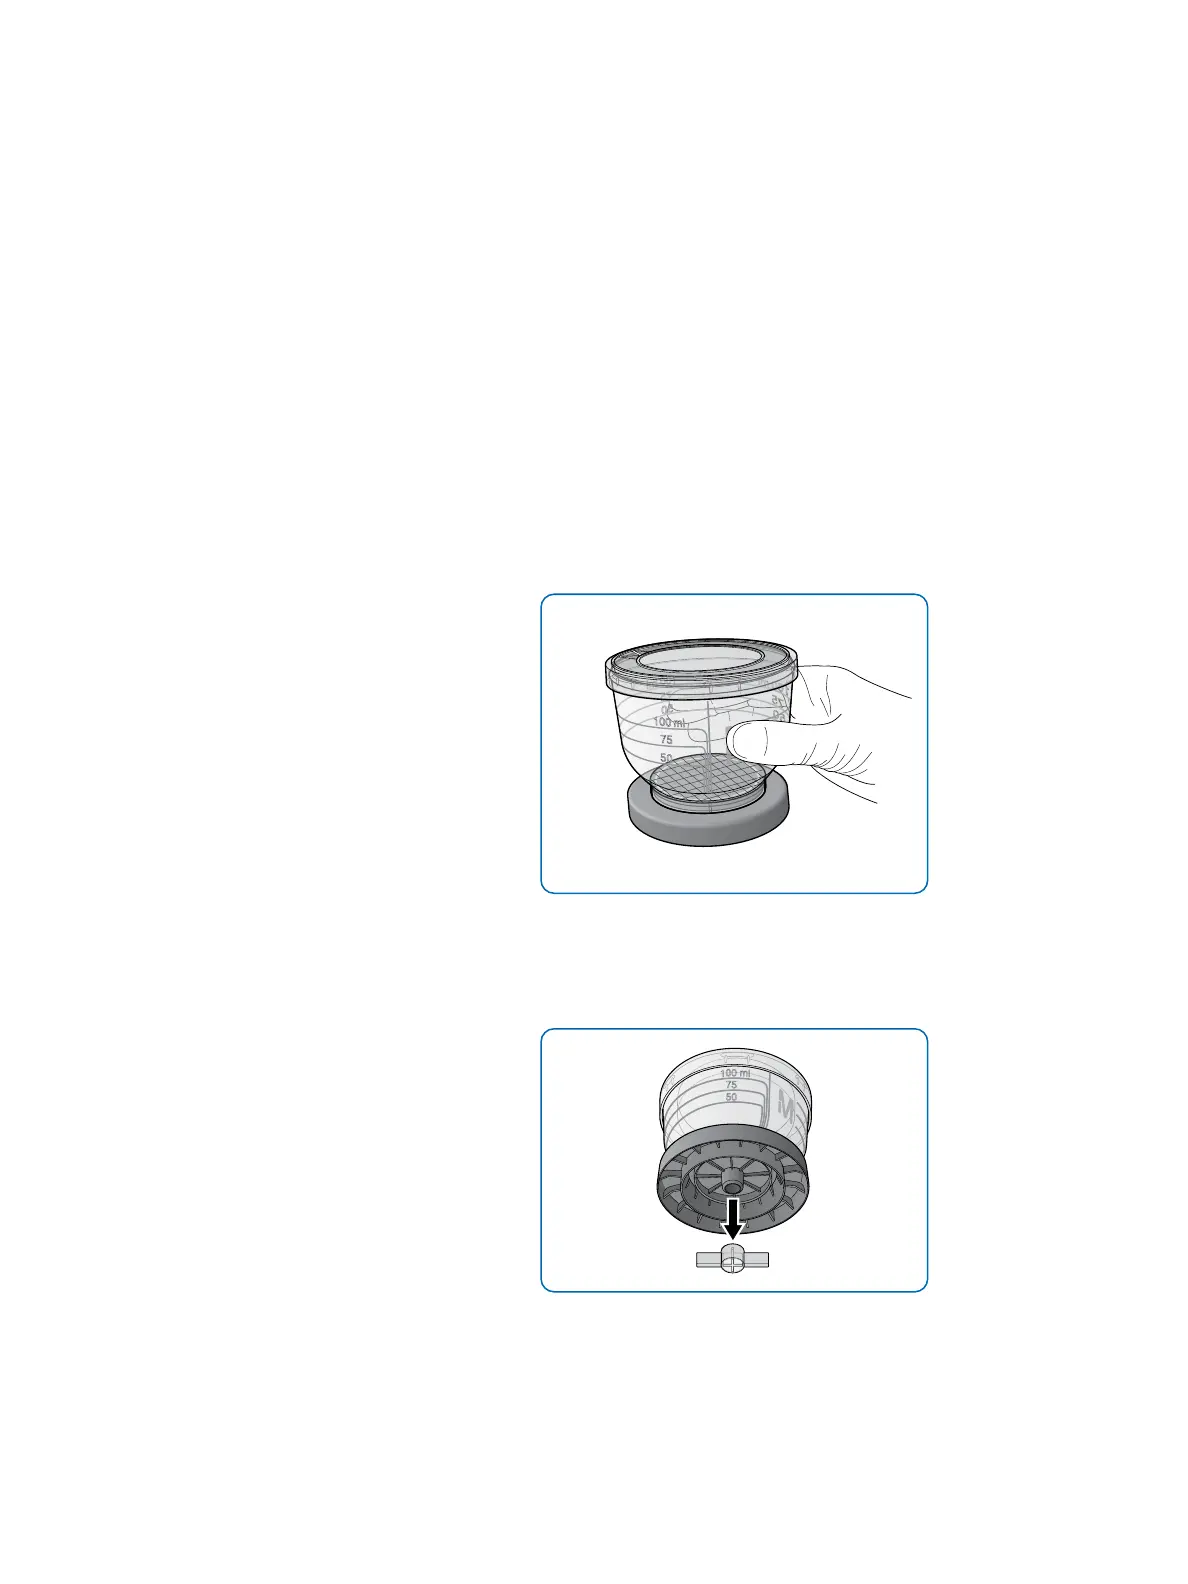
• Remove the device from the packaging by
grasping the funnel
Figure 12: Removing the unit from its packaging
• Remove the plug from the bottom of
the base (blue unit bulk packaging
versions only)
Figure 13: Removing the plug from the unit
(blue unit bulk packaging versions only)
 Loading...