OUTBOARD INSTALLATION
60
!
WARNING
Worn, loose, or seized steering components can lead to loss of boat control. Inspect all steering
attachment components for wear, lubricate all attachment hardware, and check all fasteners for proper
tightness in accordance with the inspection and maintenance schedule.
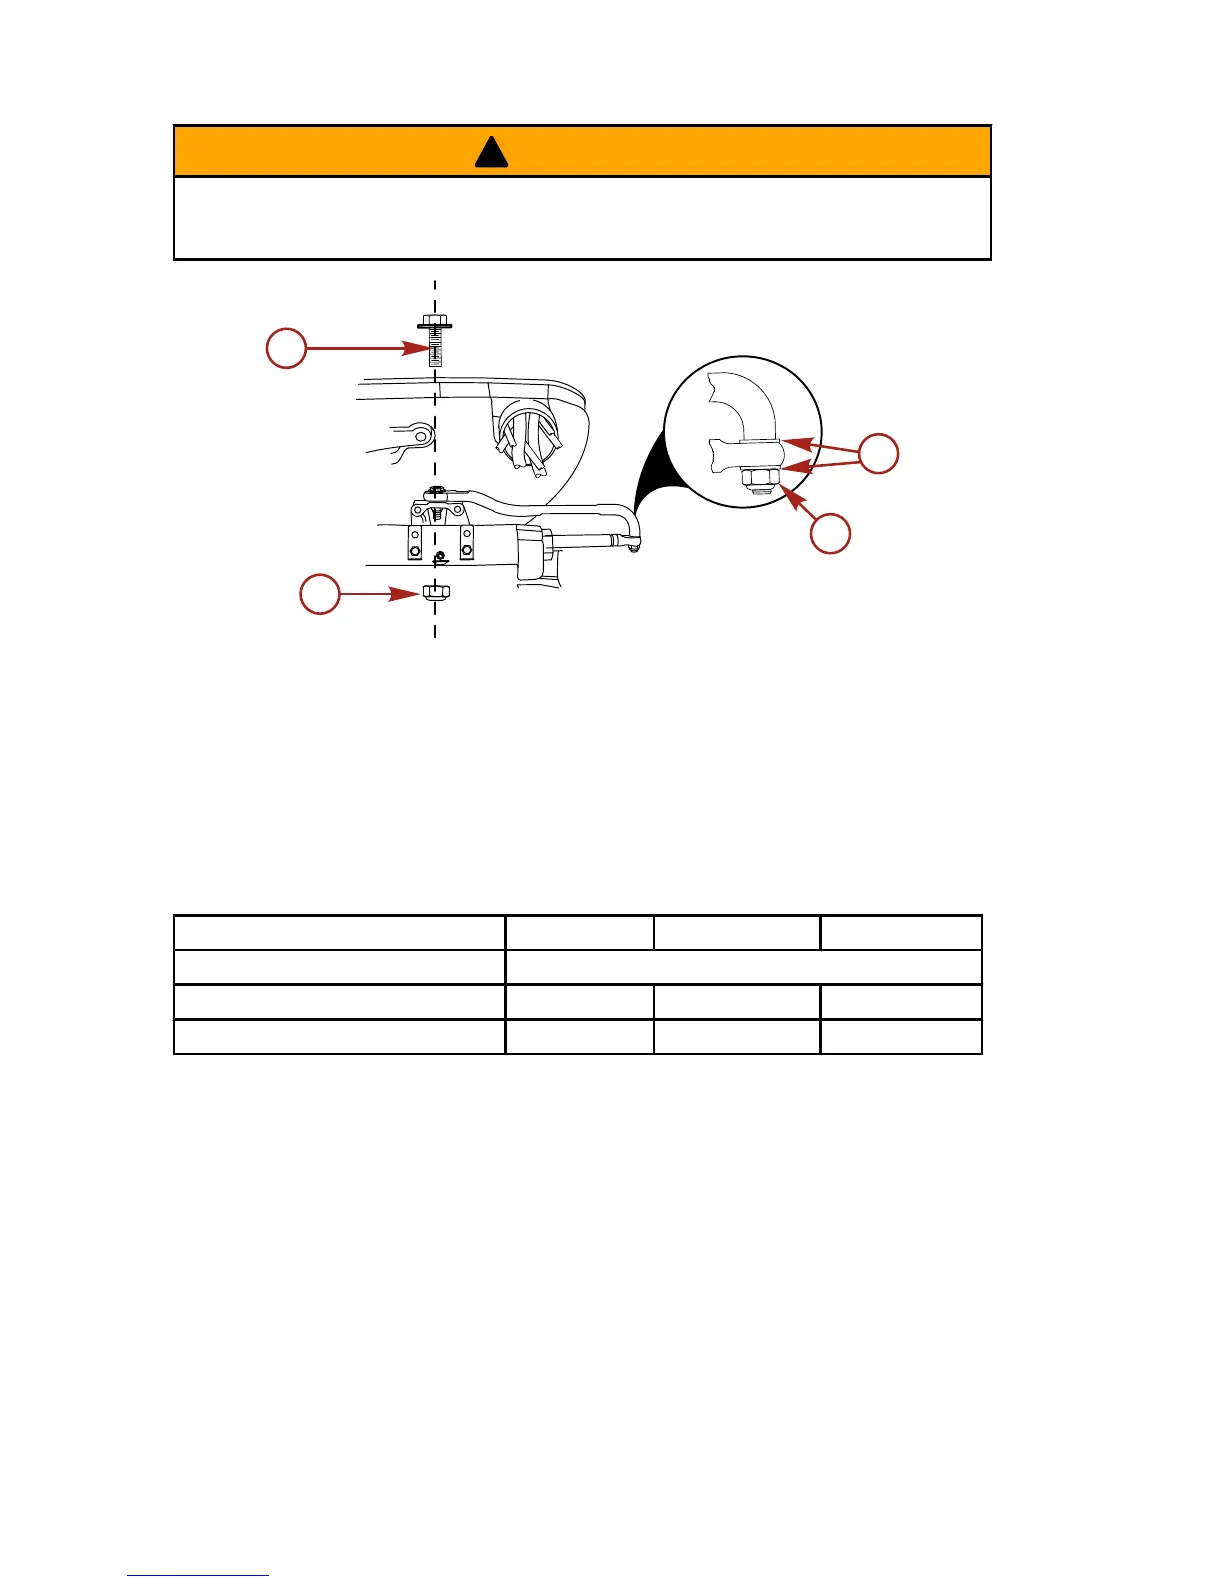
a - Special washer head bolt (P/N
10-849838)
b - Nylon Locknut - used on head bolt (P/
N 11-826709113)
c - Flat washer (2)
d - Nylon Locknut - used on cable coupler
(P/N 11-826709113)
1. Assemble steering link rod to steering cable coupler with two flat washers "c" and a self-locking
nylon insert locknut "d." Tighten the locknut until it seats, then loosen ¼ turn.
2. Assemble the steering link rod to the engine with the special washer head bolt "a" and self locking
nylon insert locknut "b."
3. Torque the head bolt, then the locknut to specifications.
Description Nm lb. in. lb. ft.
Cable Coupler Nylon Locknut "d" Tighten locknut until it seats, then loosen ¼ turn.
Head Bolt Nylon Locknut "b" 27 20
Special washer head bolt 27 20