30
a
b
c
d
G
If you have a very small frame, there
may be the danger of your foot colliding
with the front wheel. Therefore, make
sure your cleats are properly adjusted when us-
ing clipless pedals and/or for the correct position
of the foot on the pedal.
G
All tasks described in the following re-
quire the know-how of a mechanic and
appropriate tools. Make it a rule to tight-
en the bolted connections always with greatest
attention. Increase the torque values bit by bit
and check the fit of the component in between.
Use a torque wrench and never exceed the max-
imum torque values! You will find the prescribed
values in the chapter “Recommended torque set-
tings”, directly on the components and/or in the
operating instructions of the component manu-
facturers on this CENTURION CD-ROM.
I
The seating position depends highly on
how you want to use the CENTURION
bike. Ask your CENTURION dealer or
your trainer for help. The advice given below is
suitable for typical CENTURION city and trekking
bikes.
I
If sitting on the saddle causes you trou-
ble, e.g. because it numbs your crotch,
this may be due to the saddle. Your
CENTURION dealer has a very wide range of sad-
dles available and will be pleased to advise you.
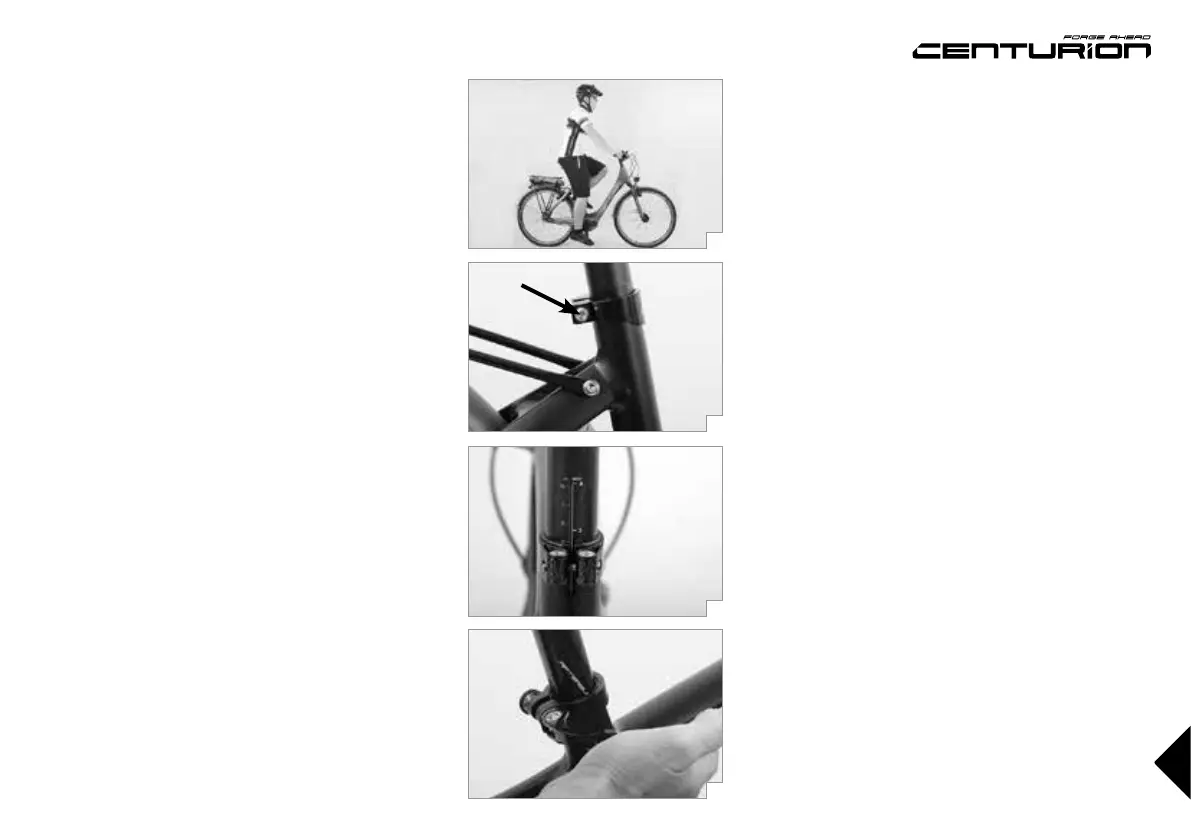
Adjusting the saddle to the correct
height
The correct saddle height depends on the length of
your legs. When pedaling, the ball of your foot should
be positioned above the center of the pedal axle. With
your feet in this position you should not be able to
stretch your legs completely straight at the lowest point,
otherwise your pedaling will become awkward
(a)
.
Check the height of your saddle with flat-soled shoes.
This is best done with suitable cycling shoes.
Sit on the saddle and put your heel on the pedal at its
lowest point. Your leg should be fully stretched and
your hips should remain horizontal.
To adjust the saddle height loosen the quick-release
lever (see the chapter “How to use the quick-re-
leases“) or the binder bolt of the seat post clamp at
the top of the seat tube
(b)
. The latter requires suit-
able tools, e.g. an Allen key, with which you turn the
bolt two to three turns counterclockwise. Now you
can perform the vertical adjustment of the seat post.
Be sure not to pull out the seat post too far – the
mark on the seat post (end, max., min., stop or the
like) should always remain within the seat tube
(c)
– and always grease the part of an aluminum or tita-
nium seat post that is inserted into a seat tube made
of aluminum, titanium or steel. Do not grease carbon
seat posts and/or carbon seat tubes in the clamping
area! Use special carbon assembly paste instead.