37
e
f
g
G
Poorly tightened or loosening bolts can
fail. Risk of an accident!
G
Check the bolts by using a torque
wrench
(c)
once a month according
to the values indicated directly on the
components and/or in the instructions of the
component manufacturers on this CENTURION
CD-ROM.
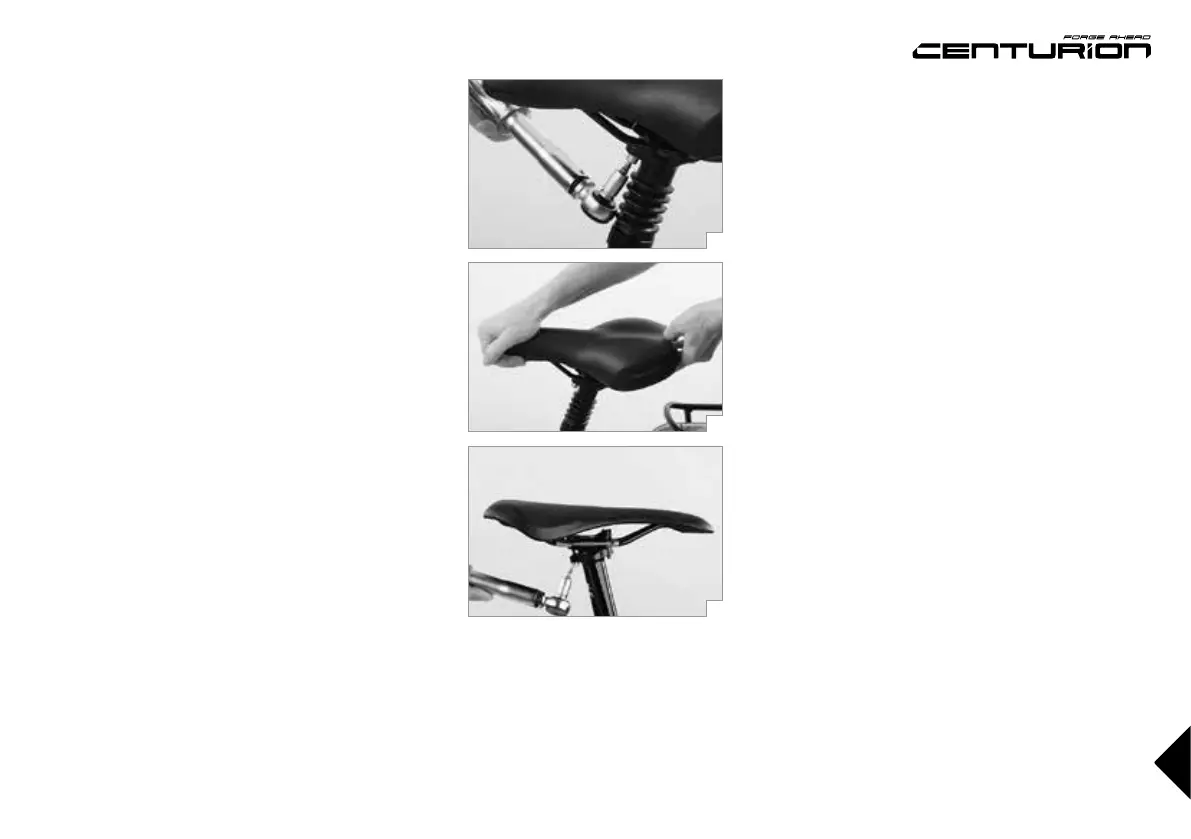
Clamping with two bolts in line
(d)
: release both
bolts two to three turns counterclockwise, otherwise
the whole assembly can come apart. Move the
saddle forward or backward as desired to adjust the
horizontal position. You may have to give the saddle
a light blow to make it move. Please observe the
markings on the saddle rail.
Having found your preferred position, make sure both
clamp halves fit snugly around the saddle rails before
tightening the bolt(s) to the correct torque value as
prescribed by the seat post manufacturer.
Tighten both bolts evenly
(e)
so that the saddle
remains at the same angle. If you wish to lower the
nose of the saddle a little, tighten the front bolt clock-
wise. You might have to loosen the rear bolt a little as
well. To lower the rear part of the saddle, the rear bolt
has to be tightened clockwise and the front bolt to be
released, if necessary. Check the strength while you
press with your hands alternate at the top and back
of the saddle. The saddle may not move
(f)
.
G
Poorly tightened or loosening bolts can
fail. Risk of an accident!
G
Check the bolts by using a torque
wrench
(g)
once a month according
to the values indicated directly on the
components and/or in the instructions of the
component manufacturers on this CENTURION
CD-ROM.