5 Assembly and Installation
17
Meritor Maintenance Manual MM-0637 (Revised 07-12)
Use a new keeper when you install the PRO-TORQ™ nut.
Discard the original keeper. Do not reuse it. A used keeper can
loosen during operation and cause the wheel to separate.
Serious personal injury and damage to components can result.
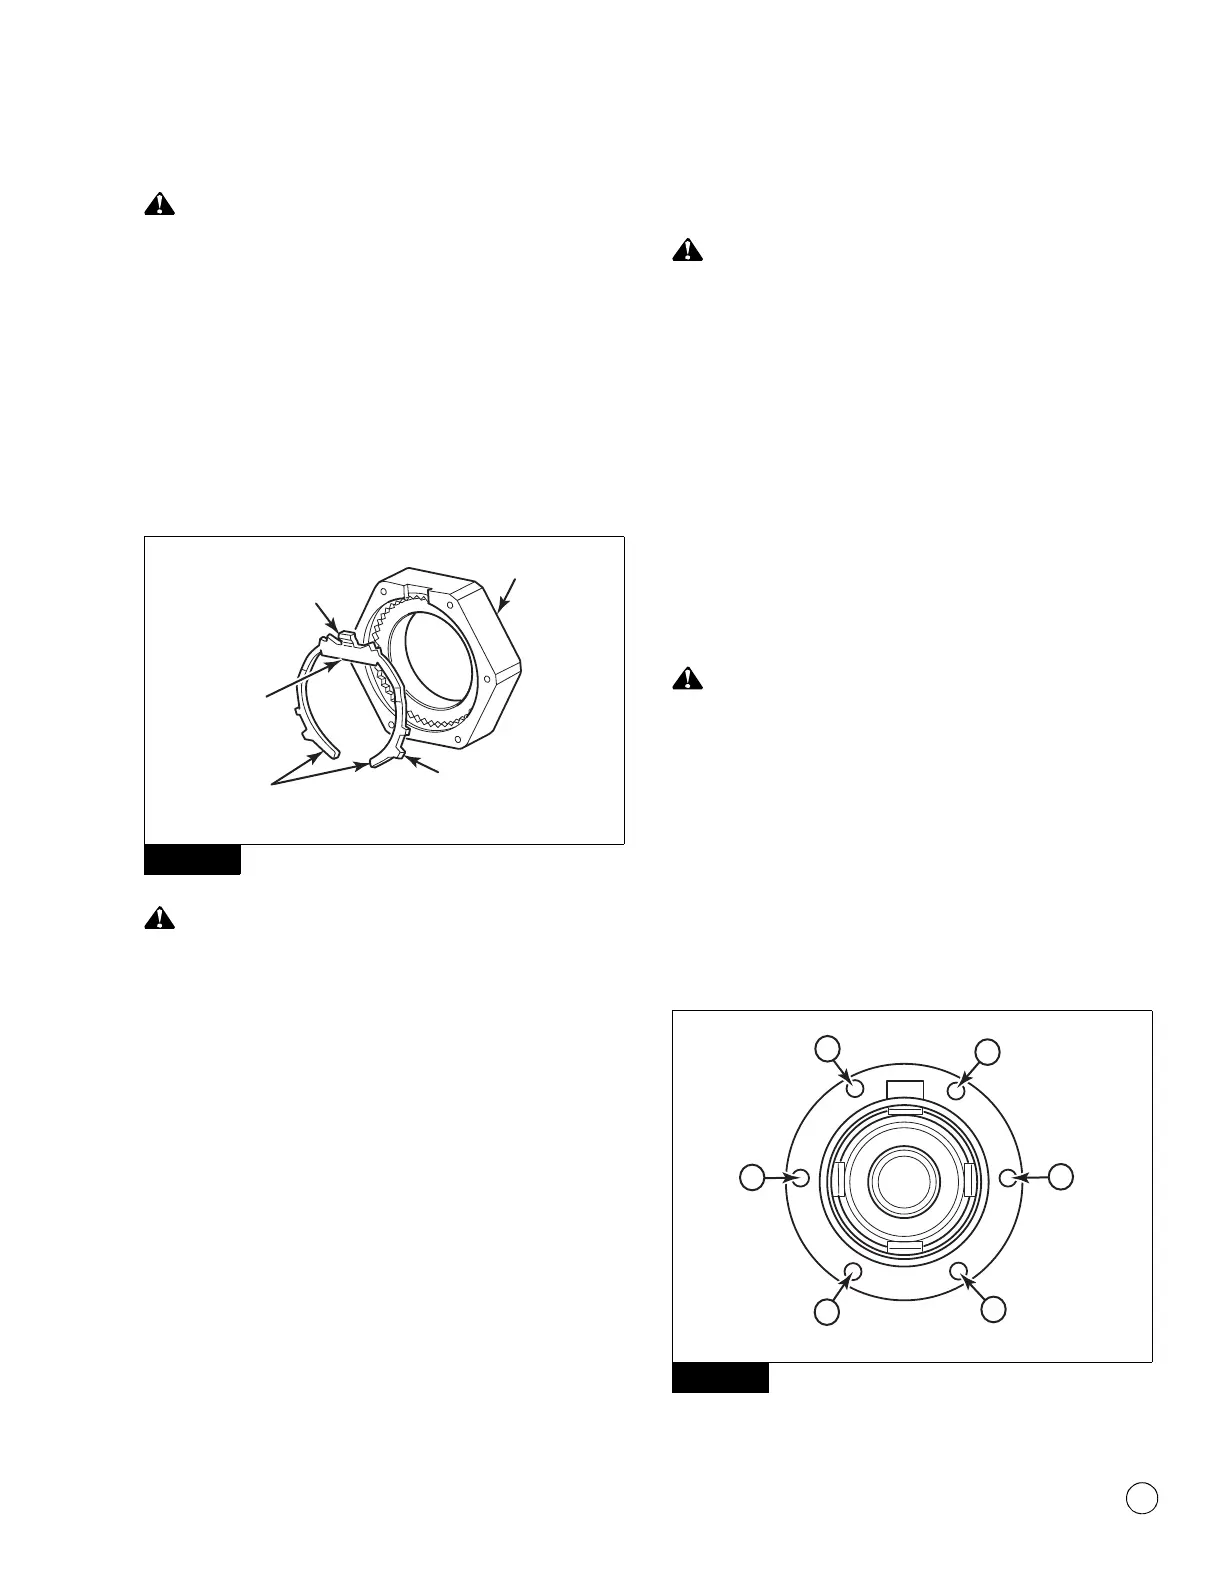
2. Install a new keeper against the nut with the orange side facing
OUT. Do not reuse the original keeper. Replace the original with
the new keeper supplied in the field service kit. Align the flat of
the keeper with the flat on the spindle. Insert the single keeper
tab into the undercut groove on the nut. Engage the mating
teeth. Figure 5.8.
Figure 5.8
Do not bend or manipulate the keyway tang in any way to force
the keeper onto the spindle and into the PRO-TORQ™ nut.
Rotate the nut to obtain correct alignment. Do not modify the
keeper arms in any way when you install the keeper onto the
PRO-TORQ™ nut. A bent keyway tang or modified keeper arms
can cause the wheel to separate from the vehicle during
operation. Serious personal injury and damage to components
can result.
3. Use a screwdriver to compress and insert the keeper arms one
at a time into the undercut groove on the nut. Ensure that the
keeper tab and arms are fully seated into the undercut groove.
Figure 5.8.
Hubcap
Before you install the PreSet
by Meritor
hubcap, inspect it
for contaminants, such as silicone gasket sealant, grease or
mud. If necessary, use a wire brush to remove contaminants
from the hubcap. Contaminants in the hubcap can prevent the
bolts from tightening correctly, which can result in leaks and
damage to components.
You must install a PreSet
by Meritor
hubcap to qualify for
Meritor’s warranty. Refer to brochure SP-95155, Commercial
Vehicle Systems Warranty, for specific information.
1. Inspect the PreSet
by Meritor
hubcap for contaminants. Use
a wire brush to remove contaminants, burrs and sharp edges.
Ensure the hubcap vent is free of debris. Always install new
gaskets.
Only install SAE Grade 5 bolts or stronger into the hubcap. Only
install flat washers with no locking features. Do not use star
washers or split-lock washers, which will enable
contaminants to corrode the hubcap threads. Damage to
components will result.
2. Install the hubcap. Only install flat washers with no locking
features. Do not use star washers or split-lock washers, which
will enable contaminants to corrode the hubcap threads. Use a
star pattern to tighten the SAE Grade 5 or stronger hubcap
bolts to 12-18 lb-ft (15-25 N폷m). Figure 5.9.
@
Figure 5.9
Figure 5.8
4005542a
SINGLE TAB
NUT
ARMS
KEEPER
FLAT
PRO-TORQ™ NUT
Figure 5.9
4005754b
5
6
1
2
4
3