5 Assembly and Installation
20
Meritor Maintenance Manual MM-0637 (Revised 07-12)
Figure 5.14
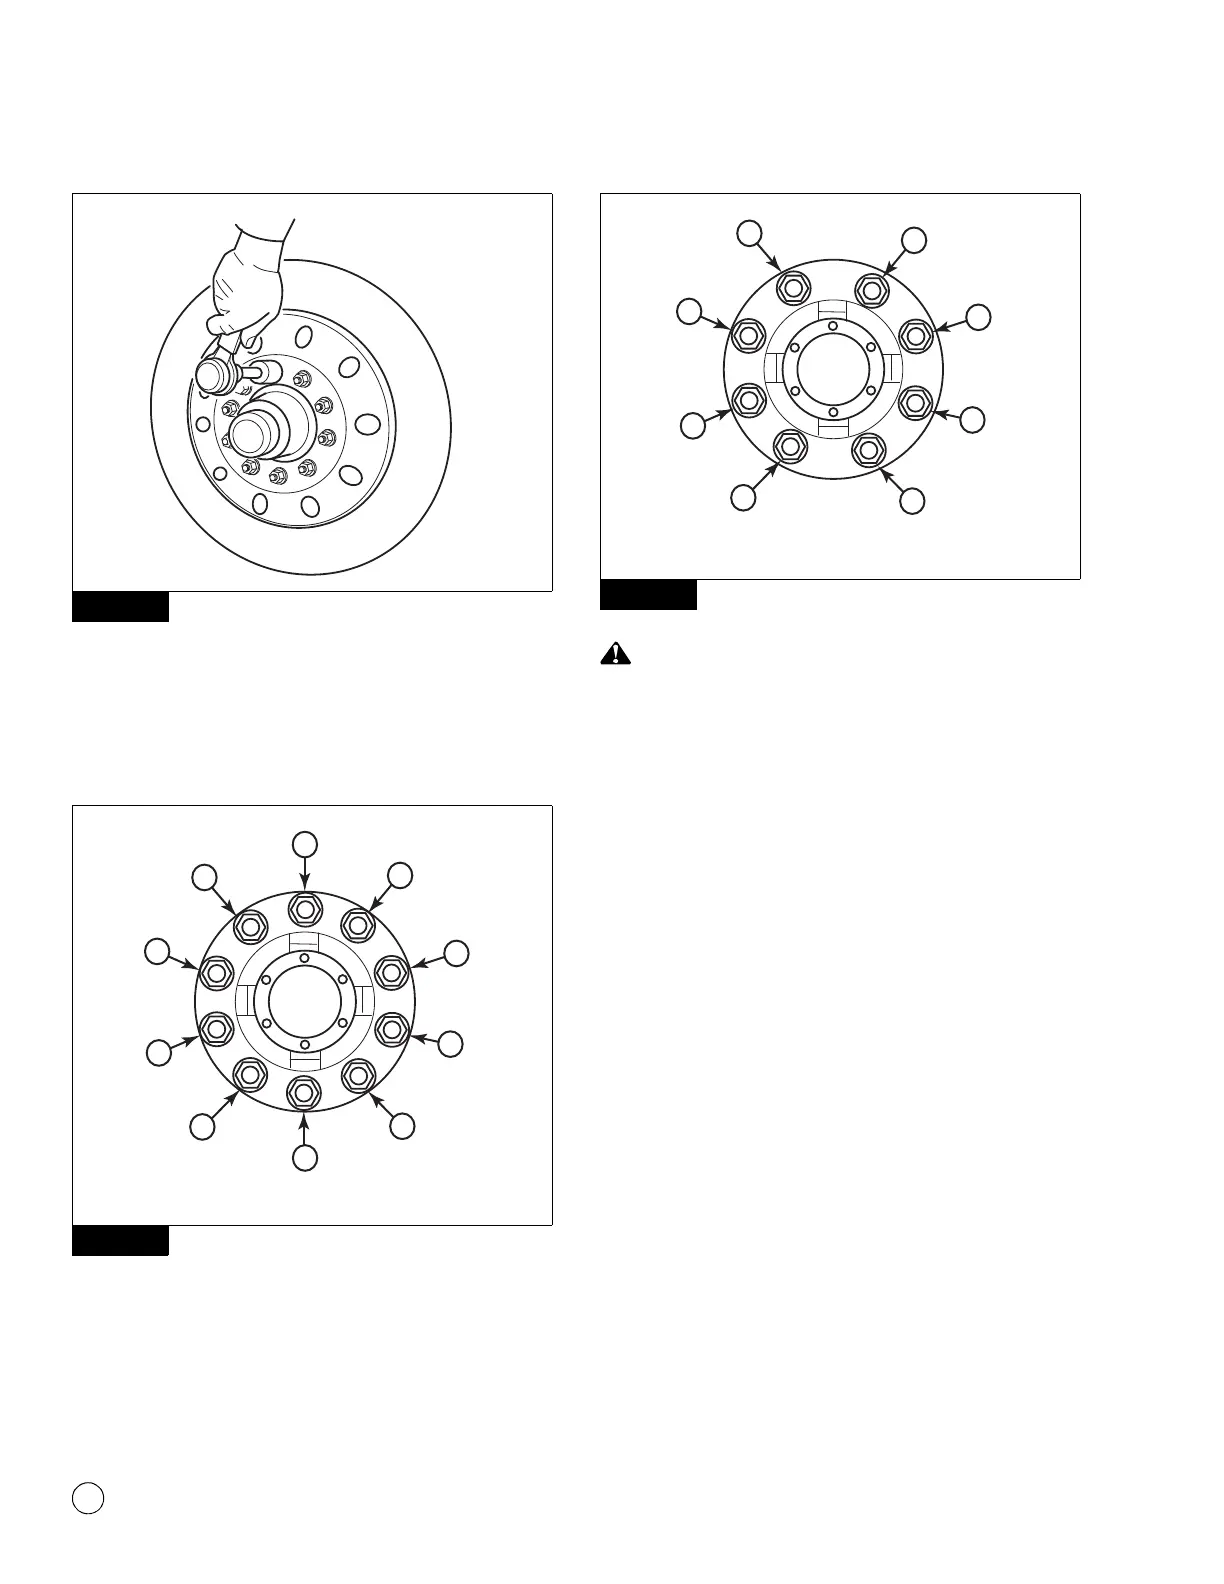
11. Install the remaining wheel nuts and tighten in the sequence
shown. Figure 5.15 and Figure 5.16. Tighten all the nuts to
50 lb-ft (65 N폷m). Then use a calibrated torque wrench to
tighten all the nuts to 450-500 lb-ft (610-680 N폷m) following
the same sequence.
@
Figure 5.15
Figure 5.16
Inspect the brake drum and wheel to verify that the brake
drum is fully-seated on the drum pilot. Rotate the wheel to
ensure it doesn’t interfere with the brake drum, which can
affect wheel and drum performance. Serious personal injury
and damage to components can result.
Tighten fasteners to the correct torque specifications. Do not
over-tighten or under-tighten fasteners, which can cause
wheels to separate from the vehicle. Serious personal injury or
damage to components can result.
12. Inspect the brake drum and wheel to verify that the brake drum
is fully-seated on the drum pilot. Rotate the wheel to ensure it
doesn’t interfere with the brake drum, which can affect wheel
and drum performance.
13. After the first 50 to 100 miles (80 to 160 km), retighten all the
nuts to 450-500 lb-ft (610-680 N폷m). Remove the load from
the wheels when retightening.
@
Figure 5.14
Figure 5.15
10-Stud Tightening Sequence
Figure 5.16
8-Stud Tightening Sequence