3 R 74 en 15
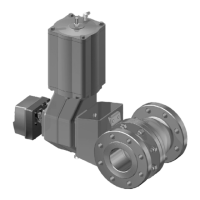
❑ The actuator must not be pressurized and the air
supply connection must be open.
❑ Turn the valve segment to correspond to the
spring operation: clockwise close, counterclock-
wise open. The marker line at the end of the shaft
shows the position, see Fig. 10.
❑ Clean the actuator shaft bore and lubricate it.
❑ Push the actuator carefully onto the valve shaft.
Avoid forcing it, since this may damage the seg-
ment and seat.
❑ Lubricate the actuator mounting screws and
screw them in. Tighten all screws, see Table 4.
❑ Adjust the valve open and closed positions by
means of the screws at the side of the actuator;
remember to tighten the locking nuts. See Fig. 39.
Keep your fingers out of the flow port!
7 MALFUNCTIONS
Table 7 lists malfunctions that might occur after pro-
longed use.
8TOOLS
❑ Removal of the actuator
- hex socket wrench set
- socket wrench set
- extractor
❑ Removal of the seat
- detaching tool
❑ Shaft position checking (low Cv valves)
- former H069563 (Series RA)
- former H069564 (Series RE, RE1)
These are available from the manufacturer.
9 ORDERING SPARE PARTS
When ordering spare parts, always include the follow-
ing information:
❑ type code, sales order number, serial number
(stamped on a valve body)
❑ number of the parts list, part number, name of
the part and quantity required
This information can be found from the identification
plate or documents.
Table 7 Possible malfunctions
Symptom Possible fault Recommended action
Leakage through a closed
valve
Wrong stop screw adjustment of the actuator Adjust the stop screw for closed position
Faulty zero setting of the positioner Adjust the positioner
Damaged seat Replace seat
Damaged segment Replace segment
Segment in a wrong position relative to the
actuator
Select the correct keyway in the actuator
Irregular valve movements Actuator or positioner malfunction Check the operation of the actuator and
positioner
Process medium accumalated on the segment
surface
Clean the segment
Segment or seat damaged Replace the segment or seat
Crystallizing medium has entered the bearing
spaces
Flush the bearing spaces
Gland packing is leaking Gland packing set worn or damaged Replace the gland packing set
NOTE:
Always use original spare parts to make sure that the
valve functions as intended.
 Loading...