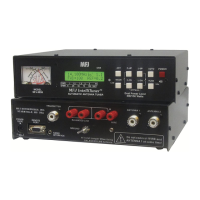
MFJ-993B IntelliTuner Automatic Antenna Tuner Instruction Manual
2005-2012 MFJ Enterprises, Inc.
3
Fast Start
WARNING
● Never operate the tuner with its cover removed. Contact with the components inside the
tuner while transmitting will result in painful RF burns.
● Locate the tuner so that the rear terminals are not accessible during operation. The single
wire and balanced line connection may have high voltage while transmitting.
● Disconnect all antennas from the tuner during lightning storms.
● Always tune with low power (2 watts minimum, 10-20 watts recommended), and with any
in-line amplifier bypassed. Apply maximum power only after tuning up.
● Never exceed tuner specifications.
1. Connect the MFJ-993B to a 12-15 VDC voltage source capable of supplying at least 1 amp.
2. Connect your transmitter or amplifier output to the TRANSMITTER connector using a 50-ohm
coaxial cable.
3. Connect your coax-fed antenna to the ANTENNA 1 connector using a 50-ohm coaxial cable, or
connect your random wire to the WIRE binding post, or connect your balanced line antenna to the
BALANCED LINE binding posts and connect a jumper between the other two posts as indicated.
4. Connect your ground connection to the GROUND post.
5. Press the [POWER] button to turn on the MFJ-993B tuner. The Power-On Reset default is also for
StickyTune
TM
to be ON. Place the [ANT] button in the out position to select antenna 1.
Note: StickyTune
TM
after power cycle means that the MFJ-993B will do a full tune after a
power cycle on the first frequency you transmit on only. No other frequency or memory
solutions will be affected. So you can fully re-tune on any frequency by simply cycling
power.
6. Lock the [AUTO] button in to select semi-automatic mode.
Note: The AUTO button should always be IN (semi-automatic) unless a compatible radio
interface cable is connected between the MFJ-993B and your transceiver. This ensures
that the MFJ-993B does not attempt tuning during high-power operation, and is
particularly important when an HF amplifier is in-line.
Note: If an amplifier is in-line, it should always be bypassed prior to tuning.
7. Key your transmitter to output a carrier of 2-20 watts CW, FM or AM.
Note: Due to detector non-linearities at low power levels, best SWR tuning accuracy occurs at
10-20 watts.
8. Press and hold the [TUNE] button for one second to start the automatic tuning process. When
completed, check to ensure an SWR of 1.5 or less has been achieved before increasing RF power.
Note: If you have a tuning solution on one band or antenna and you then change bands or
antenna and attempt to transmit a tuning signal, the previous tuning solution may be
sufficiently severe such that no power is detected by the MFJ-993B (the MFJ-993B will
tell you to increase power). When this occurs, simply bypass the MFJ-993B and then
initiate a tune.