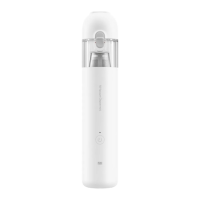
Removing the protective strips
Installation
Charging
> 0.5 meters
> 1.5 meters
> 0.5 meters
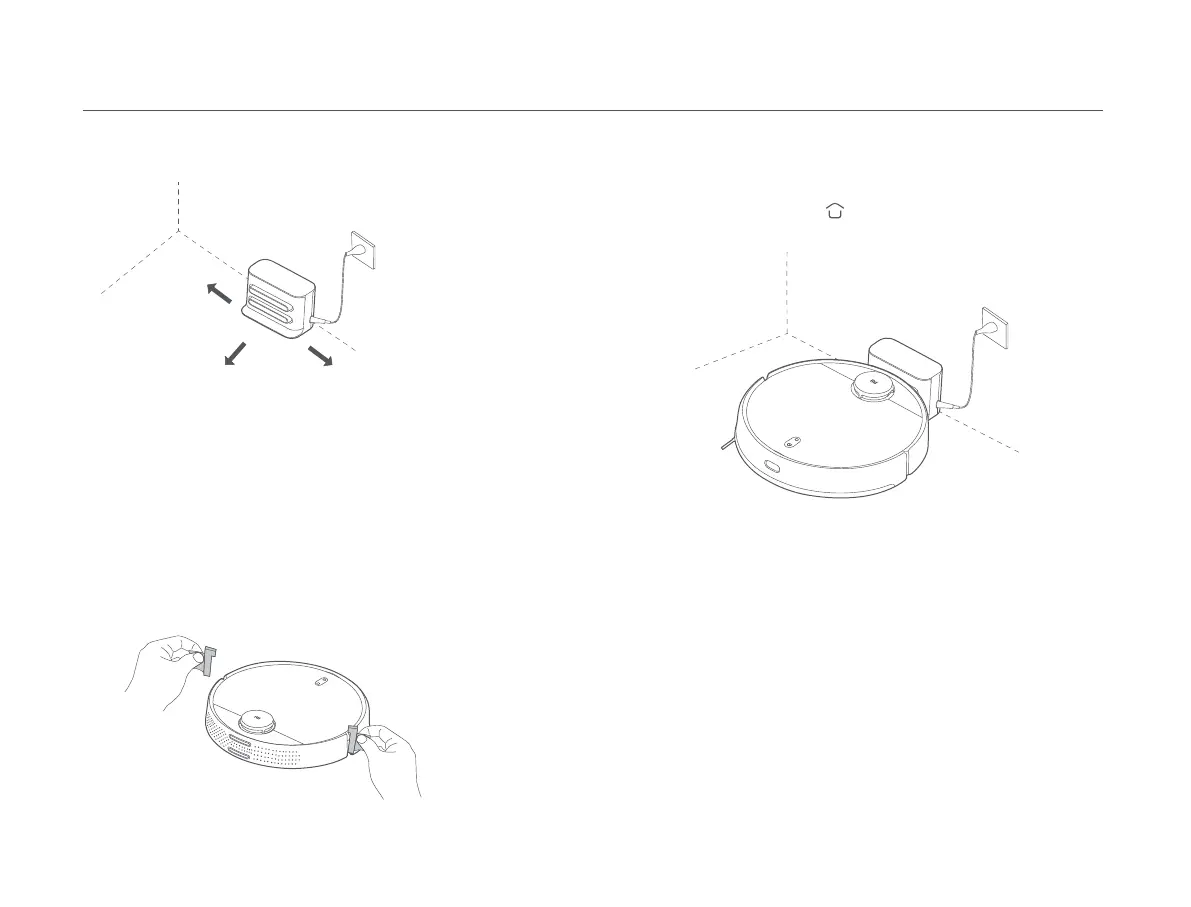
Placing the charging dock against a wall and connecting it to an
electrical outlet
Notes:
• Do not place the charging dock in an area with direct sunlight.
• Make sure there are more than 1.5 meters of clearance in front of the charging dock
and more than 0.5 meters on either side of it.
• Tidy up any loose power cord to prevent the vacuum-mop from geing tangled,
which could accidentally move or unplug the charging dock.
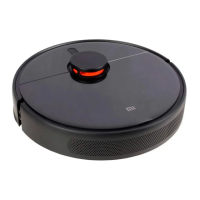
Notes:
• If the vacuum-mop cannot be turned on due to a low baery, put it against the
charging dock to charge.
• The vacuum-mop will automatically turn on when it is on the charging dock, and
cannot be turned off while charging.
• When using the vacuum-mop for the first time, please follow the in-app prompts to
complete quick map creation. To ensure accurate mapping, it is recommended to
follow the vacuum-mop and remove any obstacles on the ground when it is creating
the map. Make sure the vacuum-mop starts from the charging dock.
• If the vacuum-mop may get stuck or scratch the surface of the furniture in some
areas, you can set restricted areas in the app to prevent the vacuum-mop from
entering those areas.
Before using the vacuum-mop, remove the protective strips from each side.
When using the vacuum-mop for the first time, manually place it against
the charging dock to charge. Ensure that the charging contacts on both
the vacuum-mop and the charging dock are aligned. During daily use, you
can directly press the buon to send the vacuum-mop to the charging
dock to charge.
08