microHAM © 2010 All rights reserved
7. Select the "Recording" tab in the Sound Control Panel
●
double click "Headset Microphone (microHAM CODEC)"
●
click Levels tab and unmute the Microphone
●
Preset the Microphone level to 70%
8. While speaking into the microphone, adjust the Microphone level until you see the top green bar light on
the VU meter for "Headset Microphone (microHAM CODEC) on the Recording tab, then click OK.
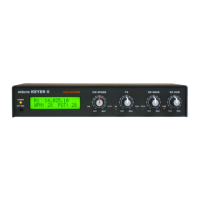
9. Set the TX control on the front of microKEYER II to 12 o'clock.
10. Select the "Playback" tab in the Sound Control Panel
●
double click "Headset Earphone (microHAM CODEC)"
●
click the Levels tab
11. Switch your transceiver to AFSK mode (PKT, DIG or DATA for Yaesu, LSB-D or USB-D for current Icom
transceivers, RTTY or RTTY-R on K2 and USB or LSB for Kenwood, TenTec and older Icom
transceivers). Do not select RTTY or FSK; they do not use the audio input.
12. Select the Audio Switching tab. Set both FSK/DIGITAL and VOICE to “Line input (rear)”
13. Click the Sound Card button to open the Audio Devices window and select "Headset Earphone
(microHAM CODEC)" in the WaveOut box. .
14. Click the “Test Signal” button and adjust the Headset Earphone level (in the Levels window of the Sound
Control Panel) for normal (rated) output on your transceiver while keeping the ALC meter as low as
possible.
NOTE: For the Elecraft K3 only: Do not adjust the TX WAVE level. Instead, adjust the Line In level (Mic
Gain) until the ALC shows five (5) bars.
15. Select the Audio Switching tab. Set both FSK/DIGITAL and VOICE to “Microphone jack.”
16. Set your radio to USB or LSB and click the “Test Signal” button on the Audio Devices window. Adjust the
BALANCE (right) trimmer so that the ALC reading on your transceiver sets at the top of the ALC zone
(rated output).
17. If you cannot balance the microphone and sound card levels with the trimmer, return it to the midpoint.
Go back to Step 9, increase or decrease the TX Level control slightly and repeat steps 10 - 17 until
balance is achieved.
18. This sets proper levels for and all modes.
19. Select the DVK tab in Router and set REC MIC and TX to 70%.
20. Record a message and adjust the REC MIC slightly if necessary so that the REC MIC VU Meter does not
peak into the red.
21. Play back the message and adjust the TX level so the transceiver ALC meter peaks at the top of the ALC
zone (the same level as steps 16).
NOTE: Under Vista and Windows 7, DVK levels are separate from those set by other applications.
DVK levels are stored with the message banks.
47