39 M1179886
Prerequisite Steps:
• AB-cover Replacement Mode – Pulls calibration data from the old AB-Cover.
1. Connect software tools USB drive with software tools to USB connector on device under repair.
2. Connect power supply to device to enable power on.
3. Power on device – Depress the power button on the C-cover to power on the device.
4. Run software tool – At the device OS, use Windows Explorer, navigate to USB drive and run:
STEP1_DisplayModuleReplacement.cmd – accept the power down prompt once tool is run.
IMPORTANT: This step must be carried out on the device successfully before the broken/faulty
AB-cover display assembly is replaced. Retry previous step if error message received.
• General Safety – Check to make sure that general guidelines and ESD compliance steps are followed prior to
opening device. Refer to Prior to Device Disassembly section (page 18) for details.
• Remove feet – Follow steps for Procedure-Removal (Non-Skid Feet) on (page 19).
• Remove C-cover – Follow steps for C-cover Keyboard Assembly Replacement Processes (Metal, Fabric) on
(page 24).
• Remove rSSD – Follow steps for Procedure-Removal (rSSD) section (page 36).
Removal Process (AB-cover Display Assembly)
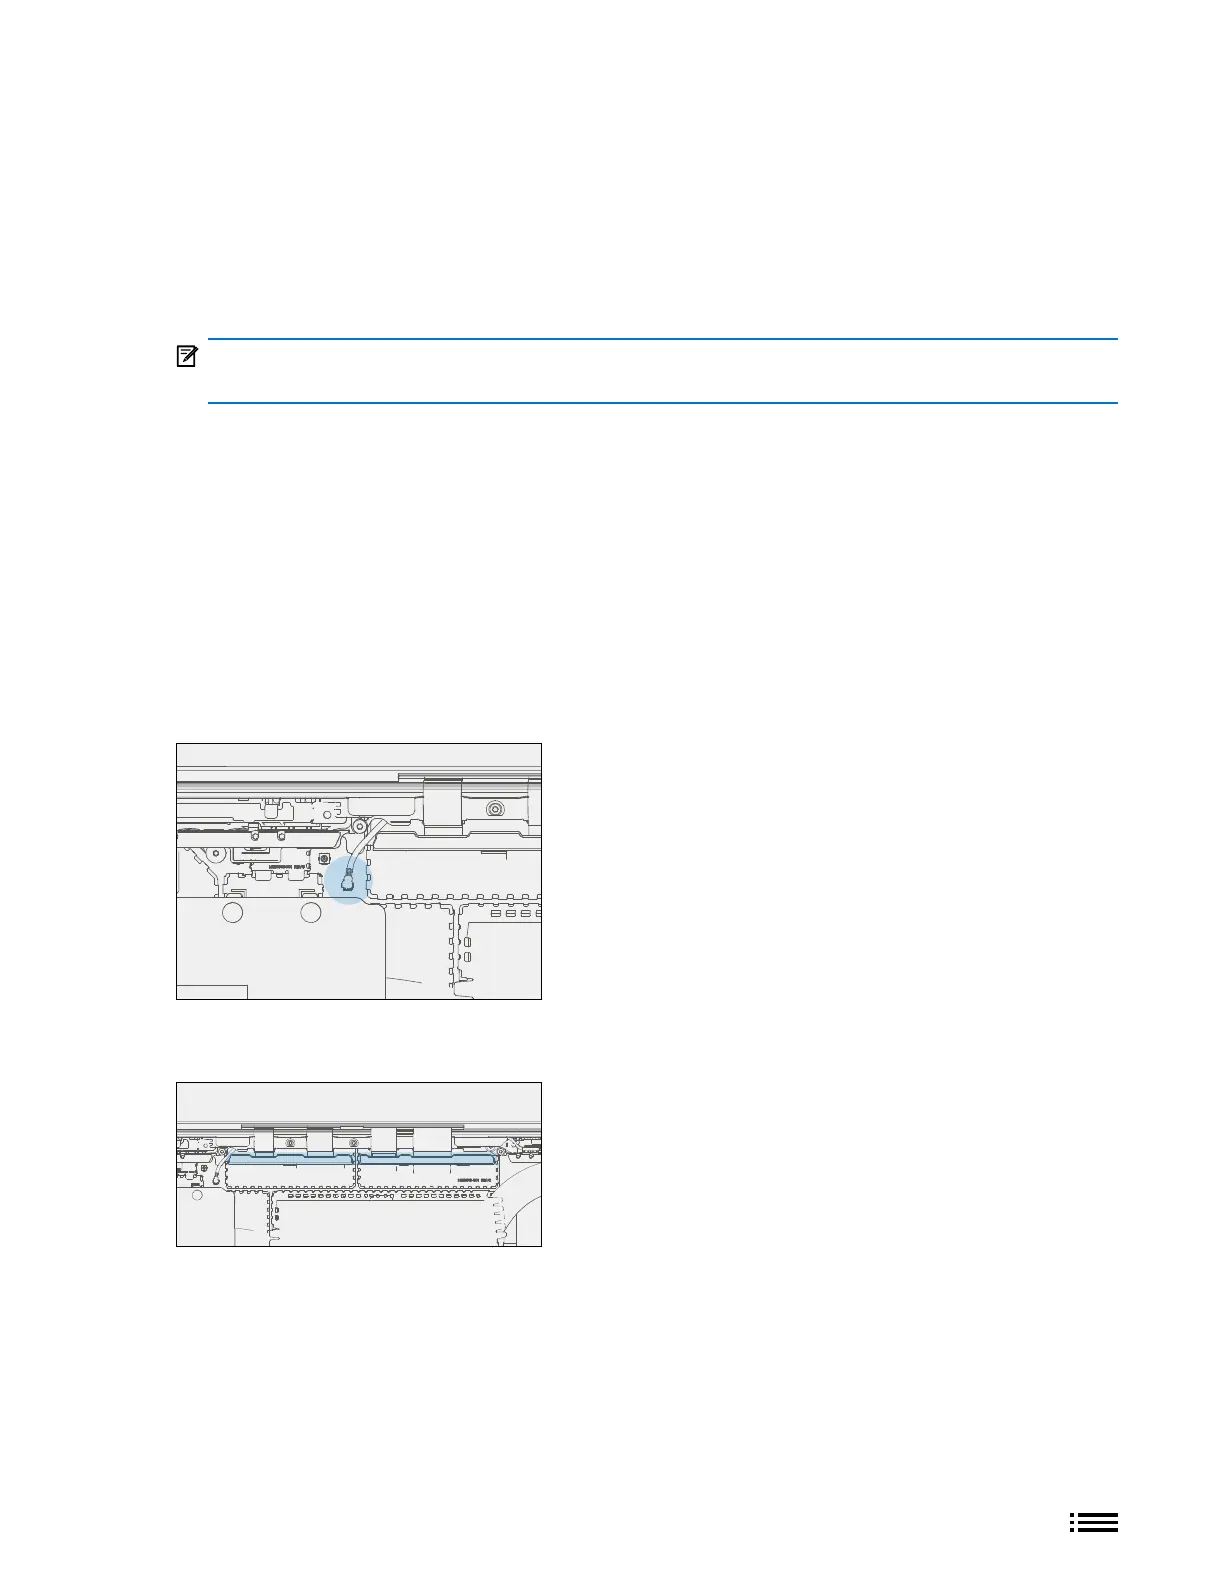
1. Disconnect Antenna Cable – Using angled tweezers, disassemble left antenna cable located to the left
of the left AB-cover FPC RF shield. This will prevent the antenna cable from being damaged during
shield removal.
2. Remove FPC RF Bafes – Using tweezers, remove the left and right bafes that sit on top of the RF shield
cans by prying upwards starting from one end of the bafe.