16 Xpress Basics
Checking the Xpress
Software Configuration
Before performing the initial test on the production system, check the
system configuration to ensure that certain items are set properly. This is
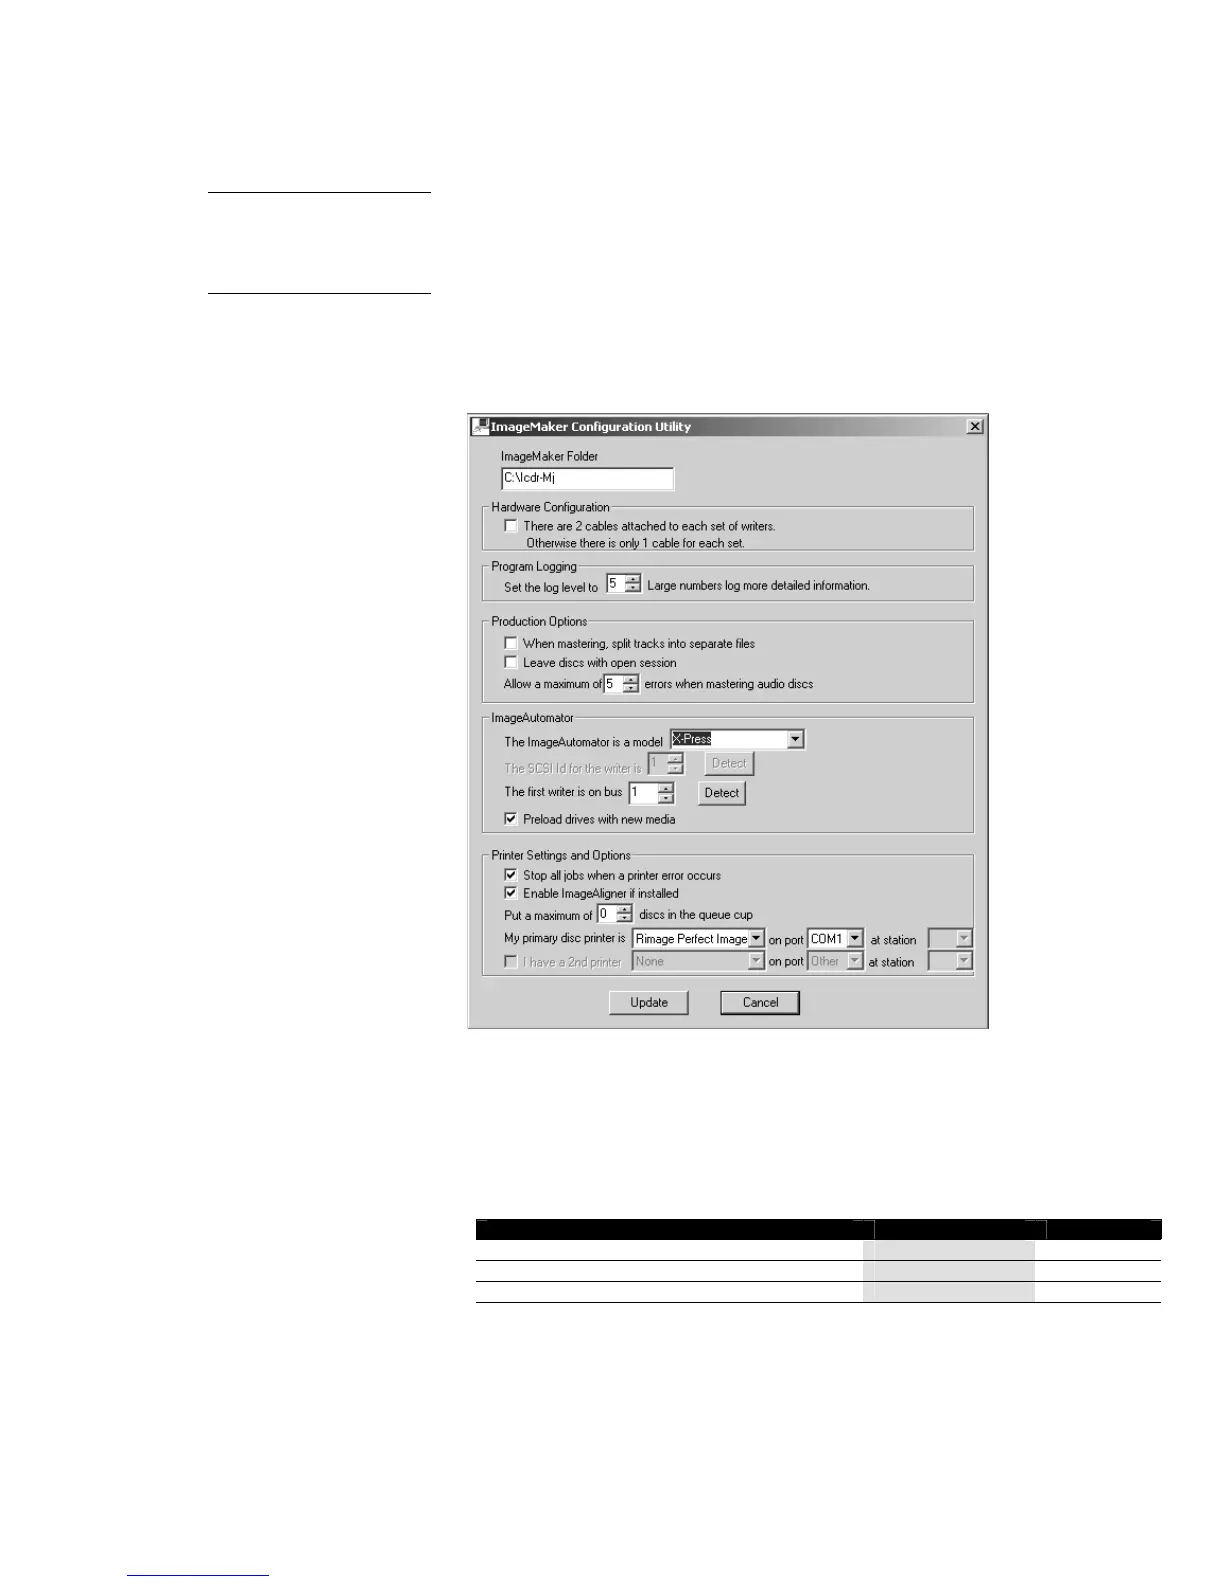
done through the ImageMaker (software) configuration utility.
Start the configuration utility.
Click the Windows Start button, located on the lower-left corner of the
desktop. From the menu that pops up, work through the submenus to
select ProgramsÆImageMakerÆConfigure ImageMaker. The
configuration dialog, shown below, will open.
Check the following configuration items to make sure they’re set
correctly:
If a printer is installed, it must be identified
Select the printer name in the field labeled My disc printer is …, and set
the port in the following field accordingly. (If there’s no printer, ignore
this setting.)
IF YOUR PRINTER IS A SELECT THIS TYPE ON THIS PORT
Perfect Image (black-only or color thermal transfer) Rimage Printer COM1
Signature IV (color inkjet) CD Color Printer IV LPT1
Signature Pro (color inkjet) CD Color Printer Pro LPT1
Identify the type of ImageAutomator system
In the field labeled The ImageAutomator is a model …, select Xpress.
• Save any changes made. If any changes to the configuration have
been made click the Update button before closing the utility. If no
changes have been made, click Close.
See the software manual
for a complete explanation
of all the ImageMaker
configuration items.