24 ScanMaker 9800XL Plus User Guide
C. Scanning Negative Film
1. Select the film you wish to scan.
Follow the procedures for positioning
transparent film to be scanned.
2. Launch ScanWizard Pro either as a stand-alone by clicking on the program icon, or
by using the File-Import or File-Acquire command from your image-editing
program (such as Adobe Photoshop).
3. Go to the Preview window and choose Negative / Negative Film from the Scan
Material menu.
4. Click the Overview button to perform a preliminary scan of your original.
5. Select the Scan Frame tool from the Toolbar in the Preview window, and choose
the area to be scanned by dragging a rectangle around it. You will see a flashing
frame (marquee) around the selected area.
6. Click the Prescan button to display a detailed image. A thumbnail of the image
appears as well in the Scan Job Queue window.
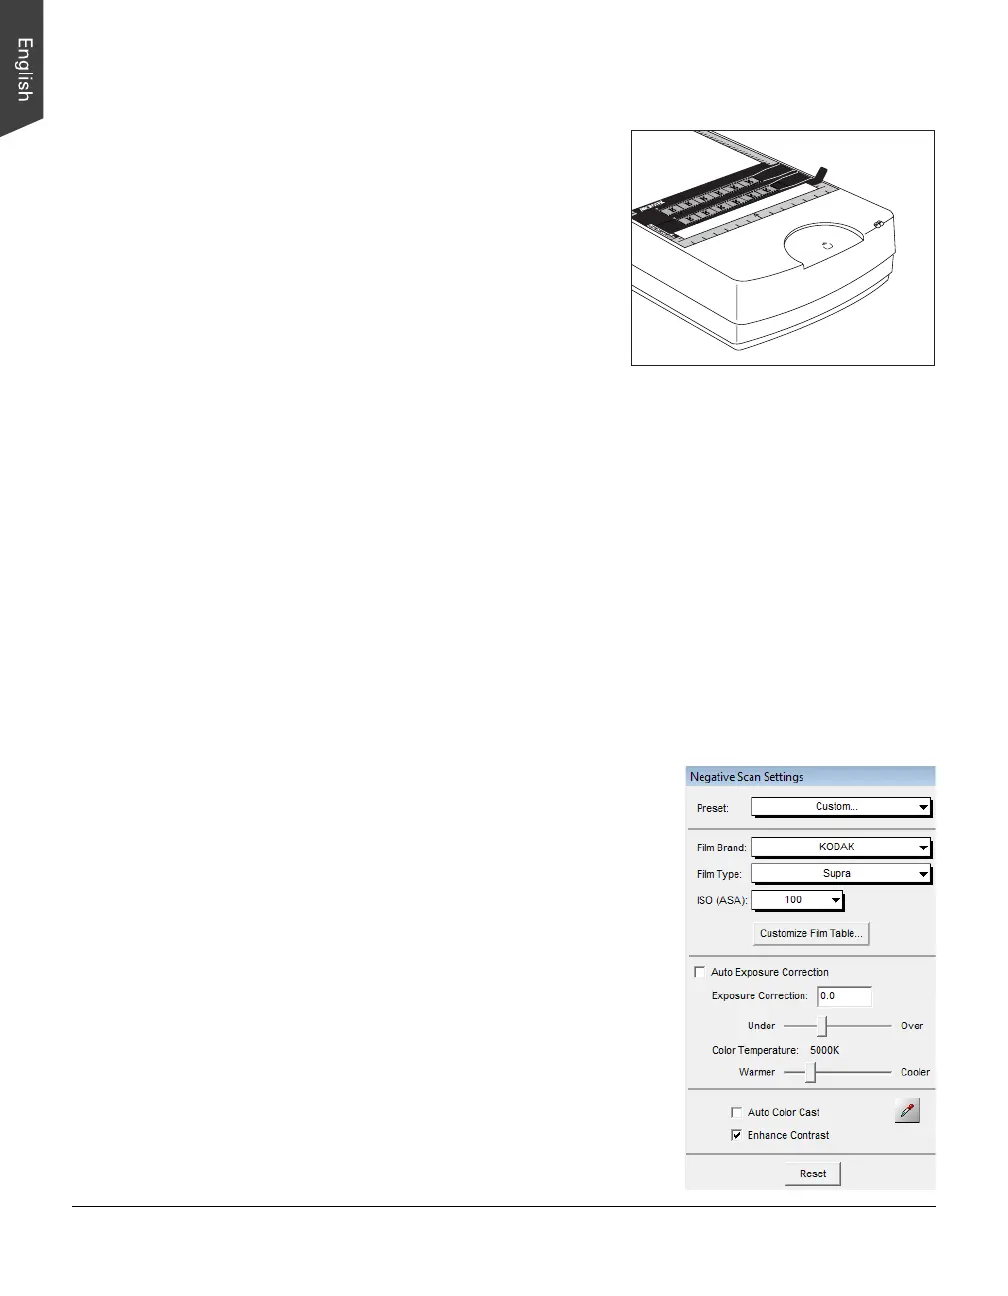
7. In the Negative Scan Settings window, you can specify options related to your
scanned negative film. Follow the steps below.
a) In the Negative Scan Settings window,
choose the Film Brand, Film Type, and
ISO settings that match your film.
b) The settings for the negative film you
selected are applied to the prescan image,
and the adjusted image is displayed in the
Preview window.
c) You can save the selected negative film
settings into the Preset drop-down menu for
easy access in the future.
For more details on how to control settings for
negative film scanning, see the section
“Negative Scan Settings Window” in the
ScanWizard Pro Reference Manual in the
Microtek software CD.
2
1
0
3
4
5
6
6
5
4
3
2
1