ScanMaker i700 Installing and Getting Started 3
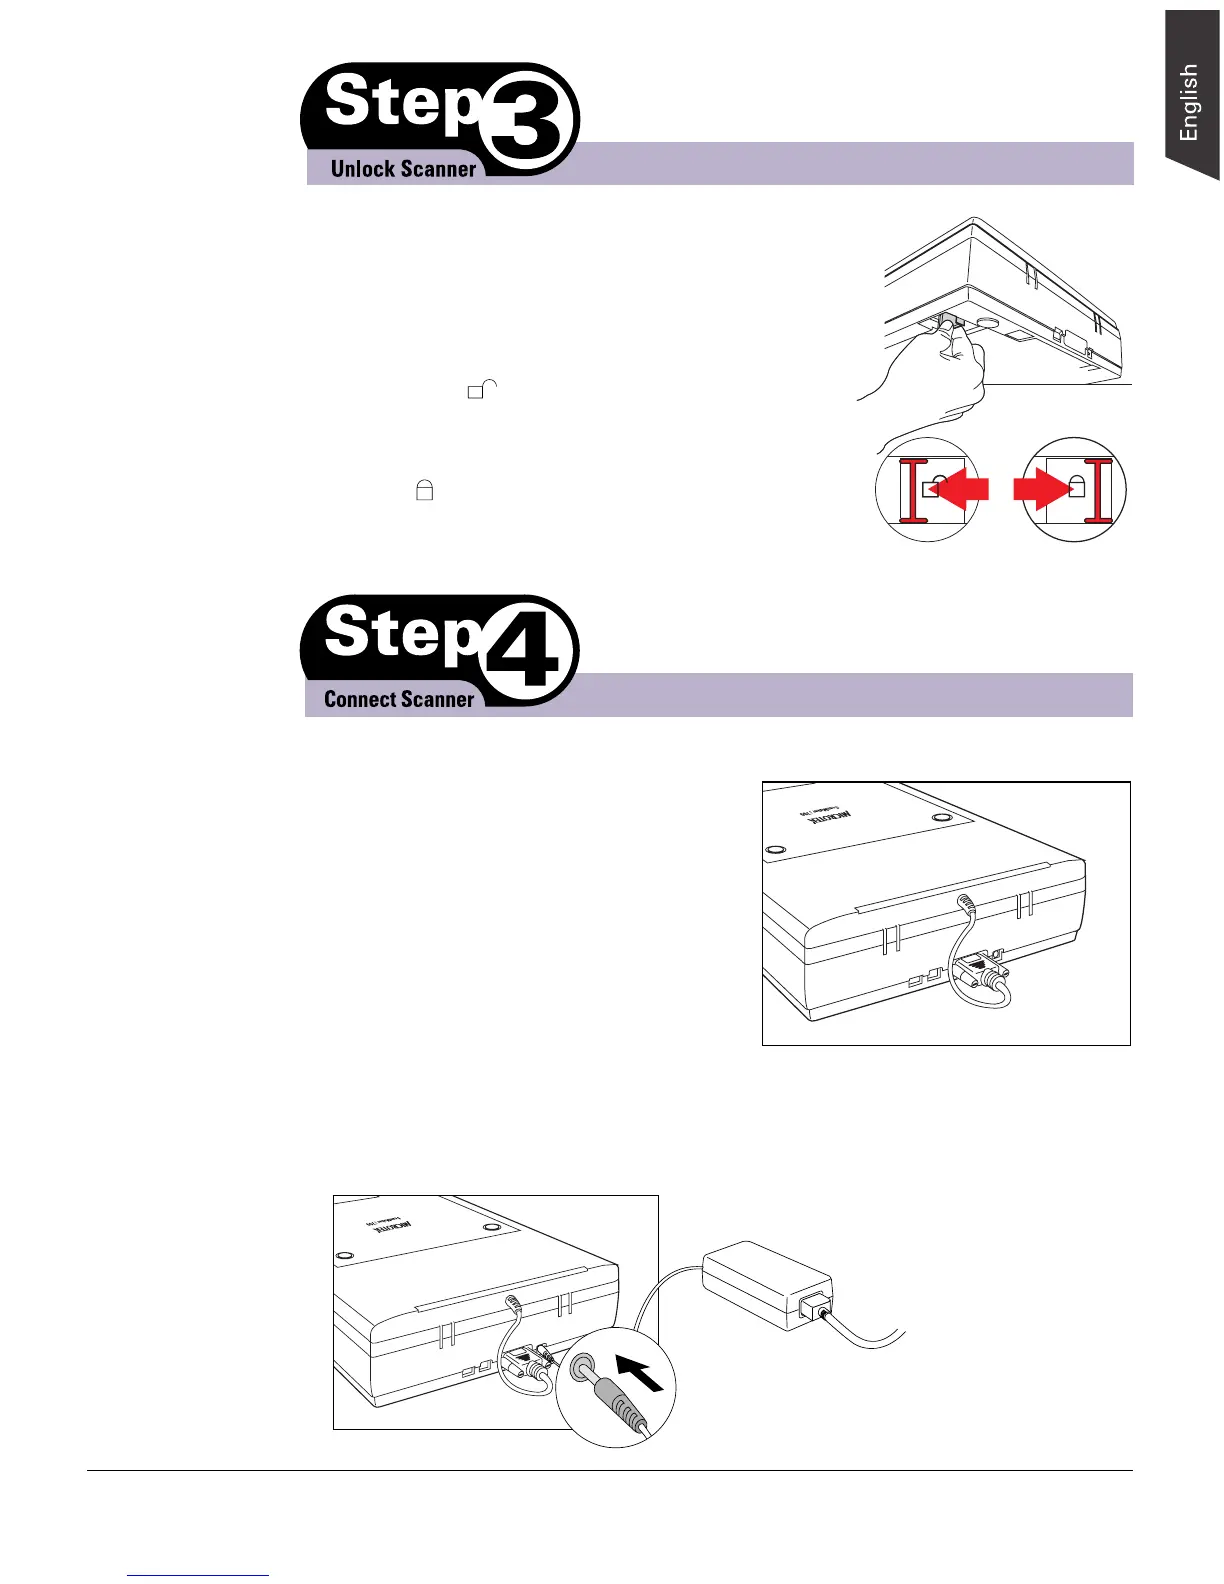
1. Remove the yellow "Step 3" sticker from the scanner.
2. With the scanner power off, tilt the back-left corner
to see the locking switch at the bottom of the scanner.
3. Push the locking switch (red) to the
“Unlocked” ( ) position.
Note: To lock the scanner (for shipping and
other reasons), push the locking switch to the
“Locked” ( ) position. Do not turn the scanner
upside down and attempt to lock the scanner this
way, as this may not work.
Unlocked Locked
Note: Make sure no other cable is
connected to the scanner except the
power cord at this point.
3. Connect the power adapter and the power cord.
Plug one end of the power adapter assembly into the back of the scanner, and
plug the other end into a wall outlet or other power source.
A. Power connections
1. Remove the yellow "Step 4" sticker from
the scanner.
2. Check to make sure that the scanner lid
(Light Plate) is properly installed, with its
connector securely connected to the
scanner’s 15-pin accessory port.