8 ScanMaker i700 Installing and Getting Started
Scanning Damaged Photos
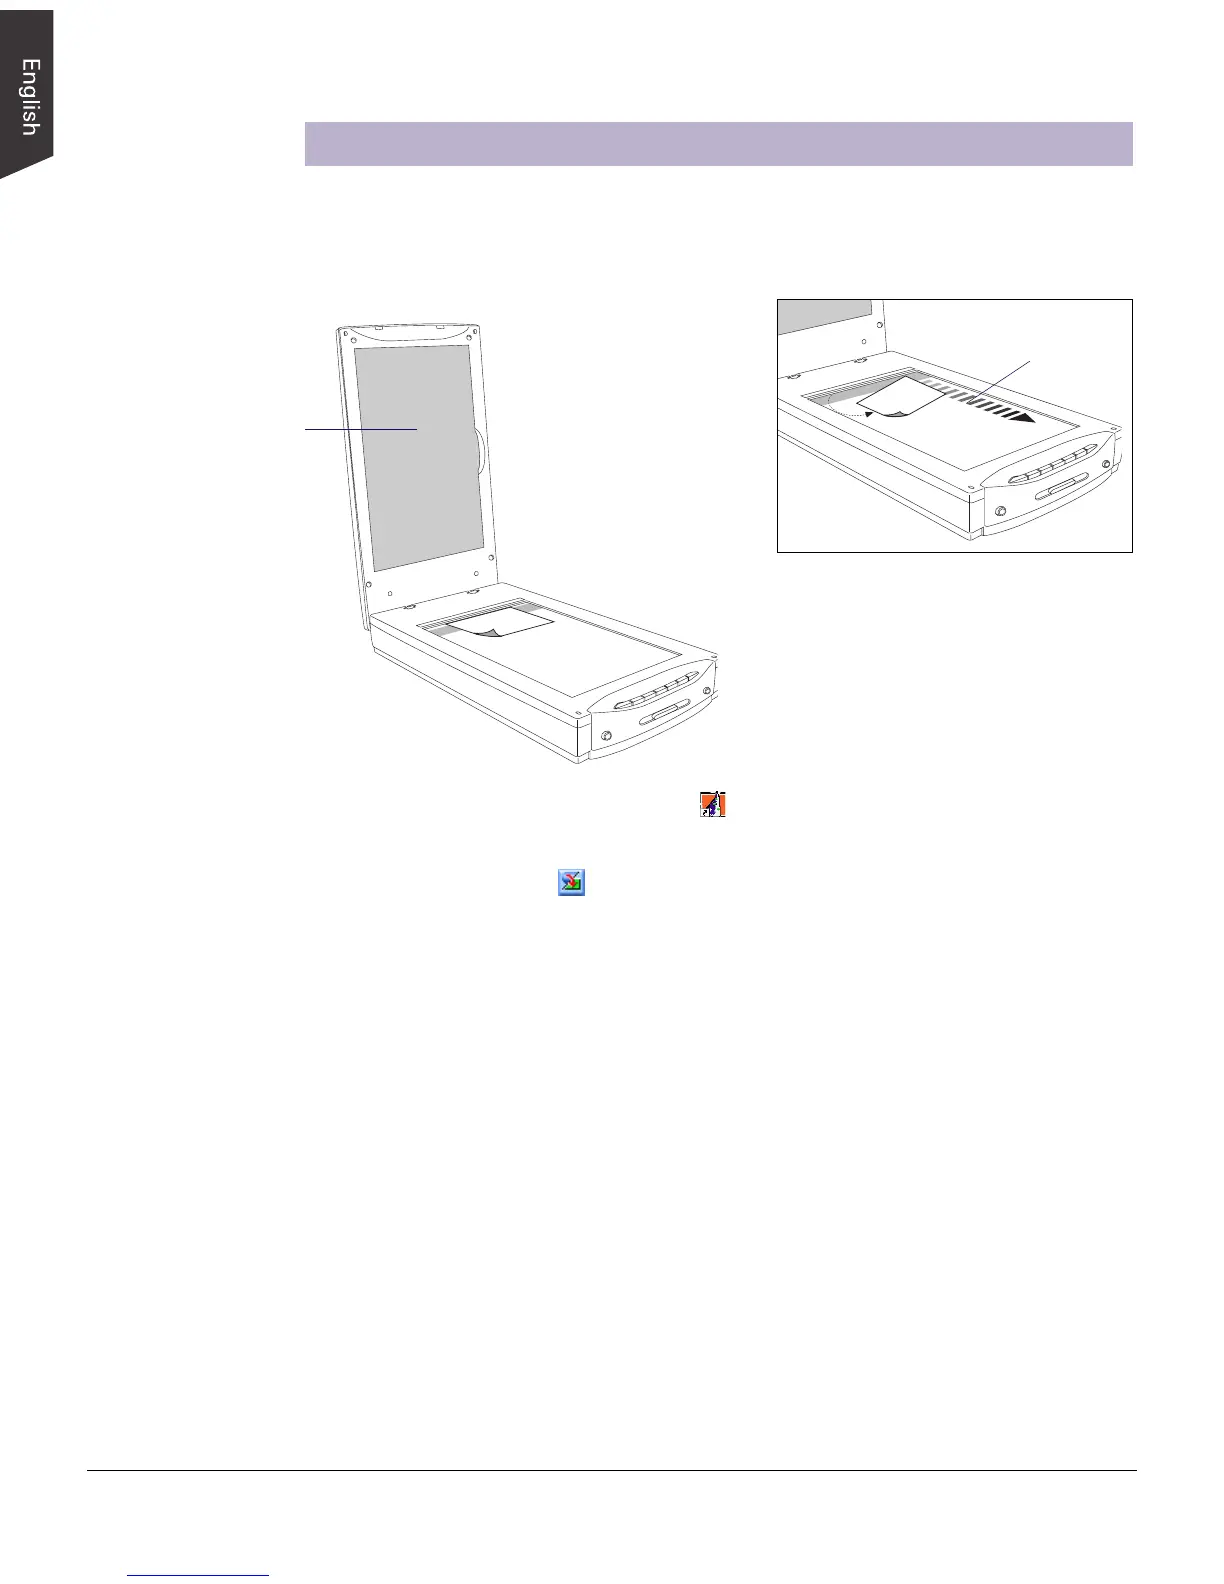
1. Raise the scanner lid, then place the damaged photo to be scanned face down on
the scanner glass surface. Center the top of the photo along the horizontal ruler
towards the back of the scanner.
Make sure the Black
Mat is attached to the
scanner lid. This will
ensure that uneven
photos lay as flat as
possible, which will
enhance the accuracy of
detecting surface
damage on photos.
2. Double-click the ScanWizard 5 icon ( ) on your desktop to launch the
ScanWizard 5 Standard Control Panel.
3. Click the Switch icon ( ) on the right corner of the Standard Control Panel to
switch to the Advanced Control Panel.
4. Click the Overview button to perform a preliminary view of the entire image.
When done, you will see an image appear in the preview window.
5. In the preview window, you can resize the scan frame (floating dotted line)
around the image by dragging on the edge or corner of the scan frame to
determine the final size of the actual scan.
6. Specify your scanning requirements in the Settings window when the ScanWizard
5 Advanced Control Panel appears.
a) Select RGB Colors/RGB Color (48-bit) or Grayscale/Grayscale (16-bit) in the
Type pull-down menu as your image output type.
b) Select a desired resolution in the Resolution pull-down menu for your image
output resolution. The recommended resolution for DIGITAL ICE for photos
is 600 dpi, and take note that the use of DIGITAL ICE will require additional
time in processing compared to regular scanning.
c) Adjust the scan frame settings if necessary.
Note: If the creases lie parallel to the
direction of the carriage motion, the
creases may not be detected by the
scanner. To fix this problem, position your
photo slightly skewed (min. 10°, max. 45°),
so that none of the creases are parallel to
the direction of the carriage movement.
Direction of
carriage motion